Why Is My 3D Printer Over Extruding? A Troubleshooting Guide
Urgent troubleshooting for over-extrusion in 3D printing: calibrate extrusion, verify filament diameter, adjust temperature and flow, and prevent recurrence with best practices from Print Setup Pro.

Over-extrusion on a 3D printer is most often caused by an overestimated extrusion multiplier or a filament diameter mismatch. Start by calibrating the extrusion multiplier (E-steps) and confirming your filament diameter matches the slicer setting, then run a calibration cube. If needed, tweak temperature and flow gradually and re-test until layer geometry is accurate.
Understanding Over-Extrusion in 3D Printing
Over-extrusion happens when the printer deposits more filament than the nozzle can lay down cleanly. The result is slightly oversized features, ridges along edges, elephant's feet at the base, and a rough surface finish. In many cases it’s subtle at first, becoming more noticeable as you scale up to larger prints. According to Print Setup Pro, the problem usually starts with calibration drift in the extrusion system: the printer believes it should push more filament than the nozzle can handle. This misalignment between the intended flow and actual material output creates a small but persistent surplus that compounds across layers. You’ll see evidence like thicker walls, rounded corners, and occasional blobbing at seam lines. Before you adjust hardware, you should confirm your slicer settings and measurement references. The goal is not to chase a single parameter in isolation, but to restore harmony between the printer’s hardware, firmware, and the software profile. A quick check of your slicer profile against your filament type can often reveal a simple mismatch that’s driving the issue.
Common Causes of Over-Extrusion in 3D Printing
Common causes range from hardware calibration to slicer misconfig. The dominant factor is an overambitious extrusion multiplier or miscalibrated E-steps: the printer is feeding more material than the nozzle can extrude cleanly. Filament diameter not matching the slicer’s assumption also causes pressure to build up inside the hot end. When the diameter is larger than expected, the nozzle pushes more filament to compensate, producing thicker lines and sagging at layer boundaries. Temperature plays a role: printing at higher temperatures lowers viscosity, which can cause oozing and smear into previous layers. Flow rate or extrusion multiplier settings that are too high also contribute. The age and condition of the nozzle matters— a worn or partially clogged nozzle can distort flow; paradoxically, a partial clog can restrict some portions while others overflow, increasing inconsistent extrusion. Inconsistent filament quality (dust, moisture, or brittle filament) may also cause fluctuations that look like over-extrusion in the final print. Finally, slicer profiles that are not optimized for the chosen layer height, print speed, and nozzle size can magnify the problem, especially on first layers. Print Setup Pro analysis shows that the top causes are usually E-steps drift and filament diameter mismatch.
Diagnostic Approach: Where to Start
Start with the simplest checks. Inspect the nozzle for a partial blockage and verify the bed surface is clean and level. Print a small calibration model at 100% flow to observe if the width matches the designed dimensions. Measure the actual printed width with a caliper, compare it to the expected width, and note if the part is consistently over-sized. If so, proceed to calibrate the extrusion multiplier (E-steps) and verify the filament diameter used in your slicer matches the actual filament you have. Keep notes of each adjustment: this helps you map which parameter changes produce the desired result. If inconsistencies persist, you may be dealing with an unreliable filament or a worn nozzle. In such cases, consider swapping filaments and inspecting the nozzle geometry under a loupe.
Step-by-Step: Calibration and Filament Diameter Verification
Calibrating extrusion requires two parallel actions: confirming your extrusion multiplier and validating filament diameter. Start by extruding a known length and measuring the actual length to adjust E-steps. Then, measure the filament diameter with calipers at multiple points and update the slicer’s filament diameter setting (and re-slice). This two-pronged approach ensures the printer’s understood flow matches the physical reality. If your printer uses a geared extruder, re-check the drive gear for wear or slippage. After adjustments, print a calibration cube and compare wall thickness to the intended value. Iterate until measurements align.
Tweaking Temperature, Flow and Slicer Settings
Temperature affects viscosity and extrusion pressure. If you observe stringing or blobs, reduce the nozzle temp by 5°C increments, testing after each change. Flow rate can also push material through too quickly; lowering flow to 95%–98% (or adjusting the extrusion multiplier) can restore balance between extrusion and layer laydown. Ensure your slicer profile is appropriate for your nozzle size and layer height. For first layers, use a slightly increased flow to improve bed adhesion, then revert to normal flow for subsequent layers.
Quick Tests You Can Run Today
Run a suite of small tests: a 20mm cube, a cylinder, and a more complex overhang model. Compare measured dimensions against nominal values to identify systematic over-extrusion versus random defects. If the first layer shows over-extrusion, the problem is likely flow-related or bed leveling. If later layers diverge, verify temperature and filament consistency. Keep a log of your results to track progress and prevent regressions.
Prevention and Maintenance to Avoid Future Over-Extrusion
Preventive steps create lasting print quality: store filament properly to avoid moisture uptake; use calibrated E-steps and update slicer profiles whenever you switch filament brands or nozzle sizes; perform regular nozzle inspections for wear or partial clogs; maintain a clean filament path and ensure spool tension is consistent. Schedule routine checks for extrusion path alignment, hot-end temperature stability, and firmware updates. Consistent maintenance reduces the risk of recurring over-extrusion across print jobs.
When Professional Help is Needed
If after systematic calibration you still experience persistent over-extrusion, professional help may be necessary. Contact a qualified technician or your printer’s manufacturer support for a diagnostic check, particularly if you suspect a hardware fault such as a mis-machined nozzle, heater block issues, or a failing hot-end. Document the symptoms, test prints, and all adjustments you’ve tried to speed up troubleshooting.
Steps
Estimated time: 60-90 minutes
- 1
Pre-check safety and tools
Power down the printer, unplug, and allow the hot-end to cool before inspecting the nozzle. Gather calipers, a calibration cube, and a spare nozzle if available. Inspect the printer’s belt tension and filament path for snags that could affect flow.
Tip: Always start with cool-down checks to avoid burns and tool damage. - 2
Calibrate the extruder (E-steps)
Mark a known length of filament and push it through to measure actual extrusion. Compare to expected length and adjust E-steps according to your machine’s firmware guide. Re-test with a small test print.
Tip: Perform this with the hot-end at printing temperature to reflect real flow. - 3
Measure filament diameter
Take measurements at several points along the spool with calipers. Use the average diameter in your slicer, and re-slice a calibration cube. Verify that printed line widths align with model dimensions.
Tip: Avoid bending the filament sharply; it affects diameter readings. - 4
Tune temperature and flow
If lines are visibly too thick, reduce nozzle temperature in 5°C steps and reprint. If walls still appear thick, adjust flow/extrusion multiplier in small increments and re-test.
Tip: Document each adjustment to compare results over time. - 5
Run calibration prints
Print a 20mm cube and a simple bench model to observe dimensional accuracy. Measure critical dimensions and compare with nominal values to validate changes.
Tip: Use a consistent filament and a controlled environment during tests. - 6
Finalize and save profile
Once measurements align within tolerance, save the new profile in your slicer and firmware, and run a final, larger print to confirm stability.
Tip: Keep a print log for future reference and changes.
Diagnosis: Excess filament is deposited, causing oversized features and rough surfaces across prints
Possible Causes
- highIncorrect extrusion multiplier / E-steps
- highFilament diameter not matching slicer setting
- mediumNozzle temperature too high, causing oozing
- lowLow-quality or moisture-laden filament
- mediumSlicer profile not optimized for nozzle size or layer height
Fixes
- easyCalibrate E-steps and extrusion multiplier
- easyMeasure filament diameter and update slicer setting
- easyLower nozzle temperature in small increments and test
- mediumDry filament or switch to a room-temperature stable batch
- easyAdjust slicer profile to match nozzle size and layer height
People Also Ask
What causes over-extrusion in 3D printing?
Over-extrusion happens when more filament is extruded than the nozzle can lay down cleanly, leading to thicker walls, blobs, and rough surfaces. The most common causes are a miscalibrated extrusion multiplier and a filament diameter mismatch.
Over-extrusion happens when too much filament is pushed out, usually due to calibration drift or a filament size mismatch.
Can an incorrect filament diameter cause over-extrusion?
Yes. If the filament diameter is larger than your slicer setting, the printer will push more material than expected, causing over-extrusion.
Absolutely. If your filament is bigger than your slicer assumes, you’ll get too much material on each pass.
How do I know if E-steps is the culprit?
If calibration prints show consistently oversized dimensions, start by rechecking E-steps. Adjusting extrusion multiplier and validating extrusion length helps confirm the cause.
If prints are consistently oversized, check your E-steps and recalculate extrusion length.
Can moisture in filament cause over-extrusion?
Moisture can cause irregular extrusion, including occasional over-extrusion. Drying filament or trying a new batch can help determine if moisture is the issue.
Yes. Damp filament can lead to inconsistent flow and over-extrusion in some prints.
Does nozzle size affect over-extrusion?
Yes. A mismatched nozzle size relative to the slicer profile can cause improper flow. Ensure your slicer settings match your nozzle diameter.
Yes—if the nozzle size doesn’t match the slicer profile, you’ll see extrusion mistakes.
When should I seek professional help?
If calibration and profile adjustments do not resolve the issue, consider professional support for potential hardware problems like a wore nozzle or heater blocks.
If changes don’t fix it, contact a pro for hardware inspection.
Is over-extrusion always a hardware issue?
Not always. It often comes from miscalibrated settings, but persistent issues after checks may indicate hardware wear or damage.
Usually it’s a setting problem, but lingering issues may point to hardware wear.
Watch Video
Quick Summary
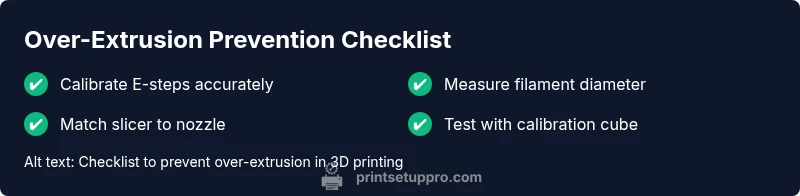
- Calibrate E-steps accurately.
- Match filament diameter with slicer settings.
- Tweak temperature and flow gradually.
- Run small calibration prints to verify changes.
- Maintain filament and nozzle health to prevent recurrence.