Why Is My Printer Over Extruding? A Practical Troubleshooting Guide
Urgent guide to diagnosing and fixing over-extrusion on 3D printers, covering extrusion calibration, filament checks, nozzle cleaning, and slicer settings to prevent future issues.

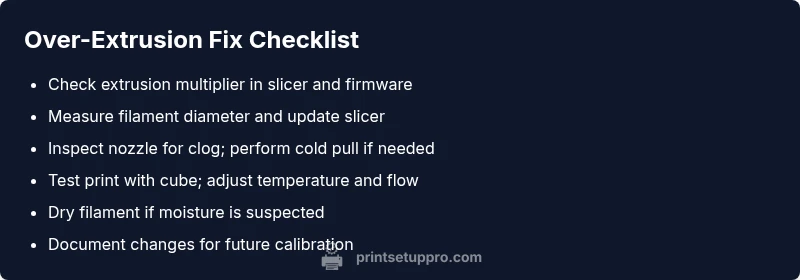
Take these quick steps: pause the print, recalibrate the extrusion multiplier in your printer, verify your filament diameter matches slicer settings, and perform a nozzle cleaning or cold pull if needed. If the issue persists, adjust flow rate and print temperature, then rerun a test print. Keep changes small and verify with a calibration cube before continuing.
Understanding Over-Extrusion: Why It Happens
If you’re asking why is my printer over extruding, you’re likely seeing excess plastic that makes layer lines bulge and surface textures look rounded. Over-extrusion occurs when the printer deposits more material than the designed layer height, resulting in blobby surfaces and poor dimensional accuracy. In most cases, the root cause is a mismatch between the slicer settings and the physical printer, often compounded by slight hardware or material variations. Print Setup Pro has found that the most common culprits are a too-high extrusion multiplier, filament diameter not matching the slicer setting, or a partially clogged nozzle. Temperature alone can contribute if it’s set too high for the filament, causing the molten plastic to ooze. By approaching the problem methodically, you can pinpoint the issue without tearing down the hot end. As you troubleshoot, document each change and test with a simple cube or benchy to confirm improvements.
Key idea: start with calibration and material checks before touching hardware beyond cleaning. The goal is to restore accurate flow so each layer matches the intended geometry.
Common Causes of Over-Extrusion
Over-extrusion can stem from several interacting factors. The most impactful are calibration and material data, while mechanical wear or environmental conditions can contribute more subtly. The main causes, listed from most to least likely in typical home setups, are:
- Incorrect extrusion multiplier/flow rate in the slicer or firmware (high likelihood)
- Filament diameter mismatch between the real filament and what the slicer is configured to use (high likelihood)
- Partially clogged or degraded nozzle causing inconsistent flow (medium likelihood)
- Filament moisture leading to steam and irregular extrusion (low likelihood)
- Printing at temperatures above the filament’s comfortable range, promoting ooze (low likelihood)
Understanding these causes helps you triage quickly. If you notice stringing or blobs along with width changes, start with calibration and filament checks before examining hardware.
First Checks You Can Do Right Now
Before you take apart any hardware, run through these quick checks to rule out the simplest causes. They often fix the problem without requiring tool use or downtime:
- Verify extrusion multiplier/flow rate is correct in your slicer and, if necessary, update firmware to a sane default.
- Measure actual filament diameter with calipers and set the slicer to that value; mismatches are a leading cause of over-extrusion.
- Print a small calibration cube and compare the resulting width to the expected dimension. If dimensions are off, you likely need to adjust extrusion settings or diameter.
- Check nozzle veil: inspect for a partial clog or degraded nozzle; a cold pull can help clear obstructions.
If results remain inconsistent, proceed to hardware checks and calibration steps. Document your changes for traceability.
Diagnostic Flow: Symptom to Solution (Structured Approach)
This section maps symptoms to likely causes and recommended fixes, forming a decision tree you can follow step-by-step. The goal is to move from simple, low-effort checks to targeted interventions, documenting outcomes at each stage. If you reach a point where a fix requires hardware replacement or professional calibration, stop and consult expert support from Print Setup Pro or a local service.
Symptom → Likely Cause → Fix
- Excess material at every layer → Extrusion multiplier too high or filament diameter mismatch → Calibrate E-steps, measure filament, adjust slicer values
- Width of printed lines significantly larger than expected → Filament diameter mismatch or calibration drift → Re-measure filament and reconfigure slicer
- Nozzle appears clogged or prints unevenly → Partial clog or degraded nozzle → Clean nozzle or perform cold pull; replace if needed
- Stringing or oozing between moves → Temperature too high or flow too high → Lower temperature slightly and reduce flow/retime retractions if necessary
- Blobs and rounded corners on dense areas → Over-extrusion at corners → Reduce flow rate and test with calibration prints
Guided flow: start with checks you can quantify (filament diameter, E-steps) and advance to hardware cleanup if the symptoms persist. This approach minimizes downtime and preserves print quality.
Step-By-Step: Calibrate and Verify Extrusion Correctly
- Calibrate the extrusion multiplier (E-steps) on your printer. This establishes the true amount of plastic the extruder pushes per step. Print a known, small cube, measure, and adjust. 2) Re-measure filament diameter with calipers and ensure your slicer is set to that value; even a 0.05 mm variance can cause noticeable over-extrusion. 3) Clean the nozzle and perform a cold pull if you suspect a partial clog; verify consistent extrusion through a test print. 4) Reprint the calibration cube to validate changes; if it’s still off, move to temperature and flow-rate adjustments. 5) Run a final test print with simple geometry to confirm stability.
This method ensures your printer is delivering material at the intended rate, aligning with your design goals.
Tips &Warnings for Safe, Effective Troubleshooting
- Pro tip: keep a notebook of all measurements, settings, and test prints to track progress.
- Warning: never touch the hot nozzle; allow it to cool and unplug before cleaning.
- Note: use calibrated tools (calipers, digital scale) for accurate measurements.
- Pro tip: dry out filament if stored in humid environments to avoid moisture-induced extrusion issues.
- Note: if you’re unsure about electrical or firmware changes, seek professional help to avoid damage.
Steps
Estimated time: 60-90 minutes
- 1
Check filament and slicer settings
Inspect filament diameter with calipers and confirm your slicer extrusion multiplier matches the measured diameter. Print a calibration cube to observe width accuracy.
Tip: Record diameter measurement and current extrusion value for future reference - 2
Calibrate E-steps
Follow your printer's procedure to calibrate the extruder steps per millimeter. This ensures the nozzle deposits exactly the intended amount of plastic per rotation.
Tip: Make small incremental changes and test with a cube after each adjustment - 3
Inspect nozzle for obstructions
Power off, heat the nozzle, and perform a cold pull or soak with a cleansing filament if you suspect a partial clog. Verify consistent extrusion then reprint.
Tip: Avoid forcing material; gentle pulls prevent tip damage - 4
Adjust temperature and flow
Tighten tolerance gradually by lowering temperature in small increments and reducing flow slightly. Re-run a calibration print to gauge impact.
Tip: Temperature steps of 5°C are a safe starting point - 5
Run a controlled test print
Print a small benchy or 20mm calibration cube to monitor dimensional accuracy after adjustments. Compare actual width to expected values.
Tip: Use a consistent fan speed if applicable - 6
Evaluate and finalize settings
If dimensions align with design intent, save settings in the printer profile. If not, return to step 1 and recheck measurements.
Tip: Don’t overcorrect; minor tweaks can have big effects
Diagnosis: Visible over-extrusion: blobs, wider width, and rough surface texture on printed layers
Possible Causes
- highIncorrect extrusion multiplier/flow rate in slicer or firmware
- highFilament diameter mismatch with slicer settings
- mediumPartially clogged nozzle or degraded nozzle
- lowFilament moisture causing steaming and irregular extrusion
- lowExcessively high printing temperature causing ooze
Fixes
- easyCalibrate extrusion multiplier (E-steps) and adjust flow rate
- easyMeasure filament diameter and update slicer settings accordingly
- mediumClean nozzle or perform a cold pull to clear obstructions
- easyDry filament and store properly to prevent moisture-related issues
- easyLower print temperature to recommended range and re-test
People Also Ask
What causes over-extrusion in 3D printing?
Over-extrusion is usually caused by an incorrect extrusion multiplier or flow rate, filament diameter mismatches, or a partial nozzle clog. Environmental factors like temperature and filament moisture can contribute as well. Start with calibration and material checks before hardware tweaks.
Over-extrusion is mainly caused by calibration or material mismatches; check extrusion settings and filament first.
How do I calibrate the extrusion multiplier?
To calibrate, print a known-dimension test object, measure the actual width, and adjust the extrusion multiplier until the measured width matches the designed width. Re-test with another cube to confirm accuracy.
Print a test object, measure, and adjust until the width matches the design.
Can temperature affect over-extrusion?
Yes. Printing at too high a temperature increases filament flow and ooze. Lower the temperature in small increments and re-test with a calibration print.
Higher temperature can cause oozing; try lowering in small steps and test again.
What if filament diameter changes between batches?
If filament diameter varies, update the slicer settings accordingly and re-run calibration prints. Consistency across batches helps maintain print quality.
If diameter varies, update slicer values and recalibrate.
Is a clogged nozzle responsible for over-extrusion?
A clogged nozzle can cause inconsistent flow that sometimes shows as over-extrusion around features. Clean the nozzle or replace if necessary, and re-test.
Clogs can cause inconsistent flow; clean and test again.
Do I need professional help for persistent issues?
If you’ve exhausted calibration, filament checks, and nozzle cleaning without improvement, consider consulting Print Setup Pro for expert calibration or hardware evaluation.
If problems persist after checks, seek professional help from Print Setup Pro.
Watch Video
Quick Summary
- Calibrate extrusion before changing hardware.
- Match filament diameter to slicer settings.
- Use test prints to validate calibration changes.
- Store filament properly to prevent moisture issues.