3d Printer Heart: A Practical Printing Guide
A comprehensive guide to designing, printing, and finishing a 3d printer heart, with material tips, slicer settings, and troubleshooting from Print Setup Pro.

To print a 3d printer heart, start with a clean heart-shaped model, select PLA or PETG filament, and configure your printer with proper bed leveling. Slice the model with appropriate supports and infill, then print, post-process, and finish. Ensure safety guidelines and firmware up-to-date, and verify tolerance for mounting or display. This guide covers design, materials, settings, and troubleshooting for reliable results.
What is a 3d printer heart?
A 3d printer heart is a heart-shaped object created on a consumer or professional 3D printer to demonstrate design concepts, test print settings, or serve as a decorative or educational piece. The term highlights a family of models that balance aesthetics and printability. According to Print Setup Pro, a 3d printer heart often serves three roles: it acts as a teaching tool for geometry and tolerances, a proof-of-concept for display props or gifts, and a low-cost way to explore material behavior on real hardware. In practice, you start with a digital heart model, prepare the printer, and iterate your settings to achieve clean surface finish, accurate dimensions, and reliable layer adhesion. Beyond the shape itself, the project teaches core printing skills such as orientation, support strategies, and post-processing techniques that apply to many other prints. This foundational knowledge is especially valuable for home office makers, students, and DIY enthusiasts who want to expand their 3D printing repertoire. The practical goal is building confidence—so you can translate digital ideas into tangible objects with predictable results.
Design considerations for a heart-shaped model
When planning a heart-shaped print, a key decision is orientation on the build platform. Flat-on-bed orientation minimizes overhangs and reduces the need for complex supports, which can mar surfaces. However, some people prefer vertical or angled orientations to improve strength along the central axis or to showcase internal lattice structures. Regardless of orientation, always consider the final use: a decorative piece might prioritize smooth surfaces and color fidelity, while a functional prop could require higher tolerances for mounting or alignment with other parts. Another crucial factor is wall thickness and infill. For a sturdy yet affordable display heart, aim for wall thickness around 1.6–2.0 mm (roughly two perimeters on most printers) with 15–25% infill if you want a lightweight structure that still feels substantial. Supports should be planned to minimize visible contact points; use tree supports or custom supports for delicate lobes, and apply a brim to help with bed adhesion on first layers. Finally, consider post-processing implications: consistent layer height and smooth surfaces will impact sanding and painting outcomes later. By mapping these choices to your end-use, you’ll streamline the print and reduce rework.
Material choices and safety for heart prints
PLA is the simplest and most common filament for beginners, offering good surface finish and low odor. PETG provides higher strength and impact resistance, making it suitable if the heart is to be handled or displayed outdoors, but it requires careful temperature control to avoid stringing. ABS is generally avoided in home environments due to fumes, unless you have a well-ventilated workspace. If you’re printing a heart with subtle color or translucency, consider a multi-material workflow or a pigmented PLA. Temperature settings vary by material and printer; always start with the manufacturer’s recommended range and adjust within a narrow window to find the best compromise between print quality and adhesion. Ventilation is important; ensure your workspace is well-ventilated, especially when printing PETG or PLA blends. Finally, be mindful of safety around hot components and moving parts: never touch the nozzle or hot bed during operation, and power down when loading filament.
Slicing setup and print tuning
Slicing is where your digital heart becomes a physical object. Start with a layer height of 0.2 mm for a good balance between surface quality and print speed; if you’re after finer details, 0.1 mm can be used but it will extend print time. A wall thickness of 1.6–2.0 mm is typical, with 15–25% infill for decorative prints and higher infill for more rigid structures. Enable supports only where needed—lobes typically require light, structured supports that are easy to remove. Use a brim for better bed adhesion on small bases. Temperature settings should begin with PLA around 200–210°C and a bed at 60°C; PETG may need 230–250°C and a lower bed temperature of 70–80°C depending on the printer. Enable a modest retraction to reduce stringing, and consider a cooling fan schedule that increases after the first few layers. Calibrate the first layer to ensure good adhesion; a slightly squished first layer often yields the most consistent print results. Finally, run a short test print to verify geometry before committing to a full-height heart.
Post-processing and finishing touches
After printing, remove supports carefully to minimize surface damage. A light sanding progression from 180 to 400 grit yields a smooth surface suitable for painting or polishing. If you want a glossy finish, apply a plastic-friendly primer followed by thin coats of spray paint, allowing adequate drying time between coats. For a two-tone or translucent effect, you can pause printing to swap filament or insert color accents with a secondary material. If your heart needs to be hollow for weight reduction or display realism, post-processing steps may include sealing internal cavities with epoxy or resin. Mounting holes, stands, or magnets can be added with precision drilling after the print has cured. Finally, perform a thorough inspection for layer defects, delamination, or warping, and perform a controlled finishing approach to ensure a polished final product.
Common pitfalls and troubleshooting for 3d heart prints
Warping typically occurs with improper bed adhesion or rapid cooling; ensure a proper first-layer calibration and bed temperature suitable for your material. Stringing can often be reduced by adjusting retraction distance, speed, and temperature. Layer shifts indicate belt tension issues or loose pulleys—check mechanical parts before printing. If you notice under-extrusion or inconsistent extrusion, verify filament diameter in your slicer settings and run a nozzle-cleaning routine. For detailed heart shapes, infill patterns and wall thickness may need adjustment to prevent sagging or drooping lobes. When in doubt, print a small test piece first to validate settings before committing to the full heart. With attention to orientation, temperature, and support strategy, you’ll iron out most common issues early in the process.
Project ideas and next steps
A printed 3d printer heart can be the centerpiece of an educational display, a decorative sculpture, or a demonstration model for design optimization. You can customize the heart with different colors by using multi-material or color-changing filaments, or create a series of hearts of varying sizes to illustrate scale and tolerance. Consider adding a simple light source behind a translucent heart to highlight internal lattice structures, or attach a small display stand to create a gallery-worthy piece. If you’re feeling ambitious, prototype a heart with internal channels for a mini-fluid demonstration or as a case study for heat resistance in different plastics. The key is to iterate, test, and refine until your print meets your goals.
Tools & Materials
- 3D heart model file (STL/OBJ)(Ensure the model is manifold and watertight; check for non-manifold edges.)
- 3D printer with heated bed and enclosed workspace(Required for consistent results, especially with PETG.)
- Filament: PLA or PETG(PLA for simplicity; PETG for strength and durability.)
- Slicer software (e.g., Cura, PrusaSlicer)(Ensure it’s up to date and supports the printer profile.)
- Calipers or a ruler(Useful for verifying final dimensions and tolerances.)
- First-layer adhesion aids (brim/raft, painter’s tape)(Helps with bed adhesion for small bases.)
- Deburring tool or Precision knife(For post-processing support remnants.)
- Safety gear (gloves, goggles)(Wear when handling hot parts and during sanding/painting.)
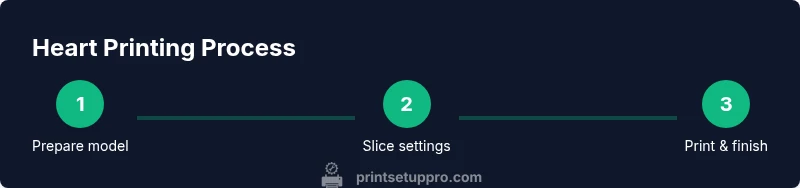
Steps
Estimated time: 2-5 hours
- 1
Prepare heart model file
Open the STL/OBJ in your slicer, inspect for errors, and orient the model for reliable printing. Confirm dimensions and model integrity before slicing. If the model has multiple parts, decide whether to print as a single piece or in segments for post-assembly.
Tip: Run a quick mesh repair if the model has minor non-manifold edges; this prevents print failures. - 2
Set up printer and bed
Level the bed and ensure the nozzle height is calibrated for a good first layer. Preheat the nozzle and bed to your chosen material settings. Load filament and perform a cold pull if you notice inconsistent extrusion.
Tip: A well-leveled bed reduces first-layer wobble and improves adhesion for intricate lobes. - 3
Configure slicer settings
Choose layer height (0.2 mm for general use, 0.1–0.15 mm for finer detail), wall thickness around 1.6–2.0 mm, and 15–25% infill for decorative prints. Enable supports only where needed and apply a brim to enhance bed adhesion.
Tip: Use a slicer profile for your material and printer; tweak infill and wall counts based on the heart’s size. - 4
Run a test print first
Print a small test piece or a scaled-down heart to verify geometry, support needs, and bed adhesion. Observe first layers closely and adjust cooling and retraction settings if stringing or blobbing occurs.
Tip: If first layer shows gaps, pause and re-level the bed before continuing. - 5
Print the full heart
Start the full-height heart print; monitor periodically for layer shifts or overheating. If the print shows under-extrusion, pause to inspect filament path and nozzle temperature; pause if you need to swap filament mid-print for accents.
Tip: Keep a spare nozzle clean and within reach for quick changes if filament color blocks occur. - 6
Post-process and finalize
Remove supports carefully, sand surfaces from coarse to fine grit, and apply primer or paint as desired. Inspect for defects and ensure any display hardware fits correctly. Allow coatings to dry fully before handling.
Tip: Use light passes during sanding to avoid rounding sharp heart edges.
People Also Ask
What is the best material for a heart print?
For beginners, PLA offers easy handling and a good surface finish. PETG provides greater strength and impact resistance but may require more fine-tuning. Avoid ABS in typical home environments due to fumes.
PLA is best for easy prints, while PETG adds strength. Avoid ABS indoors because of fumes.
Should the heart be printed in one piece or in parts?
Printing in parts can reduce print time for large hearts and makes post-processing easier. If you have a large printer or a model designed for seamless assembly, a single-piece print is possible with careful orientation and supports.
Parts can speed up printing and simplify finishing; single-piece is possible with the right printer and supports.
How long does a heart model take to print?
Print time depends on size, layer height, and infill. A small decorative heart may take under an hour, while a larger display heart can take several hours. Plan for a few hours and check progress periodically.
Smaller hearts print in under an hour; larger ones can take several hours.
What are common print issues and fixes?
Common issues include warping, stringing, and layer adhesion problems. Solutions involve correcting bed leveling, adjusting temperature, enabling proper retraction, and using supports where needed.
Warps, strings, and gaps usually come from bed leveling, temperature, or supports. Fix those first.
Can I color or finish a 3d printer heart easily?
Yes. Paint after priming for a smooth finish, or use multi-color filaments for accents. Post-processing with sanding and sealing can dramatically improve the final appearance.
Paint after priming for best results; consider accents with color and smooth finishing.
Watch Video
Quick Summary
- Plan orientation and supports before printing.
- Choose PLA for ease or PETG for durability.
- Tune slicer settings to balance quality and speed.
- Test layers and adhesion on a small piece first.
- Finish with careful post-processing for a polished display heart.