How to Create a 3D Printer Prosthetic: A Complete How-To
Learn how to design, print, and validate a 3D printer prosthetic with safe materials, proper sizing, and step-by-step workflows for home or clinical use.

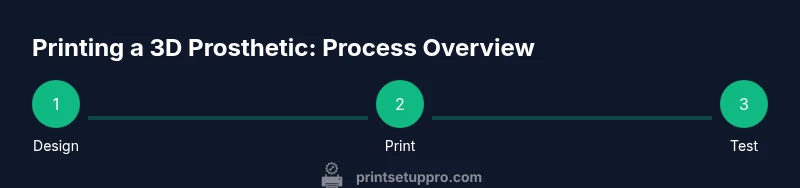
By following a careful workflow, you can design and 3D print a functional prosthetic aid for everyday tasks using a home or clinic printer. This guide covers design choices, material considerations, sizing, and post-processing to improve comfort and reliability, with practical safety steps for beginners. According to Print Setup Pro, begin with an open-source design and validate fit through patient-friendly tests.
Understanding the Landscape of 3D Printed Prosthetics and Ethical Considerations
The field of 3d printer prosthetic design sits at the intersection of biomechanics, patient-centered care, and rapidly evolving technology. A prosthetic device created with a 3D printer can offer cost-effective, customizable supports for hands, fingers, or distal limb tasks. The Print Setup Pro team emphasizes that safety, hygiene, and legal considerations are essential when choosing a design path. Before the first print, define the user’s goals, daily activities, and any medical constraints. This groundwork helps you select an existing open-source model or tailor a design that fits the wearer’s anatomy. Ethical considerations include informed consent, caregiver involvement, and clear expectations about performance and durability. The goal is to deliver a device that improves function without introducing new risks. When used responsibly, 3d printer prosthetic technologies can empower patients and students to participate more fully in daily routines and hobbies.
Design Considerations and Fit
Design choices should balance rigidity for support with comfort for extended wear. Start with a modular approach: base shells, soft liners, and interchangeable components let you adjust fit quickly. Use a patient-specific measurement approach—either 3D scans or precise physical measurements—to minimize guesswork. Validate joint alignment and load paths with simple tests, such as opening and closing motions or grip tasks, to catch misalignments early. The goal is a comfortable, functional interface that reduces slipping, pressure hotspots, and skin irritation. Always document design changes so future users or clinicians understand the rationale and can reproduce or iterate safely.
Material Choices for Prosthetics: Filaments, Durability, and Safety
Material selection has a direct impact on comfort, strength, and hygiene. Common filaments include PLA for early prototyping due to its ease of use, PETG for a blend of toughness and heat resistance, and more advanced materials like nylon blends for resilience. Consider medical-grade or skin-safe finishes for devices contacting skin, and plan for post-processing steps such as smoothing, sealing, or coating to reduce friction. Be mindful of material limitations: some filaments may degrade with sweat or UV exposure, while others may craze under stress. For high-stress applications, validate the material’s mechanical properties through simple bench tests and avoid long-term exposure to harsh chemicals.
Sizing, Scanning, and Customization Workflow
Accurate sizing is critical to comfort and function. If a patient cannot be scanned, use adjustable measurement methods with multiple reference points (length, width, circumference). When possible, employ a 3D scanner for more precise geometry, then refine the model with targeted adjustments for soft tissue tolerance. Create a baseline prototype, then iterate with wear tests and patient feedback. A modular approach—interchangeable finger pads, grips, or terminal devices—simplifies customization for different users or tasks.
Printing, Post-Processing, and Assembly
Print settings should optimize strength and surface finish without excessive print times. Start with a mid-range layer height, thick solid infill, and cautious extrusion width for reliable parts. Post-processing may include sanding, smoothing, or applying a biocompatible coating to improve hygiene. Assembly should emphasize secure fastenings, stable interfaces, and simple disassembly for cleaning. Test each stage with controlled tasks to detect fit issues or loosened joints. Maintain a clear version history so clinicians or caregivers can track changes over time.
Safety, Hygiene, and Regulatory Considerations
Hygiene is paramount for any prosthetic device that contacts skin. Clean all components before fitting, and use skin-safe finishes where possible. Avoid materials that may degrade with perspiration or body oils. While 3d printer prosthetic projects enable rapid prototyping, they are not medical devices by default; users should consult local regulations and clinical guidance. When in doubt, partner with clinicians or therapists to ensure the device meets safety and usability standards. Record all material choices, design decisions, and cleaning procedures to support any future clinical review.
Validation, Testing, and Real-World Use
Validation should involve structured testing with real users, including functional tasks, comfort assessments, and safety checks. Build a simple test protocol that measures grip strength, range of motion, and user-reported comfort. Use a buddy system during trials to catch any issues early. Real-world use will reveal wear patterns and possible failure modes that aren’t obvious in bench tests. Document results and iterate the design accordingly. Print Setup Pro highlights the importance of traceability so that improvements are reproducible by others.
Maintenance, Repairs, and Longevity
Regular maintenance keeps a 3d printer prosthetic performing well. Inspect joints for looseness, clean interfaces, and re-check fit as the wearer changes with growth or activity level. Replace worn components and keep spare modules on hand for quick swaps. Because materials wear differently under stress, establish a replacement schedule based on observed usage rather than a fixed calendar. Keeping a log of maintenance steps helps ensure consistent performance and safety.
Authoritative Sources and Further Reading
For readers seeking formal guidance and standards, refer to established health and safety resources. The following sources provide foundational information on prosthetics, safety, and biomedical research: • NIH guidelines on patient-centered device development • FDA medical device safety overview • Educational resources from accredited universities that explore 3D printing in healthcare
Tools & Materials
- 3D printer with adequate build volume(Check nozzle size and bed stability; ensure a reliable power supply.)
- Filament options (PLA, PETG, or nylon blends)(Choose skin-safe or medical-grade options when possible; consider color stability.)
- Filament dryer or dry box (optional but recommended)(Helps prevent moisture-related print defects for some filaments.)
- 3D printing slicer software(Use a slicer that supports fine layer control and supports confidence checks.)
- Measuring tools (calipers, flexible tape)(Accurate measurements are essential for fit and comfort.)
- Skin-safe sealant or biocompatible coating (optional)(For hygiene and comfort on skin-contact surfaces.)
- Sandpaper, deburring tool, and finishing supplies(Use progressively finer grits for a smooth finish.)
- Basic hand tools for assembly(Screwdrivers, small wrenches, and hex keys as needed for modular joints.)
- Testing aids (grip blocks, simple weights)(For rapid functional validation during design iterations.)
Steps
Estimated time: Estimated total time: 8-14 hours
- 1
Define user needs and goals
Meet with the user to understand daily tasks, comfort requirements, and any medical constraints. Establish clear performance goals for the prosthetic. Document measurements and preferences before any design work begins.
Tip: Create a simple questionnaire to capture functional goals and comfort thresholds. - 2
Choose or adapt a design
Select an existing open-source design that fits the user's anatomy, or begin a custom model based on measurements. Ensure the design accommodates modular components for future adjustments.
Tip: Prefer modular designs to simplify future adjustments and repairs. - 3
Measure and scan for accuracy
Take precise measurements or perform a safe 3D scan of the residual limb or affected area. Use multiple reference points to reduce error and facilitate a better fit.
Tip: Validate measurements with a second independent method to confirm accuracy. - 4
Prepare the CAD model
Modify the chosen design to mirror the user’s measurements and desired adjustments. Add alignment guides and quick-release features if needed for easier donning and doffing.
Tip: Keep a detailed change log to track iterations. - 5
Export and slice for printing
Export in a compatible format for your slicer. Choose layer height and wall thickness that balance strength and print time. Include support structures only where necessary.
Tip: Test a small test print to verify fit before committing to a full build. - 6
Print and inspect first prototypes
Print initial components with appropriate settings. Inspect for warping, layer adhesion, and surface quality. Address defects before assembly.
Tip: Document any print anomalies with photos for future reference. - 7
Post-process and finish
Sanding, smoothing, and sealing surfaces contacting skin can improve comfort and hygiene. Apply a biocompatible coating if appropriate and ensure surfaces are clean.
Tip: Avoid sharp edges and ensure no protruding supports remain. - 8
Assemble and test with the user
Assemble modular components and perform functional tests under supervision. Collect user feedback on fit, comfort, and function, then iterate as needed.
Tip: Don’t finalize any design without user confirmation and documented changes.
People Also Ask
What is a 3D printer prosthetic, and what are its typical uses?
A 3D printer prosthetic is a customized limb or assistive device produced with a 3D printer. It can support daily tasks, improve grip, and provide a stepping stone for clinicians to tailor devices for individual users. Always consider safety, hygiene, and user feedback when evaluating its suitability.
A 3D printer prosthetic is a customized limb or aid made with a 3D printer and used to assist daily tasks. Think safety and user feedback as you evaluate its suitability.
Which materials are best for skin-contact parts?
For skin-contact surfaces, prefer filaments with skin-safe finishes and consider biocompatible coatings. PLA is easy for prototyping; PETG offers durability, and nylon blends can provide resilience while maintaining comfort. Always verify material compatibility with cleaning agents and user sensitivities.
For skin-contact parts, use skin-safe finishes and consider biocompatible coatings. PLA is easy to start with, PETG is tougher, nylon blends are resilient.
How do I ensure a proper fit?
Accurate measurements or scans are essential. Use multiple reference points and test-fit prototypes with the user in real tasks. Modular components allow small adjustments to improve comfort and function.
Get accurate measurements, test-fit the prototype, and adjust modules to improve comfort and function.
What safety checks should I perform before use?
Check for sharp edges, ensure joints are secure, and verify that materials won’t degrade under sweat or heat. Clean components regularly and avoid long-term exposure to harsh chemicals. Always supervise initial usage with a clinician if possible.
Make sure there are no sharp edges, joints are tight, and materials hold up to sweat and heat. Clean often and supervise early use.
Are 3D-printed prosthetics legally allowed for medical use?
Regulations vary by region. In many places, 3D-printed devices fall under medical device oversight if used clinically. Consult local guidelines and work with healthcare professionals to ensure compliance and safety.
Regulations differ by location. Check local guidelines and collaborate with healthcare professionals to stay compliant and safe.
Watch Video
Quick Summary
- Start with user-centered goals and measured fit.
- Modularity enables easier adjustments and replacement parts.
- Choose skin-safe materials and proper post-processing.
- Document changes for reproducibility and safety.
- Validate with real-world tests before finalizing.