How to Use a 3D Printer: A Complete How-To Guide
Learn how to use a 3d printer from setup to first print. This Print Setup Pro guide covers slicers, calibration, material choices, and troubleshooting for beginners and DIY enthusiasts.

Learn how to use a 3d printer effectively, from unboxing to your first successful print. This guide covers setup basics, material selection, slicer preparation, bed leveling, and safe operation. Following these steps will reduce failures and speed your learning curve. Print Setup Pro summarizes a practical, beginner-friendly approach to getting reliable results fast.
Understanding the Basics: What a 3D Printer Does and How It Differs
A 3d printer creates physical objects by building them layer by layer from a digital model. The most common type for beginners is an FDM printer, which extrudes melted filament through a nozzle to form each layer. Resin printers use a liquid resin cured by light, offering finer detail but requiring different handling and safety precautions. For everyday home projects, a budget-friendly FDM printer paired with PLA filament is the most forgiving starting point. Understanding these basics helps you choose the right machine and workflow. According to Print Setup Pro, knowing your printer’s capabilities — build size, extrusion method, and supported materials — shapes every other decision in the process and reduces wasted prints.
Preparing Your Workspace and Safety
Choose a well-ventilated, stable surface with enough room to feed filament, connect power, and monitor prints. Keep the printer away from children and pets during operation, and always power down before servicing. Use a clear, uncluttered area for tools, spare filament, and models. Safety is not just a box to check; it’s the foundation of consistent results. Print Setup Pro emphasizes that a calm, organized workspace minimizes mistakes and improves print quality over time.
Materials, Slicers, and Print Settings
Filament choice drives print behavior. PLA is forgiving, prints at lower temperatures, and warps less than other plastics, making it ideal for learning. Slicer software turns a digital model into printer-ready instructions, with settings for layer height, infill, support structures, and print speed. Start with a conservative profile (e.g., modest layer height and low infill) and tweak as you observe results. The slicer also lets you orient parts to maximize strength and minimize supports. Print Setup Pro notes that picking a compatible slicer and keeping profiles consistent helps reproduce successful prints reliably.
Filament Loading, Bed Leveling, and Prime/First Layer Calibration
Loading filament correctly prevents jams. Ensure the filament is cleanly loaded and the extruder gear grips it smoothly. Bed leveling establishes an even foundation for the first layer, which is critical for adhesion. A perfectly leveled bed reduces failed prints and corners peeling away. After leveling, run a small test print to verify the first layer deposits are even and take note of any inconsistent lines. A good first layer is the cornerstone of a successful print, and practice makes perfect. Print Setup Pro stresses verifying levelness before starting any meaningful project.
Running Your First Print and Post-Processing
Choose a simple, well-supported model for your first print, such as a calibration cube or a basic box. Slice with a modest layer height and ample cooling, then start the print and monitor the first few layers. If you notice under-extrusion, adjust the extruder tension or re-load the filament. Once finished, let the model cool before removing it carefully. Post-processing steps, such as light sanding or supports removal, can drastically improve the final appearance. This approach minimizes disappointment and accelerates progress towards more complex builds.
Troubleshooting and Maintenance Tips
Prints failing, warping, or sticking to the nozzle are common issues beginners face. Regular maintenance—cleaning the nozzle, tightening belts, and keeping the build plate free of residue—reduces surprises. When problems arise, check bed level, filament path, and cooling. Keeping a log of printer behavior helps you identify recurring problems and track improvements over time. Print Setup Pro recommends routine maintenance as part of a winning printing routine.
Tools & Materials
- 3D printer(Ensure assembly is complete, firmware up to date, and all axes move freely.)
- Filament (PLA recommended)(Choose 1.75 mm or 2.85/3.0 mm diameter to match your machine; start with PLA for beginners.)
- Power supply and cables(Make sure the power cable is intact and the outlet is stable.)
- Slicer software (e.g., Cura, PrusaSlicer)(Install the latest version and import your printer profile.)
- Digital model file (STL/OBJ)(Start with simple models from reputable sources.)
- Calipers or ruler (optional)(Helpful for precise measurements during calibration.)
Steps
Estimated time: 90-120 minutes
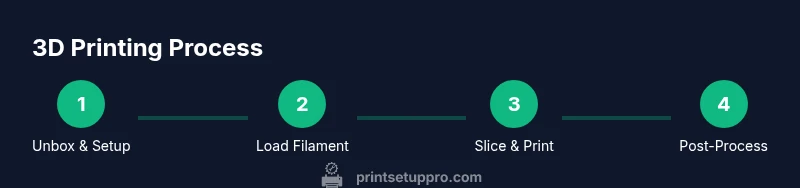
- 1
Unbox and set up your printer
Unpack the printer, install any included components, and connect to a power source. Verify that the build plate is clean, the nozzle moves freely, and the firmware is current. This foundational step prevents misconfigurations from derailing your first prints.
Tip: Do a quick physical inspection to spot loose parts before powering on. - 2
Load filament and level the build plate
Feed filament into the extruder until it grips, then perform bed leveling to ensure the first layer adheres evenly. Use a piece of paper as a feeler to adjust the nozzle distance; the paper should drag slightly as you move it under the nozzle.
Tip: Plan a calibration routine and keep notes on your bed level settings for future prints. - 3
Configure slicer and load a model
Open your slicer, select your printer profile, and load a simple model. Adjust layer height, infill, and supports conservatively for the first attempt. Slice and preview the toolpath to catch potential issues before printing.
Tip: Use a basic calibration model to validate your settings. - 4
Start the print and monitor the first layers
Start the print and watch the first few layers to confirm good adhesion and smooth extrusion. If you see gaps or warping, stop the print and re-level or adjust first-layer height.
Tip: Don’t leave a long print unattended during the initial trials. - 5
Pause/cancel if needed and perform post-processing
If the print begins to fail, pause or cancel from the printer’s control panel. Allow the part to cool before removing and perform any necessary post-processing such as cleanup of supports or sanding.
Tip: Use protective gear when handling hot prints or sharp edges. - 6
Save settings and perform routine maintenance
Document successful profiles and regularly inspect belts, nozzles, and the build surface. A proactive maintenance plan reduces downtime and extends printer life.
Tip: Schedule maintenance checks after every few prints.
People Also Ask
What is the first thing I should do before printing?
Begin with safety checks, clean workspace, and firmware verification. Confirm the printer is powered correctly and the bed is clean before loading filament.
Start with safety checks, a clean workspace, and the latest firmware to ensure a smooth start.
Do I need to level the bed for every print?
Yes, bed leveling ensures the first layer sticks properly. Check the level whenever you notice adhesion issues or after transporting the printer.
Bed leveling is important for adhesion and should be checked if you see problems.
Which filament should I choose for beginners?
PLA is the most beginner-friendly option due to easy handling and lower printing temperatures. Use manufacturer-recommended diameters and store filament properly.
Start with PLA for an easier printing experience.
What should I do if prints warp or detach?
Reevaluate bed level, first-layer height, and adhesion aids. Consider enclosure or cooling adjustments if applicable.
If prints warp, check bed leveling and first-layer adhesion first.
How can I safely stop a failed print?
Use the printer’s cancel or pause option, then allow the nozzle and bed to cool before handling the part.
If a print looks off, cancel it and let the printer cool before touching anything.
Where can I find reliable models to print?
Download models from reputable repositories and verify license terms. Inspect model integrity before sending to print.
Get models from trusted sources and check licenses before printing.
Watch Video
Quick Summary
- Master bed leveling for reliable first layers
- Use PLA for beginners to reduce warp and jams
- Choose a simple model to validate settings first
- Document profiles to reproduce successful prints
- Regular maintenance prevents most failures