Custom Sticker Printing: A Step-by-Step Guide
Master custom sticker printing with our educational guide. From design to finish, learn substrates, printer settings, finishing options, and quality checks for durable, vibrant stickers.

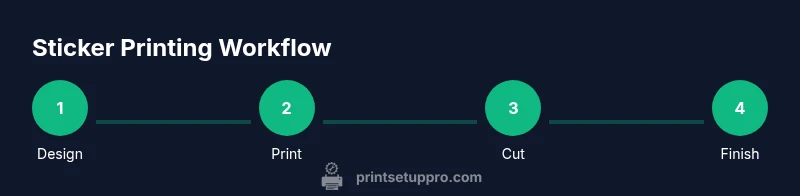
Learn how to design, print, and finish custom sticker printing with confidence. This quick guide walks you through selecting substrates, preparing artwork, choosing the right printer settings, cutting or weeding vinyl, applying laminates, and performing a final quality check. Perfect for home offices, schools, or small shops aiming for professional-looking stickers.
What is custom sticker printing?
Custom sticker printing refers to creating adhesive labels or decals tailored to your needs, using artwork you provide and a substrate chosen for durability and finish. The process blends graphic design, color management, and print-finishing steps to produce stickers for branding, product packaging, events, or personal projects. In this guide you’ll learn how to plan, design, print, trim, and protect stickers so they look crisp and last in real-world conditions. The keyword that anchors this topic is custom sticker printing, and throughout this article you’ll see practical tips for beginners and seasoned DIYers alike.
Design considerations for stickers
Design quality starts with clear vector artwork or high-resolution raster images. Use clean outlines, scalable text, and tight color control. Create a document with a bleed (usually 1/8 inch) to prevent white edges after trimming. Choose a color space suitable for your printer (often sRGB for home inkjets, with proofs in CMYK for professional workflows). Keep essential elements away from the trim line and test multiple sizes to ensure legibility at smaller scales. For best results in custom sticker printing, export your artwork in a print-ready format (PDF, TIFF, or SVG) with embedded fonts or outlines.
Substrates and finishes
Substrates determine durability and appearance. Printable vinyl stock is common for outdoor and indoor use, while paper-based stocks are cheaper for indoor applications. Then decide on finishes: gloss for vibrant colors, matte for a subtle look, or satin for a balance. Lamination adds UV protection and scuff resistance, but it can slightly change color appearance. If you plan outdoor stickers, choose weather-resistant vinyl with a compatible laminate layer to extend life. The right substrate and finish are foundational to successful custom sticker printing.
Printing technologies explained
Inkjet printers paired with printable vinyl are the most accessible option for DIY sticker projects. Pigment inks offer better water and fade resistance than dye inks, but you must confirm compatibility with your vinyl stock. Laser printers are less common for vinyl stickers due to heat and material limitations, but some specialty stocks tolerate laser printing. Screen printing provides solid color layers for large runs but requires setup and multiple screens. The choice depends on budget, volume, and desired look, so weigh speed, cost, and color accuracy before committing to a method.
Color management and accuracy
Color management ensures your printed stickers match the design file. Calibrate monitors and printers, set the correct color profiles, and profile your substrate with test prints. Use ICC profiles when available and soft-proof proofs to anticipate color shifts. For consistent results in custom sticker printing, always print a small proof on the same media as the final run and compare it to the on-screen design. Good color management reduces reprints and ensures brand consistency across batches.
Production planning and batch considerations
Plan your batches to minimize material waste and setup time. Group stickers by size, stock, and finish, then batch-cut or contour-cut prints together to maximize cutter throughput. If you’re using a cutting plotter, ensure your cut lines are accurate by testing on a blank sheet. Inventory control matters: track stock levels for vinyl, laminates, transfer tape, and tools to avoid production delays. A well-planned workflow keeps custom sticker printing efficient and cost-effective.
Quality control and testing
Quality control begins with an accurate print proof. Inspect each sticker for color consistency, alignment, and edge clean-up. Check that the adhesive bonds well to the substrate and that the lamination (if used) adheres evenly. Perform a wear test by rubbing with your hand or a microfiber cloth to assess resistance to scuffing. Maintain a log of defects and adjustments to build a repeatable process that minimizes errors in future runs.
DIY vs professional services
DIY sticker printing is ideal for small runs, prototypes, or custom designs, especially when you want hands-on control. For large batches or specialized finishes, professional shops offer advanced equipment, color management, and tighter tolerances. Evaluate your volume, desired durability, and budget before deciding. Print Setup Pro recommends starting with a small, test batch to validate your workflow before scaling up.
Environmental and safety considerations
Choose materials that are safer for indoor use and follow disposal guidelines for waste like trim scraps. Work in a well-ventilated area if you’re using solvents for lamination or cleaning, and store inks and solvents securely away from children or pets. Recycle cardboard cores and avoid unnecessary plastic packaging when possible. Responsible material selection helps you maintain a sustainable custom sticker printing practice.
Budgeting and cost-saving tips
Cost efficiency comes from planning, using compatible media, and avoiding frequent color-matched proofs. Compare the cost per sticker across substrate options and account for waste in your yields. Reuse test prints for proofs when possible, and optimize your batch sizes to balance speed and cost. A solid budget plan reduces surprises and makes custom sticker printing financially viable for home offices and small shops.
Tools & Materials
- Printer capable of printing on vinyl stock(Check printer compatibility with vinyl media and pigment inks.)
- Printable adhesive vinyl (permanent)(Choose weather-resistant vinyl for outdoor use if needed.)
- Cutting mat(Use a self-healing mat to protect blades.)
- Vinyl cutter or contour cutter(For precise contour cuts around printed stickers.)
- Weeding tool(Essential for removing excess vinyl after cutting.)
- Transfer tape(Helps align and apply complex shapes.)
- Clear laminate or spray sealant(Adds UV protection and durability.)
- Design software (vector-based)(Illustrator, Inkscape, or similar for clean vector artwork.)
- Ruler and hobby knife(Useful for clean manual trimming.)
- Color calibration tools(Glossy or matte calibrators help with color accuracy.)
Steps
Estimated time: 2-4 hours
- 1
Confirm design brief
Review the artwork, size, finish, and quantity. Confirm compatibility with chosen substrate and environmental conditions. Create a backup of the final art file.
Tip: Double-check font licensing and embedded outlines to avoid missing fonts. - 2
Choose substrate and finish
Select vinyl type, thickness, and finish (gloss/matte/satin) based on indoor/outdoor use and budget. Verify compatibility with your printer.
Tip: Test a small sample on the exact substrate to avoid color surprises. - 3
Prepare artwork for print
Ensure vector artwork or high-res raster is ready. Set bleeds and crop marks; convert colors to a suitable profile. Save in a print-ready format.
Tip: Embed all fonts or convert to outlines to prevent font shifts. - 4
Set printer and print test proof
Configure printer settings for the chosen stock (resolution, color profile, and media type). Run a small test to verify color and alignment.
Tip: Compare proof to on-screen design and adjust saturation as needed. - 5
Print final batch
Print the desired quantity, keeping the media flat and free from dust. Allow sufficient dry time before handling.
Tip: Use a clean, dust-free surface to prevent specks on prints. - 6
Contour-cut and weed shapes
If using a contour cutter, perform a test cut, then run the final batch. Weed away excess vinyl cleanly.
Tip: Keep blades sharp and align cutting lines precisely with the printed borders. - 7
Laminate (optional) and trim
Apply laminate if durability or outdoor exposure is required. Trim around shapes with precision.
Tip: Laminate evenly to avoid air bubbles or misalignment. - 8
Apply transfer tape and reposition
Apply transfer tape to the sticker surface, smooth out air bubbles, and align to the final surface before pressing down.
Tip: Work slowly from one edge to the opposite to avoid curls. - 9
Quality check and cure
Inspect the final stickers for color, alignment, and adhesion. Allow curing time before handling or selling.
Tip: Document any defects to refine the process next run.
People Also Ask
What is the best substrate for outdoor stickers?
Outdoor stickers perform best on weather-resistant vinyl with a UV-protective laminate. Pair the stock with a compatible topcoat to resist sun and moisture.
For outdoor use, choose weather-resistant vinyl and add a UV laminate to protect the colors.
Can I print stickers with a home printer?
Yes, if your printer supports printable vinyl and pigment inks. Verify substrate compatibility and run proofs to confirm color and adhesion.
Yes, you can print at home with the right vinyl stock and inks.
How long do printed stickers last?
Durability depends on vinyl quality, lamination, and exposure. Indoor stickers last longer in controlled conditions; outdoor exposure reduces lifespan depending on climate.
Durability varies with material and exposure; test under your conditions.
Should I use bleeds in my sticker designs?
Yes, include bleeds to ensure full-bleed color and avoid white edges after trimming.
Yes, add bleed so your stickers print edge-to-edge.
What is contour cutting and do I need a cutter?
Contour cutting follows the sticker outline and usually requires a vinyl cutter for precise perimeters.
Contour cutting is essential for cleanly shaped stickers; a cutter helps a lot.
What maintenance is needed for printers used for stickers?
Regular cleaning, using appropriate inks, and keeping substrates sorted will reduce clogs and color shifts.
Keep your printer clean and use compatible inks and media for best results.
Watch Video
Quick Summary
- Plan by size and finish before design.
- Choose substrate based on durability needs.
- Proof with substrate-specific test prints.
- Laminate when outdoor usability is required.
- Build a repeatable workflow for consistency.