How to Make Stickers at Home Without a Printer
Learn printer-free techniques to create custom stickers at home, from hand-drawn designs to stamping and sealing. This practical guide covers materials, steps, and troubleshooting for DIY sticker success.

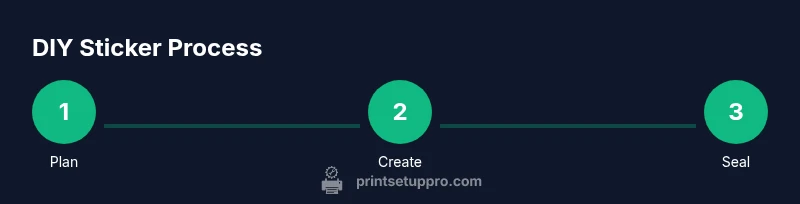
According to Print Setup Pro, you can make stickers at home without a printer using simple, hands-on methods. This guide outlines three practical approaches: hand-drawn designs on sticker paper, stamp-and-ink creations, and repurposing adhesive sheets. Gather basic supplies, seal for durability, and cut cleanly for professional-looking results. The Print Setup Pro team found that careful finishing yields durable DIY stickers without printing.
Why Make Stickers at Home Without a Printer?
Creating stickers without a printer puts you in control of the design, materials, and finish. It lowers upfront costs, avoids inkjet maintenance, and lets you customize small runs for planners, scrapbooks, or gift tags. With a little practice, hand-drawn lines, stamps, or cut-out designs can look remarkably professional. From the Print Setup Pro perspective, this printer-free approach reduces equipment needs while inviting experimentation. You can reuse materials you already own—paper scraps, labels, and adhesive-backed sheets—to test ideas before committing to a larger batch.
This approach also pairs well with labeled organization workflows, seasonal crafts, and DIY branding projects, offering a tactile, personal touch that digital designs sometimes miss. Expect some trial and error as you refine line weight, color saturation, and cutting accuracy, but the payoff is a flexible, cost-effective process you can repeat with minimal waste.
Methods Overview: Three Printer-Free Approaches
There are three practical printer-free pathways to stickers:
- Hand-drawn designs on sticker paper or label stock for a classic, artisanal look.
- Stamp-and-ink creations using alphabet or image stamps to produce repeatable patterns.
- Re-purposed adhesive sheets or cut-out shapes from magazines and scrapbooks to assemble unique collages.
Each method has distinct materials, finishing options, and durability profiles. Print Setup Pro notes that the right sealant and surface choice can dramatically improve longevity, even for handmade stickers. Start with one method to build confidence, then experiment with combinations for varied textures and finishes.
Method A: Hand-Drawn Sticker Sheets
Hand-drawn stickers begin with a base of smooth, non-porous paper such as sticker stock or label sheets. After sketching a design, you can ink it with fine liners or markers and set it aside to dry. The key is clean, confident lines and controlled color application. Once dry, cut shapes with precision scissors or a craft knife against a steel ruler to ensure straight edges. A light sanding of the surface can help inks adhere better. For durability, seal each sticker with a clear acrylic spray, Mod Podge, or a varnish that dries clear. The sealant should be applied in multiple thin coats, allowing adequate drying time between layers.
Tips for best results:
- Use bleed-free markers designed for paper crafts to prevent color feathering.
- Practice on scrap paper before committing to your final designs.
- Work on a clean, uncluttered workspace to improve accuracy.
- If you’re using color, test against a white, non-glossy surface to gauge true hue.
Method B: Stamp and Ink Stickers
Stamping offers repeatable shapes and motifs without printing. Start with a sturdy stamp set and water- or alcohol-based inks, depending on your surface. Stamp onto sticker stock, label paper, or even acetate sheets to create templates you can trace from later. Allow the ink to dry fully before cutting. For extra depth, layer stamps or combine with markers for shading. Seal the finished stickers with a compatible clear coat to resist smudging and moisture. If you stamp on porous paper, consider a primer layer or sealing before applying ink to improve adhesion.
Pro tips:
- Test stamp pressure to avoid blotches or ghosting.
- Keep a small cloth handy to wipe excess ink between impressions.
- Store unused stamps in a cool, dry place to maintain sharp image transfer.
Method C: Ready-Made Adhesive Sheets and Cut-Outs
Another efficient approach is to assemble stickers from ready-made adhesive sheets and cut-outs. Collect decorative paper cutouts, magazine images, or digital art printed on plain paper, then back them with adhesive-backed stock. Use a craft knife and metal ruler to trim shapes precisely. For a clean, durable result, layer designs with a thin sheet of clear adhesive or a sealant after assembling. This method is particularly good for collage-style stickers or mixed-media looks. It also scales well for small batches and gift sets.
Key considerations:
- Choose adhesive sheets that are compatible with your cutting method (scissors vs. knife).
- Allow any glue or backing to dry before sealing to prevent warping.
- Protect your finished pieces by storing them flat and out of direct sunlight.
Finishing, Sealing, and Durability
Durability hinges on surface preparation and sealing. For hand-drawn and stamped stickers, select a clear sealant compatible with your chosen ink or marker. Apply thin, even coats and let each layer dry completely before applying the next. If you’re using collage elements, consider a light hygroscopic coating to prevent peeling. For moisture-prone environments, a spray sealant designed for waterproofing can significantly extend lifespan, though no DIY method will be universally waterproof. Always test on a spare piece to refine your technique before coating your final sheets.
Another important factor is backing material. A sturdy, acid-free stock with good flexibility reduces edge curling and makes handling easier. Label your finished sheets and store them in a dry, cool place to maintain color fidelity and adhesion over time.
Troubleshooting Common Issues
DIY sticker projects can present a few recurring challenges. Bleeding inks occur when ink wicks into neighboring areas; prevent this by letting inks dry completely and choosing non-fusible paper for layering. Edges peeling after sealing are often due to an over-strong seal or insufficient surface adhesion; in this case, try a lighter touch and re-seal with a compatible product. If designs smudge during cutting, use a sharp blade and a steel ruler for precision, and consider placing a backing under the cutting surface to minimize movement. Finally, color discrepancies can be managed by testing colors on the same stock before finalizing a design; this helps you adjust color palettes and ensure consistency across batches.
Tools & Materials
- Sticker stock or label paper (non-porous)(Smooth finish preferred; may be matte or gloss depending on desired look)
- Plain pencils and drawing pens(Fine-tipped for details; transfer pencil lines before inking)
- Fine-tip markers or inks(Choose bleed-resistant inks if possible)
- Craft scissors or precision craft knife(Sharp blades for clean edges; use a metal ruler)
- Ruler and cutting mat(Helps maintain straight edges and protect surfaces)
- Adhesive sealant (clear acrylic spray or Mod Podge)(Select water-based for easy cleanup; apply thin coats)
- Fine brush or sponge for sealant(Optional for even application)
- Stamp set and ink pads(Only if using Method B)
- Pre-cut decorative paper or magazine cutouts(Use for Method C)
- Clear backing sheet or matte spray(For extra protection if desired)
- Gloves or mask (optional)(When applying spray sealants in a small space)
Steps
Estimated time: 60-90 minutes
- 1
Gather and organize supplies
Collect your chosen materials and set up a clean workspace. Organize papers, tools, and stock so you can move smoothly from design to cutting. This minimizes mistakes and saves time.
Tip: Keep a small tray for cut pieces to prevent loss and mis-sorts. - 2
Choose your design method
Decide whether you’ll hand-draw, stamp, or collage. Each method has unique challenges; pick one to master first before expanding.
Tip: Test a quick thumbnail on scrap stock to preview how it will look when finished. - 3
Create or collect designs
Draw or assemble your designs on your base stock. Ensure lines are bold enough to reproduce after cutting and sealing.
Tip: If tracing, use light graphite lines that are easy to erase later. - 4
Cut shapes cleanly
Carefully cut around each design using a sharp craft knife against a ruler for straight edges. Take your time on corners and curves.
Tip: Angle the blade slightly and use multiple shallow passes for precision. - 5
Seal and dry thoroughly
Apply a thin, even coat of sealant. Allow adequate drying time between coats to avoid smudges or globs.
Tip: Ventilate your workspace when using spray sealants and lay pieces flat during drying. - 6
Store and test adhesion
Store finished stickers flat and out of direct sunlight. Test adhesion on a similar surface before wider use.
Tip: Label batches by method and date to track durability over time.
People Also Ask
Can I make stickers without any tools at all?
Minimal tools help a lot, but you can start with basic items like paper, markers, and scissors. For better results, add a ruler and craft knife for precise cuts.
You can start with basic items. For sharper edges, add a ruler and craft knife later.
Which surfaces work best for DIY stickers without a printer?
Smooth, non-porous surfaces like sticker stock or label papers work best. If you apply to porous surfaces, sealants help improve adhesion and durability.
Smooth sticker stock is best; sealant helps on porous surfaces.
Is it cheaper than buying pre-made stickers?
DIY stickers can be cheaper if you already own materials, but costs may rise with specialty sealants or high-quality stock.
You can save money if you already have the supplies and use affordable sealants.
How long will DIY stickers last without a printer?
Durability depends on materials and sealing. Proper sealing and care can extend life, while exposure to moisture or sun can shorten it.
With proper sealing and care, they last longer; moisture and sun reduce lifespan.
Can I color-fill designs after sealing?
Coloring after sealing is possible if you choose compatible paints or markers that bond to the sealant surface. Test first on a scrap piece.
Yes, but test on scrap first to avoid smudging.
What should I do if edges curl after drying?
Ensure stock is flat during sealing and use a light sealant coat. Store stickers under light pressure to keep edges flat as they dry.
Keep edges flat and seal with thin coats; weigh down while drying.
Watch Video
Quick Summary
- DIY stickers are feasible without a printer.
- Choose one primary method and practice first.
- Sealants boost durability but test compatibility.
- Precision cuts improve professional appearance.
- Organized workflow reduces waste and errors.