Shipping Label Printer UPS: A Complete How-To Guide
Learn how to pick, install, and use a UPS-compatible shipping label printer. This comprehensive guide covers compatibility, drivers, label stock, testing, and common issues for home offices and small businesses.

According to Print Setup Pro, this guide helps you select a UPS-compatible shipping label printer ups, verify compatibility, install drivers, and connect to UPS software. You’ll follow a clear setup path, learn essential troubleshooting steps, and apply best practices to ensure fast, accurate labels, fewer jams, and reliable print quality in a busy home office or small business.
Why a UPS-Compatible Label Printer Matters
For busy home offices and small businesses, printing shipping labels quickly and accurately is non-negotiable. A shipping label printer ups that is fully compatible with UPS software and label formats reduces misprints, jams, and wasted labels. When you choose a printer that matches UPS label sizes, driver support, and connectivity options, you gain reliability, workflow consistency, and the ability to scale as your shipping volume grows. Print quality, feed accuracy, and ease of maintenance all hinge on compatibility. In this section, we explain why investing in a UPS-compatible printer is a foundational step in building a smooth e‑commerce operation, from packaging to doorstep delivery, and how it aligns with your budget, space, and tech ecosystem.
Understanding Thermal vs. Direct Thermal vs. Transfer
Label printers generally fall into a few core categories: direct thermal, thermal transfer, and sometimes impact or inkjet-based label printers. Direct thermal printers use heat-sensitive labels that don’t require ink or toner, making them cost-effective and low-maintenance for shipping labels. Thermal transfer printers require ribbon but offer longer-lasting labels and better resistance to moisture or chemical exposure. For UPS shipping labels, most warehouses and home offices prefer direct thermal for speed and cost, provided the label stock and printer driver are compatible. When evaluating options, consider label durability, environment (humid or dusty spaces), and your daily print volume. A UPS-friendly setup will optimize label stock selection and driver compatibility to minimize misfeeds and jams.
Key Specifications to Check Before Buying
Before purchasing a shipping label printer ups, compare several specs that directly impact label printing accuracy and reliability. Look for a minimum print resolution of 203 dpi, adequate print speed (measured in inches per second), and support for common UPS label sizes (such as 4x6 inches). Confirm driver availability for your operating system (Windows, macOS, or Linux) and whether USB, Ethernet, or Wi‑Fi connectivity is required in your workspace. Check feed path design to ensure it handles the most common UPS label formats without skewing. Finally, evaluate the printer’s compatibility with popular UPS shipping software and any required API integrations. These factors together determine long-term performance and reduce headaches during peak shipping periods.
Preparing Your Workspace and Supplies
A well-organized workspace speeds up setup and reduces label waste. Start by clearing a stable, vibration-free surface near your computer or network router. Gather essential supplies: a UPS-compatible shipping label printer ups, thermal label stock in the correct width (often 4x6 inches), power cables, and a computer with internet access. Have the latest printer drivers downloaded from the manufacturer’s site and a UPS account ready for software integration. If you use multiple devices, plan a primary workstation to standardize print settings. Keeping spare label rolls and a small maintenance kit handy will prevent downtime during busy shipping days.
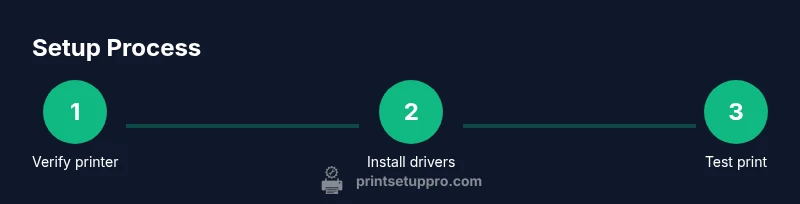
Step-By-Step Setup Overview
This overview maps out the primary actions to configure a UPS-compatible shipping label printer ups. You’ll confirm device compatibility, install drivers, load label stock, connect the printer to your computer or network, and test print a label. The goal is a seamless, repeatable workflow that minimizes misprints and jams. At each stage, verify label alignment and print quality. By following this structured approach, you’ll establish a robust baseline for fast, reliable UPS label printing.
Installing Drivers and Software on Different Operating Systems
Driver installation is a critical step that ensures the printer communicates correctly with the host computer and UPS software. On Windows, use the manufacturer’s setup wizard and verify your driver version aligns with your OS release. macOS users should add the printer via System Preferences > Printers and ensure the correct driver is selected. Linux users may rely on CUPS-compatible drivers or the vendor’s Linux package. After installation, print a test label to verify proper alignment, margins, and feed. If the test print is off, revisit driver settings and printer preferences to restore alignment.
Loading and Calibrating Label Stock
Loading labels correctly prevents jams and misprints. Remove the label roll and ensure the feed path is clean and free of dust. Align the roll with the printer’s guides, ensuring labels feed straight without buckling. Close the cover, run a feed test, and observe the gap between labels. If necessary, adjust the gap and margins in the printer driver or UPS software. Use the manufacturer’s calibration tool if available, and keep a spare set of labels in a protected area to avoid exposure to humidity or heat.
Integrating with UPS Software and Shipping Platforms
Connect the printer to UPS software and any shipping platform you use (e.g., UPS World Ship, EasyPost, ShipStation). In most cases, you’ll select the printer as the default label printer in your software, configure label size (4x6 inches is common), and set print quality to a balance of speed and clarity. Ensure the printer appears in device lists and that your label templates match UPS requirements. For multi-user environments, establish a standard printing profile so every user prints consistently, reducing format errors and wasted labels.
Testing, Alignment, and Troubleshooting
Begin with a controlled test: print a single label and compare against the UPS shipping software preview. Check margins, barcodes, and the scannable area. If alignment is off, adjust the label offset, margins, or scale in the printer driver settings. Common issues include label jams, ghosting, or faded prints; address these by cleaning the feed path, replacing worn labels, or updating drivers. When troubleshooting, document each change, so you can revert if needed. Regularly run a quick test label after any software update or printer relocation to catch misalignment early.
Maintenance, Common Pitfalls, and Long-Term Best Practices
To ensure longevity, schedule monthly maintenance: clean the feed path with a lint-free cloth, replace worn rollers, and inspect the print head for residue. Store labels in a cool, dry place to prevent adhesive degradation. Regularly update firmware and drivers, and keep spare ribbons or label stock on hand. Establish a simple workflow: verify label size, print a test, and file certificates of compliance if required by your shipments. By adhering to these practices, you’ll maintain high print quality and minimize downtime when it matters most.
Tools & Materials
- Shipping label printer(UPS-compatible model; prefer direct thermal for lower ongoing costs)
- Thermal label stock (4x6 inches)(Ensure stock width matches printer specification and UPS label format)
- Power supply/adapter(Check voltage for your region; use manufacturer-provided power cable)
- Computer or device with internet(Windows or macOS; ensure USB/Ethernet/Wi‑Fi connectivity as needed)
- Printer drivers/software(Download from the manufacturer’s site; use the latest stable release)
- UPS shipping software or integration credentials(Have UPS account ready for software integration)
- Network access (optional for networked printers)(Wi‑Fi or Ethernet; ensure stable local network)
Steps
Estimated time: 30-60 minutes
- 1
Identify compatibility and needs
Assess label sizes, throughput, and software compatibility with UPS; choose a printer that supports 4x6 inch labels and your OS. This ensures smooth operation and minimizes future changes.
Tip: Double-check UPS-supported label formats in the software help center before buying. - 2
Install drivers and software
Download the latest drivers from the manufacturer and install them following the wizard. Reboot if prompted and verify the printer appears in the OS printer list.
Tip: Always install the driver before connecting the printer via USB. - 3
Load label stock
Open the printer, load the 4x6 inch labels with the glossy side facing out, and align the edge guides. Close the cover and print a feed test.
Tip: Keep labels clean and free from dust to avoid feed issues. - 4
Connect the printer to the system
Connect via USB, Ethernet, or Wi‑Fi as supported. Ensure the device recognizes the printer and that there are no conflicting devices.
Tip: Assign a static IP if using a networked printer to prevent address changes. - 5
Configure UPS integration
In your UPS software, select the printer as the default label printer and set the label size to 4x6 inches. Save the profile.
Tip: Create a testing profile for new software updates. - 6
Print a test label
From UPS software, print one test label and compare to the on-screen preview for alignment and margins.
Tip: If misalignment occurs, adjust margins in the driver or UPS template. - 7
Set printing preferences
Adjust print quality for speed and clarity; optimize margins to prevent cutoffs, and enable batch printing if supported.
Tip: Use a draft or economy setting for bulk printing to save ink and time. - 8
Test and validate
Perform repeated prints in sequence to validate consistency. Document settings for future reference and audits.
Tip: Keep a log of printer firmware versions and driver builds. - 9
Schedule maintenance
Establish a routine: clean feed path monthly, replace worn parts, and verify label stock quality before shipments.
Tip: Store labels in a humidity-controlled area to prevent adhesive issues.
People Also Ask
What printers work best for UPS shipping labels?
Thermal label printers are commonly recommended for UPS shipping labels due to speed and low running costs. Ensure the model supports 4x6 inch labels and has up-to-date driver support for your OS and UPS software.
Thermal label printers are typically the best choice for UPS labels because they’re fast and economical; make sure the model supports 4x6 inch labels and current drivers.
Do I need UPS software to print labels?
Most UPS workflows provide built-in label printing. You can print labels directly from UPS software or through integrated shipping platforms; ensure your printer is configured as the default label printer in the chosen solution.
Usually you can print labels from UPS software or your shipping platform; just set the printer as default in that software.
What label size should I use for UPS?
The standard UPS shipping label is typically 4x6 inches, but always verify within your UPS software and printer settings for recommended templates.
Most UPS labels are 4x6 inches; confirm this in your software and printer settings.
How do I test print a UPS label?
Print a test label from the UPS software or printer driver, then compare it against the on-screen preview for alignment and margins.
Print a test label from your software and check the alignment against the preview.
What should I do if labels jam?
Power off, reseat the label roll, clean the feed path, and re-test with a single label before batch printing.
If labels jam, turn off the printer, reseat the labels, and clean the feed path, then test again.
Why is my label misaligned after setup?
Misalignment can result from incorrect margins, wrong label offset, or driver scaling. Recheck driver settings and the label template alignment.
Misalignment usually comes from margins or scaling; recheck the driver and template alignment.
How to maintain a UPS label printer long-term?
Schedule regular cleanings of the feed path, update firmware, and stock spare labels and components to minimize downtime.
Keep the feed path clean, update firmware, and have spare labels ready to avoid downtime.
Can I print UPS labels from mobile devices?
Yes, many UPS-integrated apps support mobile printing, but you’ll still need a compatible printer and network setup.
You can print from mobile apps if your printer and network setup support it.
Watch Video
Quick Summary
- Verify UPS compatibility before purchase.
- Install drivers and load stock correctly.
- Test print and adjust alignments.
- Create a repeatable printing workflow.