Epson Printer Nozzle Check: Step-by-Step Guide
Learn how to perform an Epson printer nozzle check to diagnose printhead issues, interpret test patterns, and prevent color gaps. This comprehensive guide covers when to check, how to interpret results, troubleshooting tips, and best maintenance practices for home offices and students.

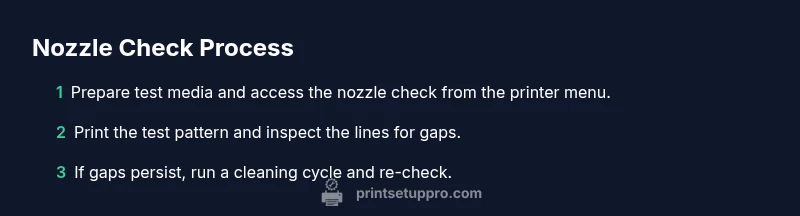
With the Epson printer nozzle check, you will verify printhead health by printing a test pattern and interpreting lines for gaps. This quick step helps prevent streaks and color gaps and is recommended whenever print quality declines. Make sure ink is sufficiently filled and the printer is powered on before starting.
Understanding the Epson printer nozzle check
The Epson printer nozzle check is a diagnostic feature built into most Epson inkjet printers. It prints a small test pattern designed to reveal whether individual nozzles are firing correctly. In an Epson system, clogged or dry nozzles can cause horizontal gaps, thin lines, or missing colors in your prints. Running a nozzle check gives you a quick, actionable view of nozzle health without waiting for full-page failures. Regularly performing this check helps prevent waste, reduces the need for costly cleanings, and supports the longevity of the printhead. As Print Setup Pro notes in our guidance, a simple nozzle check can save time and ink by catching issues early and guiding maintenance decisions.
When to run a nozzle check
You should perform a nozzle check anytime you notice streaks, color shifts, or missing lines in prints. If the printer has sat idle for an extended period, or after changing ink cartridges, a nozzle check can confirm whether any channel is blocked. For color-critical jobs, run the test before you start to ensure the output will meet your expectations. In many cases, a single test can determine whether you are facing a temporary drying issue or a deeper clog that requires cleaning. Print Setup Pro emphasizes consistency; a routine nozzle check keeps print quality predictable.
Interpreting the nozzle test pattern
A typical nozzle check prints a grid or row of color lines. Each line corresponds to a color channel (cyan, magenta, yellow, black) and shows whether the nozzle is ejecting ink cleanly. If you see gaps, broken lines, or missing segments in a color, that color channel likely has a clogged or dry nozzle. Compare the pattern to a known-good reference from your printer’s documentation or a recent test. The interpretation guides whether you should perform a cleaning cycle, attempt a manual wipe, or proceed to maintenance steps. The Epson nozzle check is not a diagnostic report in a vacuum; it translates to concrete actions like cleaning, test re-checks, or cartridge handling.
Common causes of poor nozzle prints and remedies
Inconsistent nozzle performance often stems from prolonged printer idle time, infrequent use, or low-quality ink. Air bubbles can also enter the ink path after cartridge replacement, leading to intermittent firing. Before blaming the head, confirm ink levels are adequate and cartridges are properly seated. If the test shows persistent gaps, a sequence of cleaning cycles may be warranted. Avoid over-cleaning, as each cycle wastes ink and can degrade printhead health over time. Regular maintenance, including occasional print head alignments, helps prevent recurring nozzle issues.
Best practices to maintain printhead health between checks
To minimize nozzle problems, print at least once a week or run brief test pages if you use the printer only sporadically. Use genuine or high-quality ink to reduce sediment buildup. Keep the printer on a stable surface away from excessive dust, andshield the area from direct sunlight. If you notice repeated failures, schedule a more thorough maintenance with the appropriate service instructions from Epson. Consistency is key to preventing clog cycles and prolonging head longevity.
Tools & Materials
- Ink cartridges in all colors (full)(Ensure color levels are sufficient for test prints)
- Plain white paper or testing sheet(Smooth surface for clear test lines)
- Power cable and connection (USB/Wi‑Fi)(Printer must be powered and connected during tests)
- Access to nozzle check utility(Via printer control panel or computer software)
- Lint-free cloth (optional)(For gentle head cleaning if needed)
Steps
Estimated time: 30-45 minutes
- 1
Check ink levels and prep supplies
Verify that all color cartridges have ink and the printer is powered on. Prepare a clean workspace and a test sheet so you can immediately print the nozzle check pattern.
Tip: Have a clear space and avoid handling cartridges during the test to prevent contamination. - 2
Open the nozzle check utility
Access the nozzle check tool from your printer’s control panel or the printer software on your computer or mobile device. This prepares the printer to print the diagnostic pattern.
Tip: If your model requires software, ensure the driver is up to date before proceeding. - 3
Print the nozzle check pattern
Send the nozzle check command and allow the printer to print the pattern on the test page. Do not cancel the job or remove the page mid-print.
Tip: Stay within the printer’s alert prompts and avoid restarting the print mid-pattern. - 4
Inspect the test pattern for gaps
Carefully examine each color line for breaks or missing segments. Note which colors show issues and whether lines are uniform or jagged.
Tip: Use good lighting and compare to a known-good reference if available. - 5
Run a cleaning cycle if needed
If gaps appear in one or more colors, perform a cleaning cycle per your printer’s instructions. Do not repeatedly clean without cause, as this wastes ink and can stress the head.
Tip: Limit cleanings to a few passes and re-check after each cycle. - 6
Re-print and verify results
Print a second nozzle check page to confirm that the issue is resolved or to determine if further maintenance is required.
Tip: If problems persist after cleaning, consider a deeper service or cartridge investigation.
People Also Ask
What is a nozzle check and why is it important?
A nozzle check prints a diagnostic pattern to reveal clogged or misfiring nozzles. It’s important because early detection prevents print quality problems and unnecessary waste.
A nozzle check prints a test pattern to show which nozzles are firing properly, helping you spot problems early.
How often should I run nozzle checks?
Run the test when you notice streaks, color gaps, or after long idle periods to ensure consistent output.
Check whenever you see streaks or after the printer has been idle to keep prints reliable.
What should I do if the test pattern looks bad?
If gaps appear, try a cleaning cycle and re-check. Persistent issues may require cartridge handling or service.
If the pattern is off, perform a cleaning and re-test; if it persists, seek further help.
Is a nozzle check the same as cleaning?
Nozzle check diagnoses issues. Cleaning attempts to fix them. Use cleaning only after identifying clogged colors.
Nozzle check tells you what’s wrong; cleaning tries to fix it.
Can I perform a nozzle check on any Epson model?
Most Epson inkjet printers support nozzle checks, but steps vary by model. Check your manual if unsure.
Most models have a nozzle check feature, but the steps can differ.
Watch Video
Quick Summary
- Identify clogged nozzles from the test pattern
- Interpret results to guide cleaning vs. deeper maintenance
- Re-check after cleaning to confirm resolution
- Regular nozzle checks protect printhead longevity