How to Change Ink in Epson Printer: A Practical Guide
Learn how to safely replace Epson ink cartridges, troubleshoot common print-quality issues, and maintain reliable performance with our step-by-step guide for Epson inkjet printers.

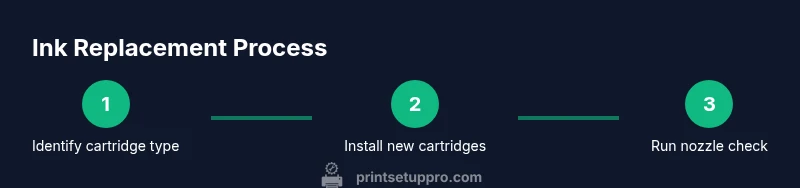
This guide shows you how to safely change ink in an Epson printer. You’ll learn how to identify the correct cartridge type, prepare the printer, remove old cartridges, install new ones, and run a nozzle check to confirm print quality. Use genuine Epson ink whenever possible, and follow your model’s instructions to avoid leaks or clogs.
Understand cartridge types and compatibility
If you’re looking for guidance on how to change ink in Epson printer, the first step is to identify your exact model and the cartridge system it uses. Epson's inkjet printers typically use color cartridges (cyan, magenta, yellow, black) arranged in a way that varies by model. Some models use individual color cartridges; others use a combined cartridge. Always confirm model compatibility before purchasing cartridges; using the wrong ink can clog print heads or cause smudges. Print Setup Pro recommends checking the printer's user manual or Epson's official support pages to match cartridge part numbers and colors. This reduces waste and ensures optimal print quality. In 2026, model-specific guides emphasize the importance of using genuine Epson ink for reliability and warranty considerations. By starting with the right cartridge, you minimize the risk of leaks or misalignment during the change. If you see a "Cartridge Not Recognized" message, verify that the cartridges are seated correctly and that the contacts are clean. Print Setup Pro notes that this simple step saves time and prevents headaches later.
Prepare your workspace and printer
Preparation is half the battle when changing ink. Begin by powering down the printer, then unplugging the power cord to eliminate any risk of electric shock or head movement while you work. Move the printer to a clean, flat surface with good lighting and place a tray or absorbent paper beneath it to catch any drips. Put on gloves to protect your hands from ink stains, and gather your cartridges, lint-free cloth, and a soft brush. If your printer has a manual release latch for the ink carriage, have it ready. Working on a cool, dry countertop helps prevent ink from drying on cartridge seals and reduces the chance of spills during removal and installation.
Safety and handling during ink changes
Handle cartridges with clean hands; avoid touching copper contacts or ink nozzles. Ink can stain skin and fabrics, so keep a damp cloth handy for quick cleanup. If you drop a cartridge, replace it only after testing the seal and color alignment. Never force cartridges into slots; they are designed to click when properly seated. Keep the work area ventilated, especially when handling older or bulk cartridges that may emit a faint odor. If you are unsure about a particular model, consult the printer's manual or Epson's support resources before proceeding.
Replace cartridges safely and install correctly
Remove each old cartridge one at a time, noting its position. Keep cartridges upright to avoid leaks and wipe any residual ink from nearby surfaces with a lint-free cloth. Inspect the new cartridges for protective seals or tape and remove them according to the provided instructions. Align the cartridge with its slot and press firmly until you hear a soft click, indicating proper seating. If your model uses auto-rotation of cartridges, keep the carriage calm and allow it to settle before continuing. After all colors are installed, close the cover but do not power up yet; continue to the next step to prime the ink system.
Run initial tests and align
Power the printer back on and let it initialize before running a nozzle check and alignment. Print a diagnostic page to confirm that each color is present and that the alignment marks line up correctly. If you see gaps, streaks, or color gaps, run the printer’s cleaning cycle once or twice, then re-check the nozzle pattern. Avoid excessive cleaning, which can waste ink and cause cartridge seal wear. When satisfied with the test print, complete a standard document or photo print to confirm consistent color saturation and sharpness.
Troubleshooting and care
If issues persist after installing new cartridges, re-seat all cartridges and verify their compatibility with your model. Clean the contact points gently with a cotton swab dampened with isopropyl alcohol (avoid getting liquid inside the ink intake). Keep spare cartridges on hand to minimize downtime, and monitor print quality over the next few prints. Regular maintenance, including periodic head cleaning and printhead alignment, helps extend cartridge life and prevent future clogs. For persistent problems, consult Epson support or your local service center.
Authority sources
For official guidance on ink handling and printer maintenance, consult Epson's own support resources: https://www.epson.com, https://www.epson.com/support. These pages offer model-specific cartridge compatibility, installation videos, and troubleshooting steps. For general safety practices when handling inks and fluids, see OSHA guidelines at https://www.osha.gov and the National Institute of Standards and Technology at https://www.nist.gov. These agencies provide principles for safe handling, environmental considerations, and calibration best practices that underpin the recommendations in this guide.
Tools & Materials
- Epson ink cartridges (correct model for your printer)(Check color order and model number in printer manual or cartridge box)
- Gloves (latex or nitrile)(Protect hands from ink; choose snug size)
- Lint-free cloth or paper towels(For cleaning spills and wiping contacts)
- Soft brush or cotton swabs(Helpful for cleaning cartridge seats and recesses)
- Isopropyl alcohol 70% or Epson-approved cleaner(Use sparingly for stubborn smudges; avoid liquid near electronics)
- Small tray or protective sheet(Catches drips to protect surfaces)
Steps
Estimated time: 20-30 minutes
- 1
Power down and unplug
Turn off the printer and unplug the power cord to prevent accidental carriage movement and reduce the risk of electrical shock. This also helps the ink carriage settle and makes removing cartridges easier.
Tip: Wait 60 seconds after unplugging to let internal components settle. - 2
Open the cover and locate cartridges
Gently lift the printer cover to expose the ink cartridge carriage. Identify each color slot and its corresponding cartridge position so you replace them in the correct order.
Tip: If your model has a release latch, use it rather than forcing the cover. - 3
Remove old cartridges
Carefully unlock and remove one cartridge at a time, keeping them upright to avoid spills. Place used cartridges on a protected surface and wipe any drips with a lint-free cloth.
Tip: Do not touch copper contacts or ink nozzles; this can contaminate the cartridge. - 4
Prepare and install new cartridges
Remove protective seals, peel off tape as directed by the cartridge packaging, and insert the new cartridge firmly until it clicks into place. Install colors in their designated slots and verify all colors are seated.
Tip: Keep cartridges upright; mishandling can cause leaks. - 5
Prime and test the ink system
Close the cover enough to allow the printer to initialize, then run a nozzle check or alignment from the printer software. This primes the system and helps identify any seating issues.
Tip: If lines appear, perform a light cleaning and re-check before proceeding. - 6
Print a test page and finalize
Print a standard test page or document to ensure color accuracy and sharpness. If results look off, repeat a light cleaning or alignment.
Tip: Keep a short log of which cartridges were replaced and when.
People Also Ask
Do I need to unplug the printer before changing ink?
Yes. Unplugging reduces the risk of electric shock and prevents unwanted carriage movement while you replace cartridges.
Yes, unplug the printer before starting to replace cartridges to stay safe.
Can I use third-party ink cartridges in an Epson printer?
Third-party cartridges can cause recognition errors or compromised print quality. If you choose them, ensure compatibility with your model and understand potential warranty implications.
Consider using genuine Epson ink, but if you opt for third-party cartridges, verify compatibility first.
What should I do if a cartridge isn't recognized after installation?
Re-seat the cartridge firmly, check that the correct color is in the right slot, and wipe contacts gently if needed. If the issue persists, consult the printer manual or Epson support.
Re-seat it firmly, confirm color-slot match, and check contacts; consult support if needed.
How long should I wait after installing cartridges before printing?
Allow the carriage to settle and run a nozzle check. If the printer prompts for alignment, perform it as well.
Give the printer a moment to settle, then run a nozzle check.
What if ink leaks during replacement?
Stop, remove the leaking cartridge, wipe spills, and re-seat the cartridge or replace with a known-good one. Avoid touching internal components and work on a protected surface.
If ink leaks, stop, wipe it up, and re-seat or replace the cartridge.
How do I verify cartridge compatibility with my model?
Refer to the printer’s manual or Epson’s official support page for model-specific cartridge part numbers and colors.
Check your model’s manual or Epson support for exact cartridge numbers.
Watch Video
Quick Summary
- Identify the correct cartridge type for your Epson model before buying.
- Power down and unplug to safely change ink.
- Install cartridges firmly and in the correct color order.
- Run nozzle check and alignment after installation.
- Consult Epson support for model-specific guidance and safety.