How to Remove Ink Cartridge from Epson Printer: A Step-by-Step Guide
Learn how to safely remove an ink cartridge from an Epson printer with clear, step-by-step instructions, tips to prevent leaks, and proper reinstallation. Brought to you by Print Setup Pro.

This guide shows you how to remove an ink cartridge from an Epson printer safely and efficiently. You’ll learn preparation, access, removal, and reinstallation steps, plus tips to prevent leaks. Before starting, gather a lint-free cloth and a replacement cartridge, and unplug the printer. Print Setup Pro recommends following each step in order to avoid damage.
How to Remove Ink Cartridge from Epson Printer
Removing an ink cartridge from an Epson printer is a common maintenance task that, when done correctly, prevents leaks and print quality issues. This section introduces the process and sets the expectations for a clean, safe removal. According to Print Setup Pro, the most reliable results come from careful preparation, a stable workspace, and attention to the cartridge’s position. By following the steps in this guide, you’ll minimize ink spills and avoid wasting supplies. This article uses general guidelines applicable to most Epson models, but always consult your model’s manual for model-specific nuances. Keeping hands clean and a soft cloth nearby helps reduce smudges during the operation. The goal is to remove the cartridge without damaging the carriage or the print head while maintaining a clean environment for reinstallation.
In this introductory section we emphasize preparation: turn off the printer, unplug it, and cover your work area. A lint-free cloth and the correct replacement cartridge should be within reach. Print Setup Pro’s analysis suggests that following a well-defined sequence lowers the risk of leaks and accidental ink contact. Remember that cartridges are designed to fit only one way; forcing them can bend guides or damage seals. With patience and attention, you’ll complete the removal smoothly and be ready to clean or replace as needed.
Prep work matters: clear space, gather materials, and ensure the printer is completely powered down. If the cartridge has recently been in use, ink may still be under slight pressure, so proceed slowly to avoid sprays. Safety notes from Print Setup Pro emphasize avoiding skin contact with ink; wear gloves if you’re prone to getting ink on your hands. This first block lays the foundation for a safe removal process and reduces the risk of mistakes that could affect print quality.
Tools & Materials
- Lint-free microfiber cloth(Use to wipe ink and contacts without leaving fibers.)
- Stable work surface or tray(Protect your desk from accidental leaks.)
- Replacement ink cartridge (if replacing)(Ensure correct model/part number for your Epson printer.)
- Latex-free gloves (optional)(Keep ink off skin.)
- Isopropyl alcohol or Epson-approved cleaner (optional)(Light cleaning for contacts or spills.)
Steps
Estimated time: 10-20 minutes
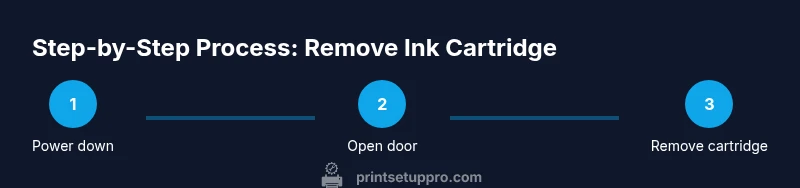
- 1
Power down and unplug
Turn off the printer, unplug the power cord, and wait a full 60 seconds. This reduces the risk of ink leakage and protects internal electronics during handling.
Tip: If your printer has a removable power brick, detach it and keep it at hand while you work. - 2
Open the cartridge access door
Gently open the access door or top cover to reveal the cartridge carriage. Do not force the door; if it feels stuck, consult the manual for model-specific instructions.
Tip: Place a cloth under the carriage in case any ink drips during opening. - 3
Identify the cartridge to remove
Look for the color-coded cartridge or the position label (e.g., C, M, Y, K). Confirm you’re removing the correct one to avoid alignment issues after reinstall.
Tip: Take a quick photo of the carriage before removal for reference. - 4
Release cartridge lock or lever
If your model uses a locking tab or lever, gently release it. Do not pry aggressively; use even pressure to avoid bending components.
Tip: Keep your fingers away from the printer’s moving parts as the carriage may shift suddenly. - 5
Remove the cartridge
Carefully lift the cartridge straight up and away from the carriage, keeping it upright to prevent ink spills.
Tip: Hold the cartridge by its body, not by the nozzles or contacts. - 6
Inspect the cartridge and carriage
Check for ink leaks, damaged seals, or debris on the cartridge contacts. Wipe the contacts gently with a lint-free cloth if needed.
Tip: Do not touch the copper contacts with bare fingers; oils can interfere with electrical contact. - 7
Prepare for replacement or cleaning
If you’re replacing, unbox the new cartridge and compare the model to your printer. If cleaning, set the old cartridge aside on a paper towel and ready a cloth for the contact area.
Tip: Keep the replacement cartridge sealed until you are ready to install to preserve ink quality. - 8
Reinsert the cartridge and close the door
Insert the cartridge firmly until it clicks into place and the carriage returns to its default position. Close the access door.
Tip: Ensure all cartridges are seated evenly to avoid printing gaps. - 9
Power on and run a test print
Plug the printer back in, power it on, and run a nozzle check or test print to verify proper alignment and color balance.
Tip: If the test print shows streaks, repeat the nozzle check or consult the manual for printer maintenance options.
People Also Ask
Can I remove an ink cartridge while the printer is on?
No. Always power off and unplug before removing cartridges to prevent electrical shock and Ink spills.
No. Make sure the printer is powered down and unplugged before removing any cartridge.
What should I do if ink leaks during removal?
Immediately place a cloth under the area to catch spills, wipe the cartridge contacts, and pause until the area is clean. If leakage continues, stop and consult the manual.
If ink leaks, place a cloth under the area and wipe away any spills before continuing. If it keeps leaking, stop and check the manual.
Should I shake a new cartridge before installing?
Do not shake cartridges. If you suspect air in the cartridge, install it as-is and run a nozzle check to prime the print head.
No shaking. Just install and run a nozzle check to prime the print head.
How do I know when a cartridge needs replacement?
If print quality declines (faint colors, streaks, misalignment) after nozzle checks, replacement is often needed. Check the printer’s maintenance guide for cartridge life indicators.
If you see faded prints or streaks after a nozzle check, consider replacing the cartridge following your printer’s guide.
Is it safe to reuse a cartridge after removal?
Cartridges can be reused if they’re in good condition and properly seated, but some printers may require a reset or new chip. Always inspect for damage before reuse.
You can reuse a cartridge if it’s in good shape and properly reseated, but check your printer docs for reset needs.
What disposal options exist for used cartridges?
Follow local recycling programs or Epson’s cartridge return options. Many programs offer prepaid shipping for used cartridges.
Recycle used cartridges via local programs or Epson’s return options for easy disposal.
Quick Summary
- Power down before handling cartridges.
- Handle cartridges gently and keep them upright.
- Seat cartridges firmly to ensure proper contact.
- Run a test print to confirm success.