How to Prevent Printer Ink from Smearing
Learn proven steps to stop printer ink from smearing. This comprehensive how-to covers paper choices, ink care, print settings, drying techniques, and maintenance for smear-free prints.

By following this guide, you will learn practical steps to prevent printer ink from smearing on printed pages and during handling. You’ll identify compatible paper, correct ink and cartridge usage, and the right print settings and drying times. This approach applies to common home office printers and everyday dye- and pigment-based inks.
What causes printer ink to smear?
Ink smear occurs when the ink doesn't dry quickly enough or spreads on absorbent paper. Several factors influence this: the ink chemistry (dye-based vs pigment-based), the paper coating, humidity, and the printer's settings. When ink sits on the surface too long, friction, handling, or moisture can cause smearing. The Print Setup Pro team notes that the root cause is usually a mismatch between ink type and paper or a setting that deposits too much ink at once. By understanding these factors, you can select compatible paper, adjust the printer settings, and give prints enough time to dry. This article addresses the main causes and provides practical steps to prevent the problem in typical home office printing scenarios.
Paper quality and compatibility matters
Paper is the single most important factor in preventing ink smearing. Heavier weights and coatings improve ink hold and reduce spread, especially with dye-based inks. When using glossy photo papers, test a sheet first because some finishes can cause ink to sit on the surface longer, increasing smear risk if the printer is not calibrated for that media. Print quality and speed also affect drying: a slower, higher-quality setting usually deposits ink more evenly and gives ink more time to dry. In practice, keep a small stock of media that is known to work well with your printer model and ink set. According to Print Setup Pro, always verify that the paper is listed as compatible in your printer's manual and by the ink manufacturer.
Ink types and cartridge health
Different inks behave differently. Pigment inks sit on the surface and dry more slowly on rough papers, while dye-based inks can bleed more easily on inexpensive stock. Cartridges that are low or old can also produce inconsistent ink flow, leading to smearing on high-absorbency papers. Regular nozzle checks, cleaning, and alignment help ensure even deposition. If you notice streaks or blotches rather than uniform color, replace or clean the print heads and use fresh ink. This section helps you understand how your ink type interacts with paper and why proper cartridge health matters.
Printer settings that prevent smear
Choose a print quality mode appropriate for the media. For everyday text and graphics on standard office paper, a higher-quality setting often yields crisper lines that dry more evenly. Avoid the draft or fast modes when printing with dye-based inks on porous paper. If your printer supports it, enable a drying or cure time option, or adjust the ink density to prevent pooling. Calibrate color profiles to ensure consistent ink laydown, and run a test page to verify results. In short, matching settings to media and ink is a powerful weapon against smear.
Drying time and handling after printing
Allow printed pages to dry completely before handling or stacking. The exact time varies with ink, paper, and environmental conditions, but giving prints space to air-dry on a clean surface is essential. Avoid touching the printed area, and place sheets face-up to prevent smudges from contact with other surfaces. If you need to speed things up, use a low-heat setting or a fan at a distance away from the ink, never direct heat onto wet ink. For best results, wait until the page is cool to the touch before you stack them.
Maintenance routines to prevent future smear
Create a simple, regular maintenance routine for your printer. Clean rollers gently with a lint-free cloth, perform nozzle checks, and run calibration prints on a scrap sheet every few weeks. Keep ink cartridges sealed and store unused media in a cool, dry place. Use high-quality paper and genuine or well-supported compatible inks as recommended by your printer's manufacturer. A short, consistent maintenance habit reduces smear risk over time and keeps prints clean and legible.
Quick troubleshooting checklist
If you still see smearing after following the steps above, run a nozzle check and cleaning cycle, replace old cartridges, and try a different paper stock. Verify that the printer is not in a high-humidity environment and avoid overloading the printer with large, dense color prints in one pass. Use a test page to confirm improvements before printing important documents.
Tools & Materials
- Quality printer paper(Choose weight 20-28 lb (75-105 g/m²); test coatings for your printer)
- Ink cartridges or refills(Ensure compatibility with your printer model and current health)
- Lint-free microfiber cloth(For cleaning rollers and glass surfaces)
- Isopropyl alcohol (70%)(For light surface cleaning of rollers (avoid contact with ink cartridges))
- Latex or nitrile gloves(Minimize oils from hands transferring to sheets)
- Test print sheets(Use plain paper for initial trials)
- Drying rack or clean flat surface(Space to air-dry printed pages)
- Printer maintenance kit(Optional tools for deeper cleaning and head alignment)
- Notebook or log(Record media tested and results for future reference)
Steps
Estimated time: 60-90 minutes
- 1
Check ink compatibility and cartridge health
Inspect ink type, confirm cartridges are not old or clogged, and perform a nozzle check to ensure even ink flow before printing. This helps prevent smearing caused by misfired nozzles.
Tip: Run a nozzle check if you recently replaced cartridges or refilled ink. - 2
Select appropriate media
Choose paper with a coating or weight suitable for your ink type. Use media listed as compatible in your printer's manual, and start with a standard test page on plain paper.
Tip: Test on scrap stock first to avoid wasting good documents. - 3
Adjust print settings for quality
Set to a higher quality print mode for the media, and adjust ink density if your prints appear too dark or pooly. Calibrate color profiles to ensure consistent ink laydown.
Tip: Always print a small test page after changing media or profiles. - 4
Run a nozzle check and cleaning cycle
If lines or gaps appear in prints, perform a cleaning cycle and re-check nozzle health. Inconsistent deposition is a common smear culprit.
Tip: Do not over-clean; excessive cleaning can waste ink and wear the head. - 5
Print and allow drying time
Print on a clean, flat surface and avoid touching the inked area until it dries. The drying time varies with ink, paper, and environment.
Tip: Place pages face-up and give them space to dry undisturbed. - 6
Handle and store prints properly
Once dry, handle prints gently and store them away from heat, moisture, and friction-prone surfaces. Use a clean folder or rack for organization.
Tip: Label sheets to prevent mixing smearing-prone inks with other media.
People Also Ask
What causes printer ink to smear?
Smearing happens when ink does not dry quickly enough or when paper absorbs ink unevenly. Ink chemistry, media quality, humidity, and printer settings all influence this behavior.
Smearing usually comes from slow drying or poor paper compatibility.
Can using better paper prevent smearing?
Yes. Using appropriate weight and coated paper reduces ink spread and improves drying. Always test media with your printer to verify compatibility.
Yes, the right paper helps a lot.
Is it safe to use heat to dry ink faster?
Direct heat should be avoided. Gentle ambient airflow or a fan is safer and reduces the risk of smearing and ink set.
Avoid direct heat; use airflow instead.
How long should I let printed pages dry before handling?
Drying times vary by ink and paper, but give prints space to dry completely before stacking or handling.
Let the pages dry fully before touching them.
How often should I clean printer heads to prevent smear?
Perform nozzle checks and cleaning cycles as part of regular maintenance, especially after switching media or inks.
Do regular nozzle checks to keep prints crisp.
Watch Video
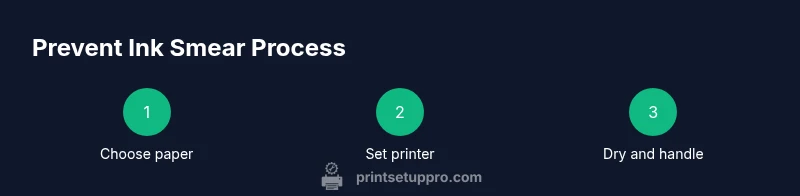
Quick Summary
- Choose compatible paper and ink for your printer
- Match print settings to media for better drying
- Allow prints to dry before handling or stacking
- Perform regular maintenance to keep ink deposition even