Painting a 3D Printer: A Complete Step-by-Step Guide
Learn how to safely paint a 3D printer with prep, priming, painting, masking, curing, and finishing to achieve a durable, professional look while protecting components.

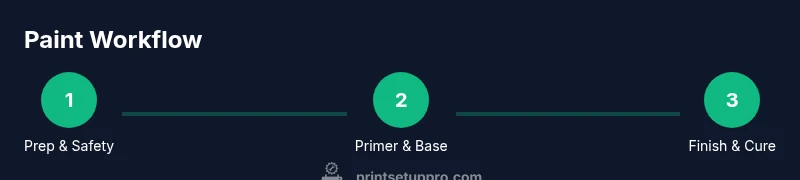
This guide shows you how to paint a 3D printer surface evenly and safely, covering prep, primer, paint application, masking, curing, and cleanup. You’ll learn material choices, masking strategies, spray technique, paint types (acrylic, enamel), and finishing touches to achieve a durable, attractive finish that lasts while protecting sensitive electronics.
Why Paint a 3D Printer? Benefits and Considerations
According to Print Setup Pro, painting a 3D printer isn’t just about aesthetics; it serves protective and practical purposes. A carefully chosen finish can shield exposed surfaces from dust, humidity, and UV light, while also helping to wipe away grime that builds up during long print sessions. Painting can also enable easy identification in a shared workspace and reduce glare on glossy panels that distract you during calibration. Beyond looks, finish quality affects how washable and durable the surface remains under routine cleaning.
Before you start, consider the printer’s material family (PLA, ABS, or PETG) because different plastics respond to primers and solvents in distinct ways. Some parts move or heat up, so you will want coatings with good adhesion that tolerate mild flexing and occasional vibration. Finally, plan your color story in advance—whether you want to match a desk setup, reinforce brand colors, or simply hide scuffs—so your first coat sets the direction for the rest of the project.
Selecting Materials for Painting a 3D Printer
The foundation of a durable finish is choosing compatible primers, paints, and sealants. For most hobby setups, water-based acrylic primers and paints offer safety, easy cleanup, and adequate adhesion on common 3D printing plastics. If you are aiming for a deeper, more durable look or a glossy finish, you may choose enamel or polyurethane topcoats, but test for chemical compatibility with your plastic parts first. Avoid solvent-heavy coatings near electronics and fans unless you isolate those components carefully.
Gather the basics: a primer designed for plastic, a base pigment in your chosen color, optional accent colors, a clear protective topcoat, masking supplies, and clean brushes or sprays. You will also want a suitable solvent for thinning or cleanup and PPE such as gloves and a proper mask. Finally, keep test patches on spare panels or scrap pieces to verify adhesion, drying, and color before applying paint to the actual printer.
Surface Preparation and Cleaning
Preparation is the stage where a good finish begins. Start by unplugging the printer and removing any detachable panels or accessories that you can safely detach without compromising calibration. Wipe the metal frame and plastic surfaces with isopropyl alcohol to remove oils from your hands and any residual printing lubricant. Allow the surface to dry completely before you touch it again. If you spot fine dust, use a tack cloth to lift it away rather than rubbing, which can embed dust into the next coat. For plastics known to craze with solvents, avoid acetone and choose milder cleaners. A thorough wipe-down reduces the risk of peeling or uneven texture once color is applied.
Masking Off Sensitive Areas
Masking is essential to protect heat vents, control panels, connectors, and areas that require precise tolerances. Use painter’s tape to cover edges around panels and any logos you want to preserve. For rounded surfaces, apply masking film or newspaper to create a clean boundary line, then press down firmly to prevent paint seepage. If you are applying a gradient or custom graphics, consider applying a stencil once the first base color dries. Always remove masking after the final clear coat or cure to avoid peeling during reassembly.
Priming: The Foundation for a Smooth Finish
Priming creates a uniform base and improves adhesion for subsequent coats. Choose a plastic-specific primer and apply light, even coats from about 6-12 inches away. Allow each coat to dry as recommended by the manufacturer, then inspect for pinholes or rough spots. If you see imperfections, sand them gently with a fine-grit sanding sponge and wipe away the dust before applying another light primer coat. Drying times vary with temperature and humidity, so plan accordingly and avoid rushing the process.
Base Color Application: Coats and Techniques
With a solid primer, base color coats form the majority of your finish. Apply several thin coats rather than a single thick layer to avoid runs and sags. Hold the spray or brush at a consistent distance—about 6-8 inches for spray—and sweep in smooth, even passes. Between coats, allow the surface to dry completely, typically 15-45 minutes for water-based paints in a well-ventilated space. If you are painting small panels separately, let them cure fully before reattaching. For flat surfaces, a light sanding between coats helps eliminate texture and creates a uniform look.
Accent Work and Graphics
After the base color cures, you can add accents, logos, or fine line graphics. Use masking tape or vinyl stencils for sharp edges, and consider an airbrush for gradients. For crisp letters or symbols, apply a contrasting color with a fine brush and use a steady hand or a guide to maintain straight lines. Practice on a scrap piece first to dial in pressure and paint flow. Seal accents with a clear coat to protect them from chipping during handling.
Clear Coat and Finishing
To protect your paint and improve durability, finish with a clear topcoat appropriate for the base paint type. Choose between matte, satin, or gloss finishes based on your aesthetic and practical needs. Apply 1-2 light coats, allowing full drying time between layers, then cure for several hours in a dust-free area. A UV-resistant clear coat can help prevent fading when the printer sits near daylight. If you notice any tiny dust nibs, gently sand with a very fine grit after the coat has cured and reapply a thin final layer.
Curing, Handling, and Post-Processing
After the final coat, let the printer cure in a dry, well-ventilated space for the time recommended by the paint manufacturer, usually several hours. Do not handle or reassemble until fully cured to avoid fingerprints, smudges, or texture changes. When reassembling, take care not to disturb masked areas; reattach panels in the reverse order of removal. If you plan to use the printer in a high-humidity environment, consider a longer cure window to maximize finish longevity.
Reassembly and Testing
Reinstall all removed components and reconnect power. Check that doors, panels, and fans sit correctly and do not rub against the new paint. Run a small print or a test pattern to confirm no binding or misalignment occurred during masking or disassembly. If you notice unusual sounds or rubbing, pause and inspect the edges behind the panels for paint build-up that might interfere with movement.
Common Mistakes and How to Avoid Them
Rushing coats, skipping masking, and using incompatible paints on plastic are common issues. Always test patches, especially on curved or flexible surfaces. Avoid heavy coats that cause runs, drips, or trapped dust. Overheating during heat tests can lift or warp delicate finishes, so monitor the printer’s warm-up behavior after painting. Finally, neglecting curing time leads to premature wear or damage when you begin printing again.
Maintenance and Longevity of Painted Surfaces
To extend the life of your painted finish, clean surfaces with a soft cloth and mild soap solution; avoid harsh solvents that can dissolve the paint. Schedule periodic retreats or touch-ups for high-wear areas, and consider re-coating every 1-2 years depending on usage. Store the printer away from direct sun to reduce color fading, and inspect masking lines after cleaning to catch any cracks early. Organized maintenance keeps the look fresh while preserving access to your printer’s components.
Tools & Materials
- Face mask or respirator(Choose one rated for chemical fumes if using solvent-based paints)
- Nitrile gloves(Protect skin from solvents and dyes)
- Isopropyl alcohol (70-99%)(For cleaning surfaces before painting)
- Lint-free cloths(For wiping and detailing without leaving fibers)
- Mild dish soap(Optional gentle degreasing agent for initial cleanup)
- Sandpaper 200-400 grit(Light abrasion to improve adhesion on plastics)
- Sanding sponge (fine grade)(Used between coats for a smooth surface)
- Tack cloth(Lifts dust before paint application)
- Masking tape(Protect vents, panels, and logos)
- Masking film or newspaper(Cover larger areas to protect from overspray)
- Plastic primer (plastic-specific)(Ensures good adhesion to plastic surfaces)
- Base paint (water-based acrylic or enamel)(Choose color and finish suited to your project)
- Clear protective topcoat(Matte, satin, or gloss finish depending on preference)
- Brushes and/or spray equipment(Use appropriate tips for even coating)
- Solvent for thinning/cleanup(Only if your paint requires thinning; follow manufacturer guidance)
- Palette or mixing tray(For mixing small quantities of paint)
Steps
Estimated time: 4-8 hours
- 1
Prepare workspace and safety gear
Clear a well-ventilated area, lay down a drop cloth, and ensure no loose items can interfere with moving parts. Put on PPE including a respirator or mask and nitrile gloves. Unplug the printer and remove anything that could be damaged by paint. This step reduces health risks and prevents accidental damage.
Tip: Ventilate the space and avoid painting near heat sources. - 2
Disconnect and protect electronics
If possible, detach removable panels and cover sensitive electronics with masking tape or removable plastic to prevent accidental paint contact. Keep cables organized and away from spray paths. This helps prevent damage and makes masking easier.
Tip: Label parts you remove so reassembly is quick and accurate. - 3
Clean and degrease the surface
Wipe all exterior surfaces with isopropyl alcohol to remove oils, fingerprints, and residues. Allow to dry completely in a dust-free area before continuing. A clean surface improves primer adhesion and final finish quality.
Tip: Do a quick patch test on a scrap piece to confirm cleanliness. - 4
Mask off sensitive areas
Apply masking tape around vents, logos, and any areas you do not want painted. Use masking film for large flat surfaces if needed. Press down firmly to prevent bleed and test a small corner first to verify edge sharpness.
Tip: Leave a small clearance between taped edges and edges you want perfectly crisp. - 5
Roughen surfaces for adhesion
Lightly scuff the plastic with 200-400 grit sandpaper to create micro-abrasions for better primer grip. Wipe away dust with a tack cloth. Do not gouge the surface or you may show imperfections after painting.
Tip: Keep sanding smooth and even to avoid creating high spots. - 6
Apply primer in thin coats
Spray or brush on light, even coats from about 6-12 inches away. Allow each coat to dry according to the manufacturer guidelines before applying the next. Primer should create a uniform tone and feel without sags.
Tip: Two to three light coats often yield the best base. - 7
Sand between primer coats
If you see fine blemishes after the primer dries, gently sand with a fine sponge and wipe away dust. A smooth primer layer improves base color application and reduces texture transfer.
Tip: Do not over-sand; you only need a subtle finish. - 8
Apply base color in thin coats
Start with a light base coat and build up with additional thin coats. Allow adequate drying time between coats. For large panels, spray in broad, even sweeps to avoid streaks.
Tip: Keep the gun or brush moving to prevent pooling. - 9
Add accents or graphics
Once the base is dry, add accents or lines with masking tape or a fine brush. For sharp edges, use stencils or vinyl decals. Allow these layers to cure before applying a clear coat.
Tip: Test graphic alignment on a scrap piece first. - 10
Apply clear coat and finish
Choose a clear coat suited to your base paint (matte, satin, or gloss). Apply 1-2 light coats with proper drying time in between. This protects color and enhances durability.
Tip: Avoid applying thick coats that trap dust or cause fisheye effects. - 11
Cure and handle with care
Let the final finish cure fully in a dust-free, ventilated area as recommended by the paint manufacturer. Do not handle or reassemble until cured to prevent fingerprints or smudges.
Tip: Plan several hours to overnight cure for best results. - 12
Reassemble and test
Carefully reinstall panels and reconnect cables. Run a quick print to verify that no paint interferes with movement or airflow. If you notice rubbing or misalignment, stop and inspect paint build-up near moving parts.
Tip: Keep a spare patch panel handy for future touch-ups.
People Also Ask
Is it safe to paint a 3D printer with acrylic paints?
Yes, acrylic paints are commonly used for DIY printer painting. Work in a ventilated area and avoid direct contact with sensitive electronics. Use masking to protect components and follow drying times.
Acrylic paints are generally safe for DIY painting when you ventilate well and protect electronics; follow masking and drying times.
What paints work best on common 3D printing plastics like PLA, ABS, and PETG?
Water-based acrylic paints are versatile and easy to use. For durability, enamel or polyurethane topcoats can be added after testing adhesion on a scrap piece. Always test on a spare panel first.
Water-based acrylics are versatile for plastics; you can add a durable topcoat after testing on scrap.
Will painting affect heat dissipation or airflow?
If you avoid covering vents and apply thin coats away from fans, painting should not significantly affect cooling. Keep heat-dissipating areas clear and do not seal perforations.
Keep vents clear and avoid painting over fan paths to prevent airflow issues.
How long does each coat take to dry, and how long to cure fully?
Dry times vary with temperature and humidity, but most water-based paints dry in 15-45 minutes per coat in a ventilated space. Full cure typically requires several hours, and overnight curing yields the best durability.
Dry between coats for 15 to 45 minutes; allow a full cure of several hours or overnight for best results.
Should I disassemble the printer before painting?
Yes, remove detachable panels and connectors where safe, mask off sensitive areas, and work on a separate test piece if possible. Reassemble carefully after the final cure.
Remove panels and mask carefully to protect your electronics and getting a cleaner finish.
Can I paint over stickers or decals after painting?
Yes, you can, but you may need to reapply decals or use vinyl decals for a clean finish. Consider sealing decals under the clear coat if you want long-lasting visibility.
You can reapply decals or use vinyl decals; seal with clear coat for durability.
Watch Video
Quick Summary
- Prepare thoroughly for better adhesion
- Choose plastic-safe paints and primers
- Apply thin coats for even coverage
- Mask off sensitive areas to protect components
- Allow full cure before reassembly and use