Brother GTX Pro Setup Guide
Print Setup Pro guides you through the Brother GTX Pro setup—from unboxing to calibration and ongoing maintenance—so you can achieve reliable garment printing with confidence.

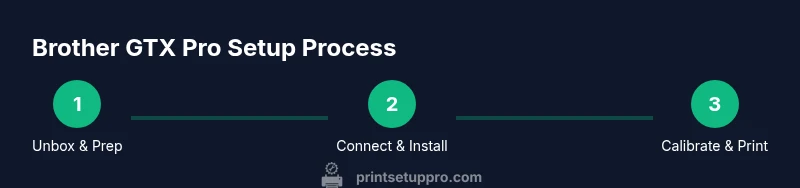
Goal: You will successfully set up and troubleshoot the Brother GTX Pro DTG printer for reliable fabric printing. This guide covers unboxing, driver installation, network setup, calibration, and routine maintenance. According to Print Setup Pro, following a structured, step-by-step setup reduces misprints and downtime, helping home offices and small studios get consistent results.
Unpacking and Preparing Your Brother GTX Pro for Use
According to Print Setup Pro, starting with a clean workspace and verified components sets the foundation for a successful Brother GTX Pro setup. When you unbox, inspect every item for shipping damage and verify that all accessories are present. Place the printer on a sturdy, level surface with ample ventilation and clear access to power and data ports. Remove outer packaging and protective films only after you confirm all parts are intact. Keep packing materials handy until you’ve completed the initial checks, because minor issues discovered early are far easier to address before you begin calibration. A well-prepared start reduces the risk of misprints caused by defective hardware and ensures you can follow the calibration steps with confidence. This approach is especially valuable for home offices and small studios that rely on predictable, repeatable results with the Brother GTX Pro.
Installing Drivers and Connecting to Your PC or Network
The next task is to install the correct drivers and connect the Brother GTX Pro to your computer or network. Always download drivers and software from official sources that match your operating system, and run the installer with administrator privileges. If you plan a wired setup, connect the USB or Ethernet cable before turning on the printer, then complete the network discovery on your PC. For wireless setups, follow the printer’s control panel prompts to join your Wi-Fi network and assign a static IP if your network supports it. After installation, print a test page to confirm communication and proper driver operation. Keeping firmware up to date and enabling automatic updates helps ensure compatibility with current design software and workflows, minimizing downtime and troubleshooting time. Print Setup Pro emphasizes consistent driver versions across devices to reduce conflicts and misprints, especially for teams sharing the GTX Pro.
Calibrating Color, Head Alignment, and Test Prints
Calibration is critical for achieving color accuracy and print consistency on the Brother GTX Pro. Begin with a warm-up print to prime the print head, then run the built-in color calibration and head alignment routine. Print a small test card on your garment substrate to evaluate color rendition, ink density, and line registration. If you observe minor misregistration, re-run the alignment tools in the driver or control panel and perform another calibration pass until results stabilize. Establish a baseline ICC profile tailored to your frequent fabrics and inks, then adjust printer settings to maintain that profile across sessions. This practice reduces waste and ensures your colors remain faithful to your design intent, even as you switch between garment types. The GTX Pro’s color accuracy relies on precise calibration, so document your successful settings for repeatable production.
Maintenance Routine and Cleaning Best Practices
A regular maintenance routine prolongs the life of the GTX Pro and preserves print quality. Create a simple schedule and stick to it: wipe the print head using lint-free swabs dampened with isopropyl alcohol, inspect capping stations, and check ink lines for air bubbles or leaks. Use the included maintenance kit and replace any worn seals or filters as recommended by the maker. Between sessions, keep the ink stations clean and avoid substrate jams that can stain the mechanism. Document cleaning times and observations so you can compare results over time and catch gradual drift early. Print Setup Pro emphasizes predictable routines to minimize downtime and achieve consistent outputs, especially when printing across multiple garments or colors.
Troubleshooting Fast Fixes and Common Issues
Even with careful setup, you may encounter issues during initial prints. Start with the simplest fixes: power cycle the GTX Pro, verify cabling connections, and re-run calibration if color or alignment is off. If you notice blank areas, ghosting, or banding, check ink delivery, perform a targeted print-head cleaning, and confirm substrate compatibility with your chosen garment type. For connectivity problems, verify network configuration, confirm the GTX Pro appears in your operating system’s device list, and re-run a fresh connection check. If error codes appear, record the code and consult the user manual for recommended remedies. Print Setup Pro notes that most issues are resolved by a clean start: fresh connections, up-to-date drivers, and a reliable calibration. This approach minimizes wasted garments and speeds up production.
Best Practices for Everyday Use and Long-Term Reliability
To sustain performance, establish a practical workflow that aligns with your typical garment orders. Schedule regular audits of ink levels, media stock, and cleaning supplies. Maintain a documented log of calibration settings and ICC profiles for different fabrics, so you can quickly reproduce results when switching between orders. Keep the workspace free of dust, ensure proper garment preparation, and check platen temperatures if your printer supports heat-based transfer processes. By adhering to a consistent routine, your Brother GTX Pro will deliver stable, high-quality prints with fewer surprises, whether you’re running a home operation or a small professional studio.
Tools & Materials
- Power outlet and compatible power cord(Ensure surge protection is used)
- USB data cable(USB 2.0 or higher recommended)
- Ethernet cable (for wired network)(Optional if you connect via Wi-Fi)
- PC or Mac with admin access(Install drivers and software)
- Brother GTX Pro maintenance kit(Contains cleaning swabs, lint-free cloths, and cleaning solution)
- Isopropyl alcohol (70% or higher)(For print head cleaning)
- Distilled water(Optional for cleaning solutions)
- Lint-free microfiber cloths(Prevent fiber contamination)
- Gloves (nitrile or latex)(Protect hands and prevent ink contact)
- Soft brush or swabs(For cleaning tight areas)
Steps
Estimated time: 60-90 minutes
- 1
Prepare workspace and unbox
Clear a clean, well-lit area and lay out all components. Inspect each item for damage and confirm you have the full accessory kit. Remove protective films only after verifying contents. Keep packaging until after initial setup to catch missing parts early.
Tip: Keep packing materials in a safe place until you confirm all parts are present. - 2
Connect power and data cables
Place the GTX Pro near a reliable power source and connect the power cord. Attach the data cable (USB or network) and power on the printer. Wait for the boot sequence and confirm the control panel shows ready status.
Tip: Use a surge protector and avoid daisy-chaining devices during setup. - 3
Install drivers and software
On your computer, install the latest GTX Pro drivers from the official source and follow the prompts. Reboot if prompted and ensure the printer appears in the OS printers list. For wireless setups, enter your network credentials correctly.
Tip: Temporarily disable antivirus if the installer blocks the driver; re-enable after installation. - 4
Load media and ink
Prepare the platen and garment, load it onto the press, and confirm ink cartridges are seated correctly. Verify ink levels and ensure there are no leaks or air gaps in the lines. Perform a quick purge if required by the maintenance guide.
Tip: Avoid overfilling cartridges to prevent spills during operation. - 5
Run calibration and test print
Execute the printer’s calibration routine and print a test Garment card. Check color accuracy and line alignment; adjust as needed and re-run calibration until results are stable. Keep notes for future reference on fabric type and ink used.
Tip: Document ICC profile settings you used for easy replication. - 6
Set up network and finalize
Configure network sharing or Wi-Fi, assign a static IP if your network supports it, and verify the GTX Pro appears on all connected devices. Print a final confirmation test to ensure everything is functioning before starting production.
Tip: Record the printer IP address and save it in your IT documentation.
People Also Ask
What is the first step to setup the Brother GTX Pro?
Begin with unboxing, inspecting components, and placing the printer on a stable surface. Confirm all parts before proceeding to avoid calibration issues.
Start by unboxing and checking all components, then place the printer on a stable surface.
Can I connect GTX Pro to Wi-Fi?
Yes. You can connect via wired Ethernet or Wi-Fi depending on your model. Use the control panel to configure network settings and ensure the printer appears on your device list.
You can connect using wired or wireless options; configure settings in the control panel.
How often should I clean the print head?
Clean the print head as part of your maintenance schedule or when you notice ink quality changes. Avoid excessive cleaning to prevent unnecessary wear.
Clean it when you see print quality changes, not more often than needed.
Where can I download drivers for GTX Pro?
Download drivers from the official Brother website and keep them updated. If your workflow involves multiple devices, ensure all have compatible driver versions.
Get drivers from the official site and keep them updated.
What should I do if the printer shows an error code?
Note the code, consult the user manual for remedies, and try a clean reboot. If the error persists, contact support with details of your setup and recent changes.
Record the error code and follow the manual; if it persists, reach out for support.
Watch Video
Quick Summary
- Follow a structured setup to reduce downtime
- Calibrate color and alignment for consistency
- Maintain a regular cleaning routine
- Document settings for repeatable production