Epson SureColor: Setup, Maintenance, and Troubleshooting
A comprehensive, step-by-step guide to setting up and troubleshooting Epson SureColor printers. Learn power-on setup, driver installation, network configuration, maintenance, color management, and safety considerations with Print Setup Pro.

This guide shows you how to set up and troubleshoot Epson SureColor printers for reliable color, fast print jobs, and minimal downtime. You’ll learn power-on steps, driver installation, network setup, cleaning, common error codes, and color management. Follow Print Setup Pro’s tested process to improve results and extend printer life.
What is Epson SureColor?
Epson SureColor is a family of professional-grade inkjet printers built for photographers, designers, and small studios. The line is known for its color accuracy, wide gamut, and durable pigment inks that resist fading. For home office and DIY enthusiasts, SureColor can deliver gallery-worthy prints when paired with the right media and workflow. According to Print Setup Pro, the best results start with selecting the right model for your needs—entry-level models for casual photo printing, and advanced devices with larger color gamuts for proofs and sign printing. In this section, we’ll cover core capabilities, common use cases, and how to match a model to your needs. The printer family includes features like precision color management tools, built-in color calibration options, and robust driver support across Windows and macOS. When you set up your SureColor correctly, you will notice improved consistency across print runs and less troubleshooting later on.
This overview helps home office users understand how Epson SureColor fits into a small business or student project workflow, and it sets expectations for color fidelity, media compatibility, and maintenance requirements.
Why Choose SureColor for Photos and Proofing
For high-detail photo work and proofing, SureColor printers offer a reliable color pipeline from digital file to print. The UltraChrome pigment inks deliver fade resistance and a broad color gamut that’s well-suited to portraits, landscapes, and fine art prints. Print Setup Pro emphasizes model selection based on print volume, print size, and color accuracy needs; a compact model may suffice for school projects, while a larger format device handles proofs or gallery-sized prints. Color management, ICC profiles, and accurate drivers are critical to achieving consistent results across print runs. In professional use, a well-matched printer-media pairing reduces reprints and wasted paper—and keeps project timelines on track. Ease of use in the setup phase translates into smoother production later, especially when you’re juggling a home office and small business tasks.
Key takeaways: understand your media choices, calibrate regularly, and maintain an organized color workflow to maximize the investment in your SureColor.
Key Setup Considerations for Epson SureColor
Choosing the right SureColor model depends on intended output (photos, proofs, or artwork), media compatibility, and connectivity options. Decide on print size, ink set (pigment vs dye), and whether you need built-in color calibration or external calibration devices. Ensure you have a clean, dust-free workspace, power stability, and compatible media types (glossy, satin, matte, canvas). Update firmware and drivers from the official site, and back up printer settings for quick recovery if you reset the device. Establish a consistent color workflow by choosing a color management strategy (ICC profiles or printer-managed color) and aligning your operating system, driver, and application settings to minimize color shifts. This upfront planning reduces troubleshooting later and helps you scale up as your needs grow.
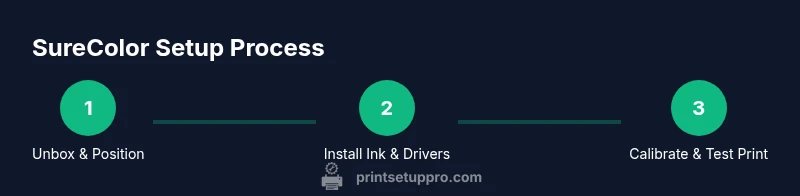
Step-by-Step: Initial Power-On and Driver Installation
- Unbox and place the printer on a stable surface with adequate ventilation.
- Connect power and turn on the printer; wait for initialization to complete (about 1–2 minutes).
- Install the ink cartridges, following the model’s guidance to avoid leaks or mis-seating.
- Install the printer driver on your PC or Mac from the official Epson support site; choose the correct model and language.
- Run the printer setup utility to configure network options if used; connect to Wi‑Fi or Ethernet as required.
- Print a test page to verify basic functionality, ensuring the printer communicates with the host computer.
Tip: Keep the printer connected to a power source with a surge protector to avoid sudden power loss during setup.
Connectivity and Network Setup
Connection options vary by model, but most SureColor devices support USB, Ethernet, and wireless networking. Start with a wired Ethernet connection for stability during setup, then enable Wi‑Fi if needed. Assign a static IP to prevent address changes during network maintenance. Install any required drivers or software on each connected computer, and ensure firewall settings do not block printer communication. If you use Windows, add the printer via Settings > Devices > Printers & scanners; on macOS, use System Preferences > Printers & Scanners. After setup, run a test print from each connected device to confirm consistency across the network.
Pro tip: Keep a dedicated print server or shared folder to simplify job routing in multi-user environments.
Maintenance and Printhead Cleaning
Regular maintenance is essential for optimal results with Epson SureColor. Start with a light cleaning of the printhead and nozzles if you notice banding or gaps in prints. Use the printer’s built-in maintenance menu to perform a nozzle check, printhead clean, and alignments. If issues persist, run a deeper cleaning cycle and test again. Printhead clogging is more common with long idle periods; schedule routine test prints to keep the nozzles flowing. Store inks and cleaning supplies in a cool, dry area, away from sunlight. Wipe down exterior surfaces with a microfiber cloth to prevent dust ingress that could affect media feeding.
Print Setup Pro notes: consistent cleaning routines trade time for long-term reliability, reducing the risk of costly reprints.
Troubleshooting Common Error Codes
Common Epson SureColor errors include paper jam alerts, ink low warnings, alignment failures, and communication errors with the host computer. Start with the basic checks: ensure paper is loaded correctly, media type is supported, and ink cartridges are seated properly. If a communication error persists, reboot the computer and printer, reconnect cables, and re-run the driver installation. For persistent issues, consult the printer’s onboard status monitor and log files to identify the root cause. Maintain a simple error log for recurring codes to speed up future troubleshooting. When in doubt, reset the printer’s network settings and re-enter configuration details from scratch to eliminate stale data.
Note: if an error code refers to hardware components, contact support and document the code with a screenshot for faster service.
Color Management and ICC Profiles for Epson SureColor
Color accuracy starts with proper color management. Use ICC profiles tailored to your specific media and printer model; avoid generic profiles that cause color shifts. Calibrate your monitor to a standard reference, then use the same color-managed workflow across applications. In many cases, letting the printer manage color with a calibrated profile yields consistent results; in others, you may prefer device-link or ICC-based workflows for precise control. Always print a soft proof before finalizing large jobs to verify color intent. If you’re producing proofs for clients, maintain a color-managed pipeline from capture to print to reduce surprises on delivery.
Print Setup Pro recommends testing profiles on each media batch and updating profiles when media stock or ink set changes.
Paper Handling and Media Tips
Use media recommended by Epson for your SureColor model; media type, weight, and surface finish affect color and drying time. Avoid feeding wrinkled or curled sheets, which can cause misfeeds. When printing on heavier media, enable thicker media settings and adjust platen gap if available. For borderless prints, ensure the media margins align with the printer’s printable area. If you’re printing on canvas or fine art paper, rely on ICC profiles to preserve tone and contrast. Store media flat and out of direct sunlight to prevent warping and color shifts over time.
Pro tip: order a small sample pack of your intended media to validate results before committing to large runs.
Safety, Warranty, and Best Practices
Always follow the manufacturer’s safety recommendations, including proper ventilation when using solvent-based products if applicable and avoiding careless handling of hot components after use. Keep the printer and its power area free from liquids to prevent short circuits. Regularly clean the exterior as part of routine maintenance to prevent dust ingress. Check your warranty terms for service coverage and ensure you use genuine Epson inks and parts. Document model serial numbers and keep a copy of purchase receipts for warranty claims. A well-documented maintenance routine reduces downtime and extends the life of your SureColor device.
The Print Setup Pro team recommends adopting a documented setup and maintenance plan to ensure consistent results and long-term reliability.
How Print Setup Pro Can Help
Print Setup Pro provides step-by-step guidance for Epson SureColor setup, maintenance, and troubleshooting tailored to home offices, small businesses, students, and DIY enthusiasts. Whether you’re configuring a new device, calibrating color for client work, or resolving stubborn printhead issues, our guides break the process into actionable steps. We emphasize safety, accuracy, and practical tips to minimize downtime and maximize print quality. By following our methodical approach, you’ll achieve reliable results across diverse print projects and media types.
Tools & Materials
- Power cable(Original power cord rated for your printer model; length 1.8m+ if possible)
- USB cable (optional for direct PC connection)(Use USB 2.0/3.0 as supported by your model; avoid daisy-chained USB hubs)
- Ethernet cable (RJ-45)(For wired network setup; keep in a fixed position to avoid IP changes)
- Microfiber cloth(Lint-free for cleaning exterior and media rollers)
- Distilled water or printer cleaning solution(For manual nozzle maintenance if needed; use only as directed by Epson)
- Replacement ink cartridges (model-specific)(Only use genuine or manufacturer-approved inks for best results)
- Paper handling aids (glide sheets or edge guides)(Helps with consistent feeding on thick media)
Steps
Estimated time: 60-90 minutes
- 1
Unbox and position
Unbox the printer and place it on a level, sturdy surface away from direct sunlight; connect to power and turn on. Allow the printer to initialize before proceeding to avoid calibration errors.
Tip: Keep the packaging orientation; log the model serial number for future reference. - 2
Install ink cartridges
Open the cartridge access area, remove protective caps, and insert cartridges in the matching color slots. Verify each cartridge clicks into place and the status lights indicate ready.
Tip: Do not shake cartridges; install promptly after opening to prevent drying. - 3
Install drivers
Download the correct driver package from Epson’s official site for your OS. Run the installer, choose your model, and complete the on-screen prompts to add the printer.
Tip: Choose recommended defaults to minimize conflicts with apps you use daily. - 4
Connect network
For Wi-Fi, run the network setup utility and select your SSID; enter the password. For wired, connect the Ethernet cable and verify the link indicator.
Tip: Assign a static IP to prevent address changes during network maintenance. - 5
Print a test page
From the printer menu or driver utility, print a test page to confirm alignment and color. Adjust alignment if needed using the calibration option.
Tip: If the test page shows misalignment, run the alignments again after a full nozzle check. - 6
Configure color workflow
Choose ICC profiles or printer-managed color in your applications; ensure monitor calibration matches your workflow. Print a color proof to verify accuracy.
Tip: Keep a note of the profile you used for each media type for consistency. - 7
Perform routine maintenance
Run a nozzle check and cleaning cycle every few weeks or after long idle periods. Keep an eye on print quality and re-run maintenance if bands appear.
Tip: Set a monthly maintenance reminder to prevent clogs. - 8
Update firmware regularly
Check for firmware updates on Epson’s site and install as directed to improve reliability and new features.
Tip: Back up your settings before updating to avoid unexpected resets. - 9
Create a troubleshooting log
Document any errors with date, model, media, and steps taken. A log helps you spot recurring issues and provide context to support.
Tip: Include photos of error messages when contacting support. - 10
Secure and store media
Store paper and media in a cool, dry place to avoid warping; keep inks sealed and away from heat sources that degrade quality.
Tip: Label media with type and batch to track results across print runs.
People Also Ask
What is Epson SureColor best used for?
Epson SureColor printers are designed for high-quality photo printing, proofing, and fine art prints. They perform best when paired with the right media and color management workflow, suitable for home studios and small businesses.
Epson SureColor is ideal for high-quality photo printing and proofs when paired with the right media and color workflow.
Which drivers are needed for Windows vs macOS?
Use the official Epson driver package for your operating system. Windows and macOS have dedicated installers; ensure you select the correct model and version during setup.
Install the official Epson drivers for your OS and model to ensure full functionality.
How do I clean the printhead effectively?
Run the printer’s built-in nozzle check and cleaning cycle from the maintenance menu. If banding persists, perform a deeper cleaning and re-run a nozzle check before resuming prints.
Run nozzle checks and cleaning cycles from the printer menu; repeat if needed.
What should I do if the printer won’t connect to Wi-Fi?
Verify the correct SSID and password, reset network settings on the printer, and re-add the device to the network. If issues persist, use a wired Ethernet connection as a stable alternative.
Reset network settings and rejoin the network; if necessary, try Ethernet for stability.
How can I extend the life of my SureColor printer?
Maintain regular nozzle checks, cleanings, firmware updates, and use genuine inks. Keep media stored properly and avoid long idle periods that can cause nozzle drying.
Regular maintenance and genuine inks help extend life.
Do I need to Calibrate color for every media type?
Calibrating for each media type ensures color accuracy across different papers and finishes. Use the ICC profiles or printer-managed color as appropriate for your workflow.
Yes, calibrate per media type for the most accurate results.
Watch Video
Quick Summary
- Understand your media and model needs before buying.
- Regular maintenance prevents clogs and color shifts.
- Follow a color-managed workflow for accurate proofs.
- Keep software, firmware, and ICC profiles aligned.
- Document issues and maintain a clear troubleshooting log.