How to Connect a Printer to a Computer: A Practical Guide
Learn how to connect a printer to a computer with USB, Wi-Fi, or Ethernet. This guide covers driver installation, OS differences, and practical troubleshooting for Windows, macOS, and networked setups.

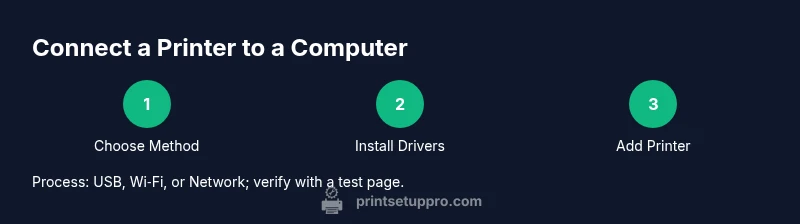
According to Print Setup Pro, the quickest path to a reliable printer connection starts with choosing the right interface (USB, Wi‑Fi, or Ethernet) and installing the correct drivers. This guide covers USB, wireless, and network setups, plus troubleshooting tips for Windows and macOS. By following these steps, you’ll be able to print from your computer with confidence. No matter your OS, the steps are straightforward and designed for home offices, students, and small businesses.
USB vs Wireless vs Network: Choosing the Right Path
Choosing the right connection method is the foundation of a reliable print workflow. USB offers simplicity and direct control with minimal latency and power concerns, but it ties the printer to one computer. Wireless (Wi‑Fi) delivers flexibility, allowing multiple devices to print without cables, but it requires a stable network and compatible drivers. Ethernet or wired network printing provides steady performance for offices with multiple users and can be more scalable than USB, especially when sharing a printer across many devices. Consider your space, network reliability, and how many devices need access when selecting your path.
Key decision factors:
- Number of users and devices
- Proximity and cable clutter
- Availability of a stable Wi‑Fi network
- Need for mobile printing or cloud printing options
Print Setup Pro notes that most home setups thrive on a mix of USB for a single PC and Wi‑Fi or Ethernet for shared access. The right choice reduces setup time and future troubleshooting.
Preparing Your Printer and Computer
Before you start, collect essential information and ensure both devices have power. Verify the printer model and port type (USB, LAN, or built‑in Wi‑Fi). Update printer firmware if an update is available, as newer firmware often fixes connectivity issues and improves compatibility with modern operating systems. Make sure you have administrator access on the computer to install drivers and modify system settings. Disable any firewall or antivirus temporarily during installation if you encounter issues, then re-enable after the setup is complete.
Prepare network details if you plan to connect over Wi‑Fi or Ethernet: know your router’s SSID and password, and decide whether to use a static IP address later for stability. Having these details handy speeds up the process across Windows, macOS, and Linux environments.
Installing Drivers and Printer Software
Driver installation is critical for proper printer functionality, including print quality and advanced features like duplex printing and color management. Start by visiting the manufacturer’s official website to download the latest driver package for your exact printer model and operating system. If you prefer, you can use the operating system’s built‑in driver database, but manufacturers usually provide more comprehensive features. Follow the installer prompts to complete the installation. After installation, restart the computer if prompted to ensure the driver loads correctly.
If you’re on Windows, you may be prompted to allow the installer to make changes to your device. On macOS, you might need to allow a permissions prompt during installation. Keep the printer powered on during driver installation to allow the system to detect and configure it properly.
USB Connection: Quick Setup
Connect the USB cable securely to both the printer and the computer, then turn the printer on. Windows or macOS should automatically detect the device and install the appropriate driver if you selected the driver option earlier. If the system cannot locate a driver automatically, point the OS to the driver file you downloaded from the manufacturer site.
Set the printer as the default device in your OS settings to ensure print jobs are directed correctly. Run a test print from a document to confirm proper communication and that the printer is responding.
Wireless Connection: Connecting Over Wi‑Fi
To connect over Wi‑Fi, ensure both the printer and computer are on the same network. Use the printer’s control panel to locate the network or wireless settings, then choose your SSID and enter the password. If your router supports WPS, you can press the WPS button on the router and select the WPS option on the printer to simplify the connection. Depending on the printer, you may need to install a corresponding wireless driver or software package on your computer.
After connecting to Wi‑Fi, verify the printer’s IP address and add it to your computer using the Add Printer wizard. This method enables printing from multiple devices without cables, but ensure network security is configured to prevent unauthorized access.
Ethernet and Network Printing: Sharing Across Devices
If your printer has an Ethernet port, connect it to your router using a standard network cable. The printer will acquire an IP address from the network (either via DHCP or a static assignment you configure). On your computer, add the printer using the network discovery feature, selecting the printer by its network name or IP address. Ethernet printing is typically more stable for multiple users and minimizes wireless interference.
Enable printer sharing if you plan to print from other machines by enabling sharing settings in your OS. This approach is common in small offices and when using a central printer for several desktops or laptops.
Adding the Printer in Windows and macOS
On Windows: Open Settings > Devices > Printers & scanners, then click Add a printer or scanner. Windows will search for available printers; select yours and click Add. If Windows cannot find the printer, use the manual add option and input the printer’s IP address or hostname. On macOS: Go to System Preferences > Printers & Scanners, click the plus sign (+) to add a printer, and select the shared or network printer. macOS generally handles driver installation automatically, but you may be prompted to download a driver if needed.
Verify that the printer appears in the default list and set it as default if you primarily print from one device. After adding, print a test page to confirm functionality.
Testing and Troubleshooting Common Issues
Print quality problems, misrouted pages, or drivers not loading are common issues during printer setup. If a test page fails, recheck cable connections (for USB), confirm network connectivity (for Wi‑Fi or Ethernet), and ensure the correct driver version is installed for your OS. Disable VPNs or firewalls temporarily if printing requires network access and you notice connectivity failures. Check the printer queue for stuck jobs and clear any stalled tasks before attempting another print.
If problems persist, consult the printer’s manual for troubleshooting steps specific to your model. You can also visit the manufacturer’s support site or community forums for model‑specific guidance and known issues.
Security, Privacy, and Maintenance Considerations
Keep firmware up to date to protect against vulnerabilities and improve compatibility with new OS versions. Use strong Wi‑Fi passwords and enable network security features like WPA3 where available. If you share a printer across multiple devices, consider enabling access controls or selective printing permissions. Regular maintenance, such as cleaning print heads and updating drivers, helps maintain print quality and reduces downtime. Finally, maintain a simple backup of driver installers in case you need to reinstall on a new machine.
Quick Recap: Choosing the Right Path for Your Setup
If you’re setting up a single computer, USB offers simplicity and reliability. For multiple devices in a home or small office, wireless or Ethernet network printing provides flexibility and scalability. Always install the latest drivers from the manufacturer, verify network settings, and test with a sample document to confirm everything works as expected.
Tools & Materials
- Printer(Model and port type (USB, Ethernet, or Wi‑Fi))
- Computer or laptop(Device you'll print from)
- USB cable(Essential for USB setups)
- Power outlet(Printer must be powered on during setup)
- Latest drivers/software(From manufacturer site or OS store)
- Network access(Wi‑Fi network or Ethernet LAN)
- Router details(SSID/password or WPS capability)
- Admin privileges(Needed to install drivers and modify settings)
- Printer manual(Model-specific setup steps)
Steps
Estimated time: 60-90 minutes
- 1
Choose connection method
Decide whether to use USB, Wi‑Fi, or Ethernet based on device count, distance, and stability needs. This choice sets the rest of the workflow and drivers you’ll install.
Tip: Document the chosen method before starting to avoid mid-setup changes. - 2
Power, inspect, and prep printer
Plug in the printer, turn it on, and perform any basic resets recommended by the manufacturer. Check for firmware updates and apply if available.
Tip: If updating firmware, ensure the printer remains powered and connected to the network during the process. - 3
Install drivers/software
Download the latest drivers for your printer model from the official site or use the OS-provided drivers if appropriate. Follow on-screen prompts to complete installation.
Tip: Prefer manufacturer drivers for full feature support over generic OS drivers. - 4
Set up USB connection
Connect the USB cable securely on both ends. The computer should detect the printer; install or confirm drivers if prompted and set the printer as default.
Tip: Use the shortest cable possible to reduce interference and unplug other USB hubs during setup. - 5
Set up Wi‑Fi connection
On the printer, select the network and enter the password; verify the printer obtains an IP address. If using WPS, enable it on both router and printer.
Tip: Prefer 2.4 GHz band for compatibility with older devices; 5 GHz offers faster throughput where supported. - 6
Configure Ethernet or network printing
If using Ethernet, connect to the router and ensure the printer obtains an IP. For shared printers, enable sharing on the host computer.
Tip: Note the IP address for manual addition if auto-discovery fails. - 7
Add printer in the OS
Windows: Settings > Devices > Printers & scanners > Add a printer. macOS: System Preferences > Printers & Scanners > Add. Use IP address if necessary.
Tip: If a prompt asks for a driver, choose the exact model or a compatible universal driver. - 8
Print a test page
Send a test page from your chosen application to confirm proper communication and print quality.
Tip: Check margins, alignment, and color accuracy. Calibrate if needed. - 9
Troubleshoot common issues
If the printer doesn’t show up or prints with errors, recheck cables, network settings, and driver compatibility. Restart devices if necessary.
Tip: Consult the printer’s manual or online support for model-specific error codes.
People Also Ask
Do I need admin rights to install printer drivers?
In most cases, yes. Installing drivers or modifying system settings typically requires administrator privileges. On macOS, you may need to approve certain permissions during installation.
Yes, admin rights are usually required to install printer drivers and adjust system settings.
Can I print from multiple devices to the same printer?
Yes. If the printer is networked or shared by a host computer, you can add the printer on each device. Ensure the printer shares correctly and security settings allow access.
Yes, multiple devices can print if the printer is on the same network or shared.
Why isn’t my printer showing up in the list?
First, confirm the printer is powered on and connected to the same network or USB port. Check drivers, restart devices, and ensure the printer isn’t blocked by firewall settings.
Make sure the printer is on, connected to the right network or USB, and that drivers are installed.
Should I use USB or Wi‑Fi for the most reliable print?
USB is typically more reliable for a single device due to direct connection. Wi‑Fi offers flexibility for multiple devices but can be impacted by network interference or distance.
USB is usually more reliable for one computer; Wi‑Fi is flexible but can vary with signal quality.
What if the printer needs a static IP address?
Static IPs can stabilize long‑term network printing. Assign a reserved IP in the router and configure the printer to use that address.
A static IP can improve stability; set a reserved IP in the router and assign it on the printer.
How do I know which driver to install?
Check the printer model and operating system on the manufacturer’s site. Use the exact OS version to avoid compatibility issues, or opt for the universal driver if available.
Look up your exact printer model and OS version on the manufacturer’s site to pick the right driver.
Watch Video
Quick Summary
- Choose the right connection path first
- Install correct drivers for best compatibility
- Test print and troubleshoot early
- Secure the network and maintain the printer