Printer to Laptop Cable: A Complete Setup Guide
Learn how to connect a printer to a laptop using USB, Ethernet, or Wi-Fi, install drivers, and troubleshoot common issues with Print Setup Pro's step-by-step guide for 2026.

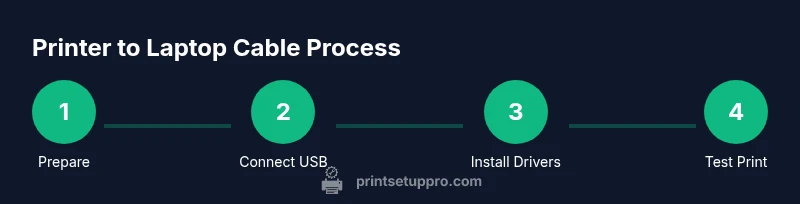
With printer to laptop cable setups, you can choose USB, Ethernet, or wireless connections. The first step is identifying the correct ports and installing the latest drivers, then setting the printer as the default device and printing a test page. This guide walks you through the most common methods, compatibility checks, and practical troubleshooting tips for 2026.
Why a reliable printer-to-laptop connection matters
A reliable printer to laptop cable setup reduces printing frictions, driver conflicts, and wasted time. In home offices, dorm rooms, and small studios, a robust connection translates to consistent print queues, fewer driver reinstallations, and smoother workflows. According to Print Setup Pro, the right combination of cable type and driver strategy minimizes common bottlenecks, such as driver mismatches or port misconfigurations. A dependable link also improves security: direct USB connections limit exposure to network vulnerabilities, while updated drivers guard against compatibility issues. For students juggling assignments and DIY enthusiasts handling project prints, reliability is the bedrock of productivity. When you know your port types, you can select the simplest path (USB for single-device setups) or the most flexible route (wireless or wired network printing) without guesswork. The goal is to get a clean, error-free print every time, with minimal steps and maximum compatibility across Windows, macOS, and Linux environments. Always verify cable integrity and port functionality before diving into complex configurations.
If you’re setting up a printer alongside a laptop for the first time, keeping a clear mental model of the connection options helps prevent repetitive troubleshooting. The Print Setup Pro team has observed that many issues stem from mixed environments (e.g., USB drivers installed but printers connected over the network). Establish a primary connection method first, then add secondary methods only if your workflow requires it.
Tools & Materials
- USB printer cable (type depends on ports)(Check printer and laptop ports (USB-A, USB-B, USB-C) and use the correct cable length)
- Ethernet cable(Only if you plan to use wired network printing)
- Wireless network access(Needed for Wi-Fi printing; ensure the printer is on the same network as the laptop)
- Printer drivers/software(Download from the manufacturer’s site; verify OS compatibility (Windows/macOS/Linux))
- Computer with updated OS(Keep OS up to date to ensure driver compatibility and security patches)
- Printer manual(Useful for port types and default settings)
- Powered USB hub (optional)(Install only if you have limited laptop ports; wired printers usually work without it)
Steps
Estimated time: 25-45 minutes
- 1
Prepare devices and gather cables
Identify the printer model, available ports, and your laptop’s port types. Gather the appropriate USB cable or plan for Ethernet/Wi‑Fi setup. Confirm you have a stable power supply for both devices and access to the internet if you will download drivers.
Tip: Double-check port types in the printer’s manual to avoid buying the wrong cable. - 2
Install or update printer drivers
Visit the manufacturer’s support site to download the latest drivers for your OS. Run the installer and follow prompts; restart your computer if prompted. Keeping drivers current reduces compatibility issues and improves print quality.
Tip: Run the installer as an administrator on Windows; on macOS, grant any required permissions when prompted. - 3
Connect via USB (quick start method)
Plug the USB cable into the printer and the laptop. Power on the printer if it isn’t already on. Your OS should detect the device and complete driver installation automatically or via the prompted wizard.
Tip: Use a direct USB port rather than a hub when possible to avoid power or bus contention. - 4
Configure network printing (Ethernet or Wi‑Fi)
If you’re using Ethernet, connect the printer to the router with an Ethernet cable and verify the device obtains an IP address. For Wi‑Fi, follow the printer’s wireless setup wizard to join the same network as your laptop. Note the printer’s IP address for future reference.
Tip: Assign a static IP to the printer to prevent IP changes that disrupt printing. - 5
Set the printer as default and run a test print
Open the Print dialog from any document, select the printer, and click Print. If the test page prints correctly, you’ve established a working link. If not, reselect the port (USB vs network) and retry.
Tip: Keep a dedicated test page with a few color blocks to verify color accuracy and alignment. - 6
Troubleshoot common issues
If the printer doesn’t appear, re-scan for hardware changes, verify cabling, and check firewall settings that might block the printer’s traffic. Ensure the printer status indicates ready and enough ink/toner. Reinstall drivers if necessary.
Tip: Consult the printer’s status monitor and OS Printer settings for error codes; many issues are resolved by a clean reinstall.
People Also Ask
What is the easiest way to connect a printer to a laptop?
For most users, USB is the simplest and most reliable option, followed by optional network printing. Ensure drivers are installed and the printer is set as default. If USB is not feasible, a wired Ethernet or a secure Wi-Fi connection can work well with proper setup.
USB is usually the easiest path. Install drivers, set as default, and print a test page.
How do I know if my printer supports USB, Ethernet, or Wi‑Fi for laptop printing?
Check the printer’s ports and the manual to identify supported connections. Most modern printers list USB, Ethernet, and Wi‑Fi on the label or specification sheet. If unsure, visit the manufacturer’s support page for exact port details matched to your model.
Look at the printer’s ports or manual to confirm supported connections.
Why is my printer not appearing in the devices list after installation?
First, ensure the printer is powered on and properly connected. Reinstall the drivers and run a printer scan in your OS. Temporarily disable firewalls that block local network printing and verify the correct port is selected (USB vs network).
Make sure the printer is on, drivers are installed, and the correct port is chosen.
Can I print over Wi-Fi Direct without a network?
Yes, many printers support Wi‑Fi Direct, which lets your laptop connect directly to the printer without a router. Enable Wi‑Fi Direct on the printer, then select the printer from your laptop’s wireless settings and print a test page.
Yes—Wi‑Fi Direct lets you print directly without a router.
Should I use USB or wireless printing for a home office?
USB provides a stable, fast connection ideal for a single computer. Wireless is flexible for multiple devices and locations. Choose USB for reliability and speed, then enable wireless printing if you need multi-device access.
If you mostly print from one computer, USB is reliable; wireless is best for multiple devices.
How do I test printing after setup?
Open a document, select Print, choose the configured printer, and print. If the page prints correctly, your setup is successful. If not, recheck drivers, ports, and network/IP settings, and try again.
Open a document, pick the printer, and print a test page.
Watch Video
Quick Summary
- Identify the correct port and cable type before starting.
- Install up-to-date drivers for reliable operation.
- Test print to confirm a successful setup.
- USB is usually more reliable; wireless offers flexibility when needed.