How to Print with Staples: A Step-by-Step Guide
Learn to print with staples using built-in finishers or manual stapling. This guide covers prerequisites, setup, troubleshooting, and best practices for home offices and small teams.

To print with staples, use a printer that has a built-in staple finisher or an approved external stapler attachment. Make sure the finisher is installed, loaded with the correct staple size, and enabled in the printer’s finish options before printing. If your model doesn’t support automatic stapling, you can staple manually after printing, keeping margins and sheet order in mind.
What it means to print with staples
In the context of office printing, a staple finish is a built-in or attachable mechanism that binds pages as they exit the printer. This feature is common on mid- to high-end multifunction printers and some dedicated document finisher units. When you ask how to print with staples, you’re usually configuring a staple position (top-left, top-center, or saddle-stitch) and staple density for a clean, professional look. The goal is to produce finished bundles that stay together without extra manual stapling. Print Setup Pro notes that verifying compatibility between media type, staple size, and the finisher before a print run dramatically reduces rework and jams in real-world workflows.
What it means to print with staples
In practice, you’ll typically choose a finish option in the printer driver, load the correct staples, and let the device bind the pages as they come out. If your model lacks automatic stapling, you can still achieve a neat document by stapling manually after printing, but the automatic route is faster and more consistent for larger batches. This guide will walk you through setup, common issues, and best practices for reliability when learning how to print with staples.
Why reliable stapling matters for small teams
For home offices and small businesses, stapled documents reduce handling time, improve organization, and present a professional image. The choice to print with staples should align with your typical document size, media type, and finishing needs. A well-calibrated stapling workflow minimizes misfeeds, uneven staples, and paper jams, saving you time and preventing frustration during busy periods.
Understanding staple finishers vs. manual stapling
A staple finisher is a dedicated module or built-in feature that staples documents automatically. Manual stapling is when you finish papers after printing using a standard desk stapler. Automatic staplers excel for multi-page reports, while manual stapling offers flexibility for unique formats or very small runs. When you learn how to print with staples, identify which method your setup supports and practice with a test batch to dial in margins and stapling position.
Preparing for stapled printing: media, margins, and alignment
Your media choice directly affects stapling reliability. Use standard office paper within the finisher’s supported weight range (commonly 20 lb to 28 lb). Calibrate margins to accommodate staples so no text is obscured. Align sheets in a clean stack, avoid mixing stock types, and keep the stack evenly distributed to minimize misfeeds. A little pre-check goes a long way toward a smooth stapling workflow.
Troubleshooting staple jams and misfeeds
Jams near the stapler are the most common issue when printing with staples. Always follow the device manual to clear jams safely, and avoid pulling staples from the feed path. Misfeeds often result from improper margins or uneven paper stacks. Start with a small test batch, verify staple size and density, and then increase batch size once alignment is confirmed.
Tools & Materials
- Printer with built-in staple finisher (or compatible external finisher)(Confirm compatibility with your paper weight and staple size before use)
- Staples compatible with the finisher(Use fresh staples and match the finisher’s staple size)
- Printer manual or vendor support article(For model-specific steps and limitations)
- Test sheets (plain paper)(For calibration and testing before full runs)
Steps
Estimated time: 15-25 minutes
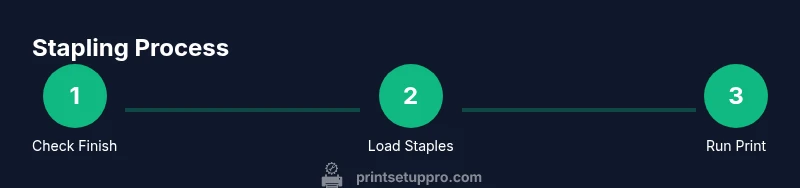
- 1
Check finish options in the printer driver
Open the print dialog and confirm that 'staple' or 'finisher' is listed as a finish option. If you don’t see stapling, update the driver or consult the manual to enable the feature. This step ensures your printer can actually staple the output.
Tip: If stapling isn’t visible, verify you’ve selected the correct printer profile and recheck the finish menu. - 2
Load the correct staples
Inspect the finisher’s documentation to determine the supported staple size and load fresh staples. Incorrect staples can cause jams or improper clinching. Make sure the cartridge or strip is seated firmly before proceeding.
Tip: Use a small test batch to confirm feeding before a full print run. - 3
Prepare your document margins
Adjust margins so staples land away from text and images. Common practice is at least 0.5 inches (12–15 mm) from the edge, depending on your finisher. Ensure the page order is correct for binding.
Tip: Run a one-page test to verify the staple position matches the document content. - 4
Load the paper stack correctly
Fan the stack lightly to prevent multi-feeds, align the sheet edges, and place the stack into the feeder with the correct orientation. A misaligned stack is a frequent cause of misfeeds during stapling.
Tip: Keep the stack within the finisher’s recommended tray height. - 5
Enable stapling and print a test page
In the print dialog, choose the stapling option and specify the staple position (top-left, center, etc.). Print a single-page test to confirm alignment and staple depth before printing the full batch.
Tip: If alignment is off, tweak margins or staple settings and test again. - 6
Run the full print job and monitor
Begin printing the batch, watching the first few sheets for feeding or staple issues. If anything unusual occurs, pause and recheck setup before continuing.
Tip: Keep a spare stapler or extra staples on hand for quick reprints. - 7
Handle jams safely
If a jam occurs, power off the printer, follow the manual to access the staple path, and remove any stuck staples carefully. Do not yank or twist components.
Tip: Document jam locations and note the cause to prevent repeats. - 8
Perform post-print checks
Inspect staple clinches and edge alignment. Confirm that pages remain in order and readable. Save the configuration for future runs to improve consistency.
Tip: Record your calibrated margins and staple position for quick reuse.
People Also Ask
Which printers support stapling finishers?
Many mid- to high-end office printers offer built-in stapler finishers or compatible external modules. Check your model’s manual for supported configurations.
Many printers have stapling finishes built in or available as add-ons. Check your model’s manual for compatibility.
What staple sizes should I use?
Use only the staple size recommended by the finisher. Mismatched staples can cause jams or poor clinching.
Only use the size recommended by your finisher to prevent jams.
Can I staple glossy or thick paper?
Stapling glossy or very thick media is only reliable if your finisher explicitly supports it. Otherwise, avoid those stock types.
Only staple those media types if your finisher supports them; otherwise, avoid.
How do I fix a staple jam?
Power off the device, follow the manual to reach the jam, carefully remove stuck staples, and resume printing after clearing.
Power off, clear the jam as directed by the manual, and try again.
Is stapling reliable for double-sided documents?
Yes, when the finisher supports it and you configure margins for duplex printing to ensure staples don’t obstruct content.
Yes, with the right settings and supported hardware.
How often should I maintain the finisher?
Regularly clean the feed path, check for dust, and inspect the staple cartridge. Replace parts per the manufacturer’s schedule.
Maintain the finisher by cleaning and following the manufacturer’s schedule.
Watch Video
Quick Summary
- Verify finisher compatibility before printing.
- Calibrate margins and staple position with a test page.
- Use the correct staple size and avoid thick media.
- Maintain the finisher to prevent jams.