How to Use a Canon Printer: Step-by-Step Guide
Learn how to use a Canon printer with a clear, step-by-step guide. Install drivers, connect to power and network, load media, print from computer and mobile, and maintain your device.

Goal: Learn how to use canon printer across devices. This guide covers setup, driver installation, wireless and USB connections, and common print tasks like photo and document jobs. Key requirements include a Canon printer, power cable, computer or mobile device, and a network or USB connection. By the end you’ll be able to print reliably with minimal fuss.
Why Canon printers excel for home and small offices
Canon printers are favored for their balance of cost, quality, and reliability. Whether you need crisp text documents, vibrant photos, or scans to a computer, a Canon device can produce consistent results. For beginners, understanding the core workflow—setup, drivers, connection, and print settings—reduces wasted ink and frustration. According to Print Setup Pro, starting with the right driver and a clean initial setup makes it easier to use canon printer day after day. This section explains the advantages and what you should know before you start. Keep in mind that model differences exist, but the basic principles apply to most current Canon printers. In short, knowing how to use canon printer across scenarios helps you tackle documents, photos, and school projects with confidence.
Before you begin: Tools and prerequisites
Before you start installing or printing, gather a few essentials and confirm basic conditions:
- Printer and power cable: Ensure the device is on a clean, stable surface away from heat sources.
- Connection method: Decide between USB or wireless and verify that cables and adapters (if any) are compatible with your computer or router.
- Computer or mobile device: You’ll install drivers on a computer or use the Canon PRINT app on a phone or tablet.
- Network credentials: If you print over Wi‑Fi, have the network name (SSID) and password handy.
- Paper and ink: Confirm you have the correct paper size and the appropriate Canon cartridges for your model.
- Firmware updates: Check the Canon support site for the latest firmware to improve reliability.
Pro tip: Always read the printer’s quick start guide for model-specific steps, because a few models use different button layouts or menus.
Setting up: Install drivers and connect
-
Install the driver package from Canon’s official website or your installation disc. Run the setup wizard and follow on-screen prompts to install printer drivers, utilities, and the optional software suite.
-
Choose your connection type: USB or wireless. If using USB, plug in the cable after the driver installation starts. For wireless, connect the printer to your Wi‑Fi network using the onboard control panel or the software utility.
-
Add the printer to your computer: On Windows, use Settings > Devices > Printers & scanners to add it. On
Loading media and basic print settings
Proper paper handling improves print quality and reduces jams. Use the printer’s input tray guides to fit the paper size, and adjust the rear tray guides for heavier media if supported.
- Paper types: Plain, photo, envelopes, and heavyweight paper require different settings.
- Orientation and margins: Choose portrait or landscape and set margins according to the document.
- Print quality presets: For documents choose standard or text; for photos choose high or best photo; for drafts choose economy.
Tip: Run a small test page after changing media to verify alignment and color balance.
Printing from a computer (Windows and
Printing from mobile devices
Mobile printing is convenient when you’re away from your desk. Canon offers the CANON PRINT app and supports AirPrint on
Common tasks: Photo printing, duplex printing, and scans
- Photo printing: Use high-quality paper and select photo print settings. Calibrate color as needed.
- Duplex printing: If supported, enable double-sided printing to save paper.
- Scanning: Use the printer’s control panel or scan utilities on your computer to save to PDF or email.
Example: If your goal is a brochure, print a test page on the chosen paper stock to verify color and margin consistency.
Troubleshooting common issues
No device or no connection issues are common, but many can be resolved with a few checks:
- Printer is offline: Ensure the printer and computer are on the same network, restart both devices, and re-add the printer.
- Paper jams: Remove jammed sheets slowly, avoiding tearing; check the paper path and trays for obstructions.
- Poor print quality: Run a nozzle check or head cleaning from the printer software; replace cartridges if colors are off.
Tip: If problems persist, consult the Canon support site for model-specific steps.
Maintenance tips: longevity and head cleaning
- Regular maintenance: Periodically clean the print head, feed rollers, and ink cartridges to prevent clogging and misfeeds.
- Firmware updates: Keep firmware current to benefit from bug fixes and feature enhancements.
- Cartridge handling: Use recommended cartridges and store unused ones properly to avoid drying out.
Pro tip: Schedule a monthly quick maintenance routine to maintain consistent print quality.
Tools & Materials
- Canon printer(Model-specific steps may vary; ensure compatibility with your computer/mobile.)
- Power cable(Keep in a safe, accessible outlet.)
- USB cable(useful for USB connections if supported by your model)
- Computer or mobile device(Needed for drivers or mobile printing apps)
- Wi‑Fi network or router(Required for wireless printing)
- Canon printer drivers/software(Download from Canon's official site or use included media)
- Canon ink/toner cartridges(Use the correct model cartridges for your printer)
- Printer paper (various sizes)(Include plain and specialty media if needed)
- Canon PRINT app (optional)(Useful for mobile printing and scanning)
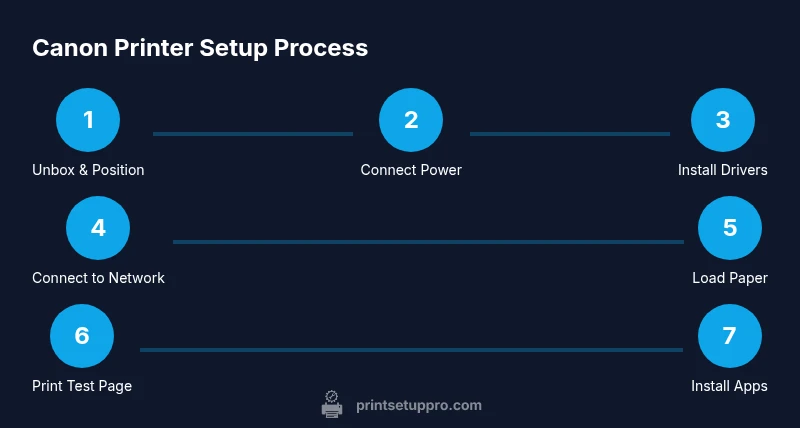
Steps
Estimated time: 60-90 minutes
- 1
Unbox & position printer
Remove packaging, place the printer on a stable surface with clear access to power and paper trays. Check for protective tapes and remove them. Verify venting space for proper cooling during long print jobs.
Tip: Keep packaging for possible returns or transport. - 2
Plug in & power on
Connect the power cord and switch the printer on. Allow the printer to initialize and run any on-screen calibration if prompted.
Tip: Avoid power strips that could sag during startup. - 3
Install ink cartridges
Open the cartridge access area and install the cartridges according to the color guides. Replace any protective seals and run a basic alignment if the printer prompts you.
Tip: Use official Canon cartridges to guarantee color accuracy. - 4
Install drivers
Download and run the Canon driver package. Complete the setup wizard to install drivers, utilities, and optional software.
Tip: Choose a default app suite only if you plan to use it regularly. - 5
Connect to network
Choose Wi‑Fi during setup and input your network credentials. Alternatively, connect via Ethernet if your model supports it.
Tip: If the signal is weak, relocate the router or printer closer to improve stability. - 6
Load paper
Adjust the input tray guides to match the paper size. Place the stack neatly to avoid jams and fan the stack to prevent sticking.
Tip: Use the correct tray for photo or plain paper to avoid misfeeds. - 7
Print a test page
From the printer or the computer, print a test page to verify alignment, color balance, and print quality.
Tip: If colors are off, run a nozzle check and head cleaning. - 8
Print from a mobile device
Install Canon PRINT or use AirPrint/Mopria to print from your smartphone or tablet.
Tip: Ensure the mobile device is on the same network as the printer. - 9
Set up maintenance routines
Configure periodic cleaning and firmware checks to maintain print quality and reliability.
Tip: Keep spare cartridges and cleaning kits handy for quick refreshes. - 10
Run routine checks
Perform regular checks for updates and confirm the printer remains the default device for frequent tasks.
Tip: Document any recurring issues and consult Canon support if needed.
People Also Ask
Do I need an internet connection to use a Canon printer?
You can use USB to connect directly, but a network connection enables wireless printing from multiple devices. If you have Wi‑Fi, you’ll typically print from phones and tablets more easily. For offline tasks, USB is perfectly workable.
You can print via USB or network. Wi‑Fi makes mobile printing easy, but USB works when you’re near the printer.
How do I install Canon printer drivers?
Visit Canon’s official support site, locate your model, and download the full driver package. Run the installer and follow prompts to add the printer to your computer.
Download the Canon drivers from the official site and follow the setup steps to add your printer.
Can I print from my phone?
Yes. Use AirPrint on iOS or Mopria on Android, or install the Canon PRINT app for more features like scanning and cloud printing.
Yes, you can print from your phone using AirPrint or the Canon PRINT app.
What should I do if the printer shows offline?
Check that the printer is on and connected to the same network as your device. Re-add the printer in your OS settings and restart devices if needed.
If it shows offline, verify power and network, then re-add the printer and reboot if necessary.
How do I replace ink cartridges on a Canon printer?
Open the cartridge access area, remove old cartridges, insert new ones following color guides, and run a nozzle check afterwards for readiness.
Open the cartridge area, replace with the correct cartridges, then test the print quality.
Why is my print quality poor after setup?
Run a nozzle check and head cleaning from the printer software. Ensure you’re using the correct media type and settings for your task.
If print quality is off, perform cleaning and nozzle checks, and verify media settings.
Watch Video
Quick Summary
- Install the correct drivers and connect reliably.
- Load media correctly and adjust print settings per task.
- Print from computer and mobile with appropriate apps.
- Run regular maintenance to preserve quality.
- Keep firmware updated for ongoing compatibility.