How to Use a Printer at Library: Step-by-Step Guide
Learn how to use a printer at the library with a clear, step-by-step approach. From gathering essentials to paying and collecting your prints, this guide covers policies, file prep, and privacy tips to make library printing efficient and stress-free.

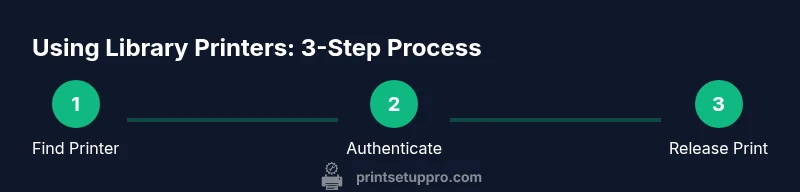
Printing at the library is a practical, self-serve process. You authenticate at the printing kiosk, choose a printer and settings, upload your file, pay per page, and release the print from the machine. This quick guide outlines the essential steps to get you printed fast without surprises.
How to use a printer at the library: a practical guide
Printing at a library is designed to be straightforward yet secure. Whether you’re submitting homework, resumes, or photos, the general workflow remains consistent: authenticate, select a printer and settings, upload your file, pay, and release the print. If you ask how to use a printer at the library, the answer is: prepare your document, locate the printing station, and follow the kiosk prompts. How you reach this goal can vary by institution, so expect small differences in sources, file formats, and payment methods. According to Print Setup Pro, library printers are typically managed through a self-serve kiosk connected to a patron account, with privacy-protecting defaults and clear cost indicators. In practice, you’ll encounter variations in supported file types, mobile printing options, and how receipts are issued. This section sets the stage for the rest of the guide and helps you approach the printing task with confidence.
What you’ll need before you print
Before you begin, assemble a small kit of essentials to avoid delays:
- Library card or guest access: You’ll use this to authenticate and access print credits.
- Document file to print: Prepare a print-ready file (PDF is widely supported) on your device or USB drive.
- Payment method: Check accepted options (cards, coins, or library-approved payment) to cover per-page costs.
- Optional: USB drive or cloud access: Some libraries allow direct printing from USB or cloud storage.
- Quiet workspace: If you’re printing sensitive documents, choose a private or semi-private area when possible.
Having these items in hand speeds up the process and reduces the chance of failed prints.
Understanding library printing policies
Policies vary by library, so it’s important to review local rules. Common elements include per-page costs, color versus monochrome options, duplex printing, and page limits per user or day. Some libraries require you to release prints at a kiosk after job submission, while others involve staff-assisted release. Privacy and data handling are also part of the policy—avoid printing sensitive information unless you’re at a private area or secure machine. Print Setup Pro’s guidance emphasizes checking for any mobile printing options, file format restrictions, and whether guest access is allowed without a library card. By understanding these nuances, you’ll avoid surprises and minimize waste.
Preparing your document for printing
The quality of your print starts with preparation. Convert documents to widely supported formats (PDF is a safe default) and embed fonts to avoid font substitutions. Check page size (letter or A4) and orientation (portrait vs landscape). Ensure color settings align with what you actually need; if color is expensive, consider black-and-white. Name your file clearly and remove extraneous metadata that might confuse the printer. If you’re printing photos, choose appropriate resolution and color management. Printing a test page or a single-page sample is a smart way to catch issues before you print multiple copies.
Connecting to the right printer and selecting settings
At the kiosk, you’ll see a list of available printers. Choose one that’s closest to you and suitable for your job (color vs monochrome, single- vs double-sided, paper size, and number of copies). Important options include duplex printing (two-sided), grayscale, and print quality (draft, standard, high). Some libraries offer a unified queue where you can see status and estimated wait times. If you’re unsure which printer to pick, staff can point you to the most reliable unit. Remember: incorrect settings can waste paper and money, so verify your choices before sending the job.
Uploading your file and print-job configuration
You can upload files to the printer in several ways: via USB drive, direct upload at the kiosk, or through a library account connected to a cloud storage service. Always use a print-preview feature if available to catch formatting errors. Confirm the number of pages, color settings, and duplex options again before you submit. If your file contains multiple documents, consider printing them as a single job to simplify release. For sensitive materials, ensure you’re printing only what you intend to keep.
Payment, release, and printing
After you submit your job, proceed to payment. Payment methods vary by library; some kiosks accept cards, others require cash or a library-specific print credit. Complete the payment and proceed to release your job. You may need to enter a release code or authenticate again at the printer. Once released, monitor the device to confirm it has started printing. If a job doesn’t print, check the queue status and retry the release if needed. Keep your receipt for records and future reference.
Collecting your prints and finishing touches
Retrieve your prints promptly from the designated pickup area. Verify page order, completeness, and color accuracy as you collect each page. If a page is missing or incorrect, contact library staff rather than attempting to reprint on a different device. Log out of the kiosk to protect your account and remove any sensitive documents from the screen or temporary storage. When you’re done, consider saving a digital copy of your receipt for expense tracking or assignments. If you plan to print regularly, ask about setting up a recurring print account for faster future visits.
Privacy, security, and cost-saving tips
Protect your privacy by logging out securely and avoiding printing sensitive information in public spaces. Use the library’s own devices to avoid linking personal accounts to shared printers whenever possible. If you’re on a tight budget, review per-page costs and select duplex-only if it’s cost-effective; some libraries offer cheaper black-and-white options. For workflows, print only what you actually need, review monthly usage, and delete unused drafts from your device after printing. The Print Setup Pro team recommends validating the library’s official workflow and privacy settings before sending any sensitive materials.
Authority sources
- Library printing policy guidelines (examples from library associations and public libraries)
- American Library Association: https://www.ala.org
- Library of Congress: https://www.loc.gov
- U.S. Department of Education: https://www.ed.gov
Common issues and troubleshooting
If a printer is busy or offline, wait a few minutes and try again. If a file fails to print, re-check the file format, fonts, and color settings. Ensure you’re connected to the correct printer queue and that you have sufficient funds on your account. When in doubt, ask staff for help; library staff are accustomed to assist in these situations.
Quick-start recap
To use a printer at the library, prepare your file, identify the right printer, configure print options, upload your document, pay, release, and collect. Keep your receipt, log out when finished, and consult staff if you encounter any issues. This approach minimizes waste and keeps your data secure.
Tools & Materials
- Library card or guest access(Essential for authentication and access to print credits)
- Document file to print (PDF recommended)(Prepare in advance on your device or USB drive)
- USB drive (optional)(Use if you plan to print directly from USB)
- Payment method (card, coins, or library-approved option)(Check local options for per-page costs)
- Print preview capability(Review before submitting to avoid waste)
Steps
Estimated time: 20-40 minutes
- 1
Locate the printing station
Find the designated self-serve printer area or kiosk in the library. Look for signage or ask staff if you’re unsure where to go. Being in the correct area prevents misrouted print jobs.
Tip: If a line forms, observe the order and prepare your file before reaching the kiosk. - 2
Sign in at the kiosk
Authenticate with your library card or guest access. This step ties the print job to your account and enables payment tracking.
Tip: If using a guest card, confirm printing privileges with staff to avoid delays. - 3
Choose printer and settings
Select a printer that’s ready and configure color, duplex, and page size. Double-check the preview to ensure alignment with your document.
Tip: If you’re unsure about settings, start with black-and-white and single-sided to save costs. - 4
Upload or select your file
Upload the document from USB or cloud storage, or pull from your library account. Use the print-preview to confirm formatting and margins.
Tip: Embed fonts in PDFs to avoid font substitution issues. - 5
Review and submit
Double-check the number of pages, color, and double-sided options. Submit the job only after you are satisfied.
Tip: Limit the number of copies to reduce waste unless you need multiple copies. - 6
Pay for printing
Proceed to payment via the kiosk. Ensure you have sufficient funds or a valid print credit.
Tip: Keep your receipt for expense tracking or reimbursement. - 7
Release the job
Authenticate again at the printer or enter the release code to start printing.
Tip: If release fails, re-select the job from the list instead of re-uploading. - 8
Collect prints
Grab your prints promptly from the output tray and verify page order and color accuracy.
Tip: If pages are missing, request staff assistance immediately. - 9
Conclude and log out
Sign out from the kiosk to protect your account and clear any temporary data.
Tip: Wipe your workstation area and recycle or discard printed drafts appropriately.
People Also Ask
What do I need to print at the library?
You typically need a valid library card (or guest access), a print-ready file (PDF is common), and a means to pay for prints. Some libraries also allow printing from USB or cloud storage.
You usually need a library card, a print-ready file, and a way to pay. Some libraries also support USB or cloud-based printing.
How do I pay for prints at the library?
Payment methods vary by library. Common options include card payments, coins at a kiosk, or per-page print credits loaded to your account.
Most libraries accept cards or coins at a kiosk, or print credits you load to your account.
Can I print from my phone or email?
Many libraries support mobile printing or printing from cloud storage and emails. Check your library’s policy or ask staff for available options.
Often you can print from a phone or cloud service; ask staff to confirm.
What if the printer is offline or busy?
If a printer is offline, try another nearby unit or ask staff for assistance. Most libraries have a backup printer and staff to guide you.
If a printer is offline, switch to another unit or ask staff for help.
Are there limits on pages or color printing?
Policies vary; some libraries set daily or monthly page limits and differentiate color from black-and-white pricing.
Limits and color pricing differ by library; check local rules.
How can I protect my privacy after printing?
Log out of the kiosk, retrieve only what you printed, and avoid printing sensitive information in public spaces.
Log out after printing and don’t leave sensitive docs on public screens.
Watch Video
Quick Summary
- Know your library’s printing policy and costs.
- Prepare files in the proper format before printing.
- Always use print preview to avoid waste.
- Log out to protect your privacy after printing.
- Ask staff if you encounter issues or offline printers.