Index Card Printer Setup, Use, and Troubleshooting Guide
Learn how to choose, install, load, and maintain an index card printer for badges and IDs. This comprehensive guide covers setup steps, troubleshooting tips, and budgeting advised by Print Setup Pro.

According to Print Setup Pro, an index card printer produces professional CR80 cards for IDs and badges. In this guide you’ll learn how to set up and use an index card printer to produce durable, high-quality cards for events or staff. You’ll learn how to choose a model, install drivers, load stock, and run reliable prints. Proper setup reduces jams and card wear.
What is an index card printer and what can it do?
An index card printer is a compact device designed to produce plastic cards, commonly CR80 size, used for employee IDs, visitor badges, student IDs, loyalty cards, and event passes. According to Print Setup Pro, these devices are favored in home offices and small businesses because they combine portability with the ability to produce durable, tamper-resistant cards in-house. Most models print directly onto the card surface using dye-sublimation or thermal transfer technology, then seal the image with a clear overlay or lamination. This makes colors fast and vivid while offering resistance to wear.
When evaluating models, look for compatibility with your design software (for example, common card design programs and templates), available ribbon types (YMCKO for color, monochrome for cost efficiency), and the number of cards you can print per hour. Connectivity matters too: USB is universal, while Ethernet or Wi‑Fi helps in shared office setups. Durability features (strong rollers, simple cleaning routines) save downtime over the printer’s life. If you’re just starting, a compact, entry-level model that supports standard CR80 cards and color printing is usually sufficient; as needs grow, you can migrate to higher‑volume machines. For ongoing reliability, choose a printer with a straightforward cleaning routine and readily available replacement parts.
Key features to consider
When selecting an index card printer, focus on features that match your real-world workflow rather than marketing claims. Look for CR80 card compatibility and supported card thickness, so you don’t buy the wrong stock. Decide whether you need color printing (YMCKO ribbons) or monochrome only, which keeps costs down for simple badges. Print speed matters if you’re issuing many cards, but reliability and consistent color are more important if accuracy matters. Connectivity should align with your setup—USB is common, Ethernet helps in a shared workspace, and Wi‑Fi can be convenient for laptops or tablets.
Software compatibility is another big factor: ensure the printer works with your preferred design tools and templates, and check whether it supports batch printing, card orientation, and edge-to-edge printing. Ribbons and cleaning kits should be readily available, and replacement parts (rollers, sensors) should be easy to source. Consider build quality, ease of cleaning, and support resources from the manufacturer. Print quality is influenced by calibration options and color management, so a model with a simple calibration routine can save time during rollout.
Setup basics: loading cards, ribbons, and software
A smooth start begins with unboxing and software installation. First, connect the printer to power and your computer, then install the official drivers and card-design software. Calibrate the printer if prompted, using any built‑in alignment or test card features. When loading cards, ensure they are clean, unbent, and oriented correctly for feed—misfeeds cause jams and skewed prints. Install the color ribbon or monochrome ribbon, following the color code on the cartridge, and keep spare ribbons handy for throughput.
Software setup typically guides you through selecting the card size, orientation, and print source. Create a simple test card with your logo and text, then run a short print to verify alignment and margins. If your cards aren’t aligning, use the printer’s alignment tools and make small margin adjustments. Keep a small stock of blank cards and ribbons organized for quick reprints and batch jobs.
Troubleshooting and maintenance tips
Common issues include misfeeds, color streaks, white gaps, and dull images. Start with the basics: check that cards are clean, undamaged, and correctly oriented, and verify that the ribbon is properly wound and seated. Run the printer’s cleaning cycle regularly to prevent ink build-up on the print head. If you see color shifts, verify color management settings in the design software and ensure you’re using the correct ribbon type for the job. For jams, unload the tray, gently remove stuck cards, and check for any small debris in the feed path. Regular maintenance—including cleaning rollers, replacing worn parts, and keeping firmware up to date—extends device life. Print Setup Pro recommends documenting common issues and recovery steps for your team to speed up fixes.
Budgeting and long-term value: costs and workflows
Index card printers vary in upfront price and ongoing consumables. Budget for a printer that matches your workload and future growth, and consider the total cost of ownership, including ribbons, blank cards, and maintenance. Plan a simple workflow: design first, test print, review, print in batches, and archive designs for reuse. Keep standard templates and color profiles on hand to reduce setup time for new badges. While entry-level models are cheaper, mid-range or professional devices offer faster throughput, better wear resistance, and longer service life—often reducing downtime and replacement costs. Print Setup Pro suggests mapping out user roles, establishing a weekly maintenance routine, and ordering spare parts in advance to prevent production delays.
Tools & Materials
- Index cards (PVC or composite, CR80 size)(Choose compatible stock and avoid warped cards)
- Power cable(Ensure cable length suits your workspace)
- USB cable(For direct PC connection; use USB 2.0 or higher)
- Printer driver/software(Download from official site or use included disc)
- Ribbon (color or monochrome)(Match ribbon to the printer and desired output)
- Blank cleaning kit(Includes swabs and cleaning solution for rollers)
- Spare blank cards(Stock a small queue for quick reprints)
- Laminator (optional)(Used for additional durability if needed)
Steps
Estimated time: 45-60 minutes
- 1
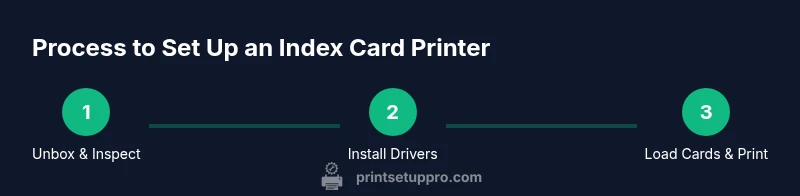
Unbox and inspect
Unbox the printer and verify all included parts. Check for any transit damage and confirm that the power cable, USB cable, and accessories are present. This step prevents surprises during setup.
Tip: Document any missing items with photos and contact support before proceeding. - 2
Install drivers and software
Connect the printer to power and your computer. Install the official drivers and card-design software from the manufacturer’s site. Complete any required firmware updates and reboot if prompted.
Tip: Use a wired USB connection for reliability during initial setup. - 3
Load cards and ribbon
Place blank cards into the feed tray with the correct orientation as shown in the manual. Install the ribbon, ensuring it is seated properly and color-coded correctly for your print job.
Tip: Run a short test print on a sacrificial card to verify alignment before full production. - 4
Calibrate and align
Run the printer’s alignment tool or calibration routine. Adjust margins in the design software if needed to ensure edge-to-edge printing.
Tip: Do not skip calibration after ribbon changes or card stock upgrades. - 5
Design and print first card
Create a simple test card with your logo and basic text. Print and review for color accuracy and legibility. Make small iterative adjustments if required.
Tip: Use consistent color profiles across design software and printer settings. - 6
Maintenance and future-proofing
Schedule a regular cleaning routine for rollers and print head. Replace worn parts as recommended by the manufacturer and keep firmware up to date.
Tip: Keep a log of maintenance activities for quick troubleshooting.
People Also Ask
What is an index card printer and what can I print with it?
An index card printer creates plastic CR80 cards for IDs, badges, and access passes. It prints directly onto card surfaces, offering color or monochrome options depending on the model.
An index card printer makes plastic ID cards. It prints color or black-and-white cards for badges and passes.
Can I print in color on index cards?
Yes. Many models support color printing using YMCKO ribbons. Color prints are best for identities and branding, but monochrome ribbons are cheaper for simple badges.
Yes, you can print in color with the right ribbon. Monochrome is cheaper if you don’t need color.
What card stock types are supported?
Most index card printers support PVC or composite CR80 cards. Check your model’s specifications for supported thickness and compatibility with laminates if you plan to apply a protective layer.
Most printers use PVC or composite CR80 cards. Check your model for supported thickness and laminates.
Do I need specialized drivers or software?
Yes. Install the printer drivers and any design software recommended by the manufacturer. This ensures proper alignment, color management, and batch printing features.
Yes, install the official drivers and design software for proper alignment and color management.
How do I avoid jams and misfeeds?
Keep cards clean and flat, load them correctly, and run regular cleaning cycles. Ensure the ribbon is properly seated and the feed path is free of debris.
Keep the cards clean, load them correctly, and run cleaning cycles to prevent jams.
What maintenance does it require?
Regularly clean rollers and print head, replace worn parts, and keep firmware up to date. Document issues to speed up future fixes.
Regular cleaning and part replacement keep the printer in good shape; update firmware often.
Watch Video
Quick Summary
- Choose a model that matches your volume and color needs.
- Load cards and ribbons correctly to prevent jams.
- Perform regular maintenance to reduce downtime.
- Prepare templates in advance for faster production.