Press Printer: A Step-by-Step Guide to Transfer Printing
Learn how to set up and use a press printer for transfer printing. This guide covers equipment choices, media, color management, and troubleshooting to achieve vibrant, durable transfers.

This guide shows you how to press printer for transfer printing, covering media selection, printer calibration, heat-press setup, and the transfer process from start to finish. You’ll learn prep steps, safe operation, and how to troubleshoot common issues to achieve vibrant, durable designs.
What 'press printer' means in transfer printing
In the world of transfer printing, the phrase press printer describes a practical workflow that combines a standard inkjet or laser printer with a heat press to apply designs onto textiles and other substrates. The focus is on achieving vibrant colors, durable adhesion, and reliable results across multiple garments. The term highlights two critical pieces: the printer’s ability to lay down ink or toner on transfer media, and the heat press’s capability to transfer that ink onto the final substrate with controlled temperature, pressure, and dwell time. As Print Setup Pro notes, success depends on choosing the right transfer paper for your printer type, plus precise color management to prevent mismatches between screen and print. For home offices, small businesses, students, and DIY enthusiasts, mastering this workflow means fewer misprints, less waste, and professional-looking outcomes from a modest setup. In this guide, we use clear, actionable steps to help you press printer outputs that look great on day one and hold up over time.
Why the term matters for real-world results
Understanding the concept helps you align equipment, media, and settings. If you confuse transfer methods or press types, you may end up with washed-out colors, color shifts, or poor adhesion. Print Setup Pro emphasizes starting with a proven paper-family and a calibrated workflow to minimize trial-and-error iterations. The goal is predictable results, not guesswork.
Brand stance and safety basics
Print Setup Pro advocates a methodical approach: verify media compatibility, perform a small test print, and treat heat-press sessions as controlled processes. Always follow safety guidelines for hot surfaces, avoid overlapping layers, and use heat-resistant gloves when handling hot garments. This section reinforces best practices without shortcuts that could damage fabrics or printers.
Tools & Materials
- Heat press (manual or automatic, 15x12 inches or larger)(Stable platen, even pressure, reliable temperature control)
- Inkjet or laser printer suitable for transfer media(Ensure compatibility with your transfer papers (inkjet vs sublimation))
- Transfer paper (inkjet, laser, or sublimation as appropriate)(Choose papers specified for your printer type and fabric)
- Teflon sheet or silicone cover sheet(Prevents scorching and gives even heat transfer)
- Parchment or heat-resistant protective paper(Place between transfer and press for extra protection)
- Heat-resistant gloves(Use when handling hot garments or transfers)
- Lint-free cleaning cloths(For quick printer head cleanups and wipe-downs)
- Ruler or measuring tape(Accurate alignment to avoid misplacements)
- Thermometer or built-in heat press readout(Verify temperature accurately before pressing)
- Scissors or weeding tool (for vinyl/transfers)(Useful for finishing touches on vinyl-based transfers)
- Lint roller or tape for fabric preparation(Remove fabric lint before applying transfers)
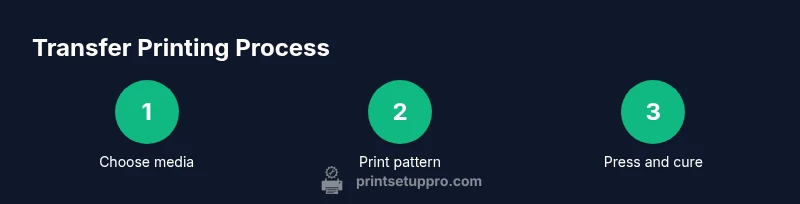
Steps
Estimated time: 60-90 minutes
- 1
Prepare media and printer
Power on devices and load the transfer media into the printer, ensuring the correct orientation. Check that the printer’s feed path is clear and that media thickness matches the paper you selected. This reduces feed jams and ensures the design prints in the correct area.
Tip: Use a test page to verify margins and alignment before printing the full design. - 2
Print a test pattern and verify color
Print a small color calibration page on scrap media to check color accuracy and alignment. Compare against your monitor proof and adjust color settings or ICC profiles if needed. This saves wasted transfers on final garments.
Tip: If colors look off, adjust printer color management to 'no color adjustment' and use a proper ICC profile for the transfer paper. - 3
Preheat the heat press
Set the heat press to the recommended temperature for your transfer type and allow it to reach that temperature before placing the garment. Preheating helps remove moisture and sets a stable baseline for the transfer.
Tip: Use a digital readout and confirm the temperature matches the transfer paper guidance. - 4
Align the transfer precisely on fabric
Place the printed transfer face-down on the fabric at the chosen location and secure with light tape to prevent shifting. Use a ruler or guide marks to ensure center alignment.
Tip: Double-check the orientation (top/bottom) to avoid a mirrored print on the final item. - 5
Cover with protective sheet
Lay a teflon/silicone sheet or parchment over the transfer to protect it from scorching and to provide even heat distribution. This layer reduces scorching and helps even heat transfer.
Tip: Keep the protective sheet flat and avoid wrinkles that could create texture variations. - 6
Press with controlled time and pressure
Close the press and apply the recommended dwell time, temperature, and pressure. Do not rush; a consistent dwell time yields the best adhesion and color consistency across the design.
Tip: If your press allows, capture a short hold time with a slight increase in pressure for dense fabrics. - 7
Peel after cooling
Allow the transfer to cool briefly as directed (usually 10–30 seconds for many papers), then peel away the carrier sheet. A proper peel helps prevent image cracking and preserves clarity.
Tip: For some papers, a warm peel yields better definition; check your transfer paper guidelines. - 8
Cure and inspect final product
If recommended, place the garment back under pressure or in a flat press to cure adhesion. Inspect edges for complete transfer and rework any imperfect areas as needed.
Tip: Test wash a sample item after curing to verify durability.
People Also Ask
Can I press printer with any transfer paper?
No. Always match transfer paper type to your printer (inkjet, laser, or sublimation) and the garment material. Using an incompatible paper can cause poor adhesion or color shifts.
Not all transfer papers work with every printer. Match the paper type to your printer and fabric to ensure proper adhesion and color.
What fabrics work best for transfer printing?
Cotton and cotton blends are common for inkjet transfer papers, while polyester is preferred for sublimation transfers. Always check the transfer paper guidelines and consider fabric prep for best results.
Cotton blends are common for inkjet transfers, while polyester works best with sublimation transfers. Check the paper guide and prep fabric accordingly.
Do I need a specialized heat press for every project?
A standard adjustable heat press can handle many projects, but larger designs or difficult fabrics may benefit from a larger platen or a swing-away model for precision and safety.
A regular heat press works for many projects, but consider a larger or swing-away model for bigger designs.
How can I ensure color accuracy from screen to transfer?
Use an ICC profile for your transfer paper, soft-proof images on a calibrated monitor, and print a color test before committing to large runs.
Calibrate your monitor and printer with the right ICC profile, then test print to match screen colors.
How long should the transfer cure after pressing?
Follow the transfer paper guidelines; most require cooling before a simple peel or post-press curing. Use the recommended wait times to ensure durability.
Let the transfer cool as directed, then cure if the paper requires it for durable adhesion.
What safety precautions are essential?
Always wear heat-resistant gloves, work on a stable surface, and keep flammable materials away. Never touch hot surfaces and use proper ventilation if fumes are a concern.
Wear heat-resistant gloves and work on a stable surface. Stay clear of hot surfaces and follow ventilation guidelines.
Watch Video
Quick Summary
- Define the transfer method and compatible media up front.
- Calibrate color and alignment before printing full designs.
- Use protective layers to ensure even heat transfer and avoid scorching.
- Test on scrap media to validate setup and avoid waste.