Where to Find Your Printer IP Address: A Quick Guide
Learn reliable methods to locate your network printer's IP address. From the device menu to router pages, this Print Setup Pro guide helps home offices and students troubleshoot connectivity and keep printing flowing.

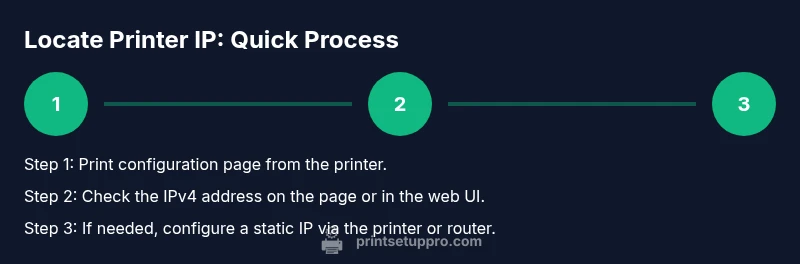
If you’re asking where can i find ip address on printer, start with the printer’s network menu or print a configuration page. Then verify the address in your router’s DHCP client list or on a computer on the same network. Print Setup Pro’s guidance helps home offices identify IPv4 addresses, assign a static IP, and keep printing reliable.
What the IP address is and why it matters
In most modern home networks, every device—including printers—receives an IP address. The IP address is how other devices locate the printer on the network and send print jobs or scanned documents. There are two common formats: IPv4, which typically looks like 192.168.x.x, and IPv6, which is longer and less common in small offices. For day‑to‑day printing, the IPv4 address is often the one drivers and software expect. Understanding whether your printer uses DHCP (dynamic addressing) or a static address helps you plan reliable connections. According to Print Setup Pro, knowing the printer IP address is essential for reliable network printing and troubleshooting. This block will outline practical ways to locate it and what to do if the address changes over time.
Method A: Print a Network Configuration Page from the Printer
A fast, model‑independent method to identify the IP is to print a Network Configuration Page or Status Page from the printer itself. Most modern printers offer a menu option under Settings or Network that prints this page automatically. Look for a line labeled IPv4 Address, IP Address, or something similar. If you see multiple addresses, focus on the one listed as Active or Connected. This page often includes additional details such as subnet mask and gateway, which can help with advanced setups. Print Setup Pro notes that printing a configuration page is dependable because it does not require access to external devices and works even when the computer cannot connect to the printer directly.
Method B: View Network Settings on the Printer’s Onboard Display
If your printer has a built‑in display, navigate to Network or Wireless settings to view the current IP. On touchscreen models, you’ll typically find a path like Menu > Settings > Network > Connectivity > IPv4 Address. For printers with physical buttons, the path may differ slightly, but the goal is the same: locate the IP shown in the network status area. Some units show two addresses (IPv4 and IPv6); most drivers still rely on IPv4. If you don’t see an address, confirm the printer is connected to the same network as your computer and that Wi‑Fi or Ethernet is active. Print Setup Pro emphasizes using the visible IPv4 address for driver configuration and printing reliability.
Method C: Check Your Router’s DHCP Client List
Your router maintains a list of devices currently connected to the network and assigned IPs. Log into your router’s admin page (often at 192.168.0.1 or 192.168.1.1) with admin credentials, then find sections labeled DHCP Clients, Attached Devices, or LAN Status. Locate the printer by its hostname or MAC address (you can find the MAC on a label on the printer). The corresponding IP address is what you’ll use in printer settings or driver configuration. If your router supports ARP tables, you can cross‑reference MAC addresses to confirm the correct device. Print Setup Pro recommends keeping this page handy for quick troubleshooting.
Method D: Use a Computer to Locate the IP on the Same Network
From a computer on the same network, you can discover the printer’s IP without touching the printer. Windows users can print a configuration page or use commands like arp -a from Command Prompt to map MAC addresses to IPs. macOS/Linux users can run similar network discovery commands or use a free network scanner app. If your printer’s hostname is visible on the network, you may also be able to locate it in your computer’s network browse panel. This method is useful when the printer has no easy display or the configuration page is unavailable.
Setting a Static IP to Avoid Future Changes
To prevent IP addresses from changing after router reboots or DHCP lease renewals, configure a static IP on the printer or reserve an address in the router (DHCP Reservation). Choose a IP outside of the DHCP pool to minimize conflicts, and document the chosen address. Then update your printer driver settings to point to the static IP. Print Setup Pro notes that static IPs improve reliability for frequent print jobs and multi‑user environments, reducing the need to re‑locate the IP every few weeks.
Common Pitfalls and Quick Fixes
Misinterpretation of the IP address is common: IPv6 addresses can look unfamiliar, and some printers show multiple addresses. If you can’t connect, ensure the printer is online and on the same network as your computer. Disable IPv6 if your driver only supports IPv4, or configure the printer to use IPv4 by default. A simple reboot of the printer and router can resolve many transient connectivity issues. If a print driver still reports the wrong IP, re‑print the configuration page and cross‑check with the router’s DHCP list.
Verifying Connectivity with a Test Print
Once you have the IP address, open the printer properties on your computer and point the driver to that IP. Send a test page to confirm the setup works. If the test fails, double‑check that the IP matches the address shown on the printer and router, ensure the device is online, and confirm there are no firewall rules blocking the port used by the printer. Printing a quick test page is the best final check to ensure end‑to‑end connectivity.
Tools & Materials
- Printer manual or model number(Identify menu paths precisely for your device.)
- Printer control panel/display(Used to access network settings directly.)
- Computer, smartphone, or tablet on the same network(Needed for verifying IP via software or router admin page.)
- Router admin access credentials(Required to view DHCP clients and reserved addresses.)
- Web browser(Used to access printer web interfaces and router pages.)
- Network scanning app (optional)(Fing, Angry IP Scanner, or similar tools can help discover devices on your network.)
Steps
Estimated time: 20-40 minutes
- 1
Open the printer’s network menu
Navigate to Settings or Network on the printer’s control panel. If your model uses a web UI, you may need to access it through a connected computer to view network status. The goal is to locate the page or option that reveals current network connection details, including the IP address.
Tip: If you’re unsure of the path, consult the user manual for your exact model. - 2
Print a Network Configuration Page
From the printer’s menu, select Print Network Configuration Page or Status Page. This page lists the active IPv4 address and other network settings. If multiple addresses appear, use the one labeled Active or Connected.
Tip: Ensure the printer is powered on and connected to the network before printing. - 3
Locate the IPv4 address on the page
Read the line labeled IPv4 Address, IP Address, or similar. Note whether your printer shows IPv6 as well and distinguish which address you will use for driver setup.
Tip: If you see more than one IP, choose the one corresponding to the active connection. - 4
Access router admin page to view DHCP clients
Open a browser and enter the router’s gateway URL (commonly 192.168.0.1 or 192.168.1.1). Log in with admin credentials, then locate DHCP Clients or Attached Devices to find the printer by hostname or MAC.
Tip: If you can’t identify it, compare the printer’s MAC address on the device label with the list. - 5
Find IP via computer network discovery
On Windows, run arp -a in Command Prompt or use a network scanner; macOS/Linux users can use similar commands or apps. Match the MAC/hostname to confirm the printer’s IP.
Tip: Keep the MAC address handy from the printer label for quick matching. - 6
Open the printer’s web interface (optional)
Enter the IP you located into a browser to reach the printer’s embedded web server. You may need to log in; the network/status page there confirms the IP and configuration.
Tip: Default credentials vary by model—check the manual or reset guidance if needed. - 7
Set a static IP to stabilize the address
In the printer’s network settings or via DHCP reservation on the router, assign a fixed IP outside the DHCP pool. Document the IP and update drivers accordingly.
Tip: Avoid conflicts by choosing an unused address and noting it in a safe place. - 8
Verify connectivity with a test page
Print another test page or scan to confirm that the printer responds at the assigned IP. If issues persist, power cycle the printer and router and re‑check the IP.
Tip: If the test fails, double‑check the IP against the router’s DHCP list and the printer’s status page. - 9
Document the IP information
Store the IP address, subnet, gateway, and any reserved settings in a simple note or your IT log. This reduces future search time and driver reconfigurations.
Tip: Keep the document accessible to all users who print to this device.
People Also Ask
How do I know which IP address to use for my printer driver?
Most drivers use IPv4 addresses. Use the IPv4 address shown on the printer’s configuration page or the router’s DHCP client list. If you see IPv6, prefer IPv4 for driver setup unless you’ve configured IPv6 in your network.
Use the IPv4 address from the printer or router for the driver, unless your network is configured for IPv6.
What if the IP address changes after a router reboot?
Configure a DHCP reservation or set a static IP on the printer to prevent address changes. Update the driver with the fixed IP and re‑test printing.
If the IP changes after reboot, reserve the IP on your router or set a static IP on the printer.
Can I locate the IP if the printer is offline?
If the printer is offline, you cannot read its IP from the device. Check the router’s connected devices or use a network scanner once the printer reconnects.
If the printer is offline, bring it online or rely on your router’s device list to find its last known IP.
How do I access the printer’s web interface once I know the IP?
Enter the IP address into a browser to access the printer’s embedded web server. Log in if prompted and navigate to Network/Status pages for confirmation.
Type the IP into a browser and sign in if needed to view settings.
What if I can’t find the IP using these methods?
Try printing a fresh configuration page, resetting network settings on the printer, or using a network scanner to discover devices again.
If you still can’t locate it, re‑try the config page or use a network scanner to locate the device.
Is it safe to set a static IP for the printer?
Yes, as long as you pick an address outside the DHCP pool and document it to avoid conflicts with other devices.
Static IPs are safe if you avoid duplications and keep a log.
Watch Video
Quick Summary
- Identify the printer IP via multiple methods
- Prefer IPv4 for driver compatibility
- Use DHCP reservation or static IP for stability
- Always verify with a test print
- Document the IP for future maintenance