Zebra Thermal Printer Setup & Troubleshooting Guide (2026)
Learn how to set up and troubleshoot a Zebra thermal printer for labels and receipts. This step-by-step guide covers connection options, driver installation, media loading, calibration, and common fixes to keep your printing tasks reliable.

This guide helps you set up and troubleshoot a Zebra thermal printer for labels or receipts. You’ll learn to choose the right model, install drivers, load media, calibrate, test prints, and resolve common issues with step-by-step actions you can perform in about an hour or two.
What is a Zebra thermal printer and where it's used
Zebra thermal printers are purpose-built for label and receipt printing in warehouses, retail, healthcare, and shipping. They support direct thermal printing for short-lived labels and thermal transfer for durable, long-lasting prints when used with ribbons. According to Print Setup Pro, zebra thermal printers are widely chosen for their reliability, speed, and durable output, especially in high-volume environments. They come in desktop and industrial forms, with options for USB, Ethernet, Wi‑Fi, and Bluetooth connectivity. The right choice depends on your media type, print volume, and environment. This guide will walk you through selecting a model, installing drivers, loading media, calibrating, and validating prints to minimize downtime and misprints.
Direct thermal vs. thermal transfer: choosing the right Zebra model
When deciding between direct thermal and thermal transfer, consider label life, exposure, and cost. Direct thermal printers use heat-sensitive media that darkens with heat, producing prints without ribbons. They’re excellent for short-term labels or receipts. Thermal transfer printers apply pigment from a ribbon to media, yielding durable labels suitable for outdoor or harsh conditions. Print Setup Pro’s analysis highlights that most small businesses start with direct thermal for shipping labels and receipts, then migrate to thermal transfer for long-term inventory identifiers as they scale. Your choice should align with label durability needs, environmental exposure, and total cost of ownership.
Connectivity options: USB, Ethernet, Wi‑Fi, and Bluetooth
Zebra printers can connect via USB for single-workstation setups, Ethernet for shared lab environments, or Wi‑Fi/Bluetooth for mobile print applications. USB is straightforward and reliable for desktops, while Ethernet enables networked labeling across multiple users. Wireless options add flexibility but require secure configuration to prevent unauthorized access. In practice, most small offices deploy a mix: USB for a local setup and Ethernet or Wi‑Fi for shared label printing. Ensure your computer, tablet, or POS system can reach the printer's IP address or USB port, and keep firmware up to date to maximize compatibility.
Key tip: verify driver availability for your operating system (Windows, macOS, Linux) and download the latest version from Zebra’s official site.
Driver installation basics for Zebra printers
Driver installation is foundational. Start by downloading the latest Zebra driver package from Zebra’s official site or your vendor’s admin portal. Run the installer, connect the printer, and follow prompts to select the correct model and connection type. After installation, print a test label to confirm basic functionality. If your OS blocks the driver, you may need to grant permissions or disable signature checks temporarily for installation. Always restart after driver setup to ensure the system recognizes the printer.
Media and ribbons: loading labels correctly
Loading media correctly is essential for reliable prints. For direct thermal media, keep labels Clean, aligned, and free from dust. For thermal transfer, ensure you’re using a compatible ribbon (supply width and color) and that the ribbon is wound correctly and advanced to prevent creases. Calibrate the printer after loading new media to align the print image with the label’s edges accurately. If you’re printing multi-part labels, consider the orientation and margin settings in the driver and label template to avoid cutoffs.
Calibrating print width and margins
Calibration aligns the printer head with the media so text and barcodes print in the correct position. Use the printer’s calibration option via the control panel or the driver’s calibration tool. A typical calibration prints a test page showing margins, image width, and alignment. If misalignment persists, re-run calibration with the media loaded and ensure no slack in the media guides. Regular calibration helps maintain print quality across different media batches.
Configuring printer settings in the driver
Driver settings govern how the printer interprets label templates, font sizes, and barcode printing. Set label size, margins, darkness, and print speed to match your media and application. For frequent tasks, save a profile for shipping labels, another for inventory tags, and a third for receipts. After updating settings, print a few test labels to verify alignment and readability. Use a consistent template to minimize formatting differences across devices.
Printing tests: labels and receipts
Testing is crucial before going into production. Start with a standard test label and a blank receipt to verify print quality, scannability, and barcode integrity. Check for faint lines, missing pixels, or misprints. If issues appear, inspect the media path for obstructions and verify the ribbon tension if using thermal transfer. Keep a small library of test label templates to quickly verify alignment after media changes.
Common troubleshooting steps
If prints are blurry or misaligned, confirm media type, width, and darkness settings. Check for barcode readability with a ruler against the label; ensure the label stock isn’t curling or wrinkled. For connectivity problems, verify printer IP assignment, firewall rules, and that the device shows as online in the printer management utility. When jams occur, gently clear the path and inspect for broken media or debris on the print head. Document recurring issues to inform future maintenance.
Maintenance and cleaning for longevity
Regular maintenance extends the life of a zebra thermal printer. Clean the print head with approved cleaning cards or isopropyl alcohol and lint-free swabs, taking care not to damage components. Dust the printer’s interior and keep the media path free of residue. Replace worn consumables on schedule, including media sensors, rollers, and seals. A simple monthly cleaning routine helps prevent print defects and jams, saving downtime and material waste.
Security and network considerations
If your Zebra printer is networked, enforce access controls to prevent unauthorized use. Use strong Wi‑Fi or Ethernet security settings and keep firmware up to date. For mobile printing, evaluate app permissions and ensure data isolation for labeled assets. Networked printers can be vectors for risk if left unmanaged, so disable unused services and segregate label printing traffic from general office networks.
Advanced tips for speed and reliability
To maximize throughput, keep firmware current, use high-quality media, and set the print density to an optimal level for your label stock. Maintain a consistent barcode grade by testing with industry-standard labels. Consider enabling auto-calibration on media changes and create templates for common label formats. Regularly review print logs for recurring patterns and adjust your setup accordingly.
Tools & Materials
- Zebra printer power adapter(Ensure voltage matches your region (e.g., 100–240V).)
- USB A-to-B cable(Use a high-quality cable for stable USB connections.)
- Ethernet cable (RJ-45)(Needed for networked setups.)
- Wi‑Fi router or access point(Only if using wireless printing.)
- Computer or workstation(Needed to install drivers and configure templates.)
- Zebra printer drivers (Windows/macOS/Linux)(Download from Zebra's official site or your vendor portal.)
- Media stock (labels) and ribbons(Select compatible sizes (e.g., 1x2.125 in.) and materials.)
- Cleaning kit (head cleaning cards)(Recommended for long-term reliability.)
- User manual and quick-start guide(Keep for reference on model-specific steps.)
- Label templates and software integration(Templates for common formats (shipping, inventory, receipts).)
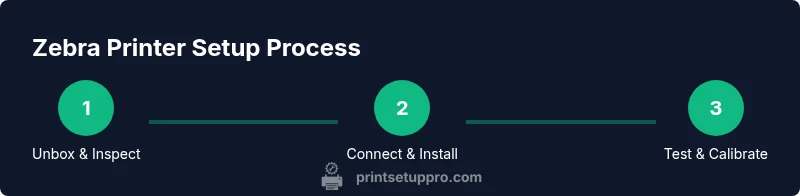
Steps
Estimated time: 1-2 hours
- 1
Unbox and inspect the printer
Carefully remove packaging, verify model and accessories, and check for any shipping damage. Confirm that all listed items are present and that the print head and platen are clean. If anything is damaged, contact support before powering on.
Tip: Take photos of the box and labels for warranty records. - 2
Choose and connect the interface
Decide between USB, Ethernet, or wireless, then connect according to the chosen method. For USB, plug into a direct PC port; for Ethernet, connect to the network; for Wi‑Fi, select the printer in your wireless setup tool and enter the network credentials.
Tip: If using network, assign a static IP to prevent address changes. - 3
Install the Zebra drivers
Download the latest driver package from Zebra’s official site and run the installer. Follow prompts to select your model and connection type, then restart the computer to complete installation.
Tip: Disable any conflicting print utilities during setup to avoid driver conflicts. - 4
Load media correctly
Open the media compartment, insert labels with the correct orientation, and align guides to fit the width. For thermal transfer, ensure ribbon is threaded properly and tensions are even to prevent creases.
Tip: Calibrate after loading new media to ensure proper alignment with the print area. - 5
Calibrate print width and margins
Use the printer’s calibration option via the control panel or driver to align prints with label edges. Run a test print to verify margins and readability.
Tip: If the test page shows misalignment, re-run calibration with media loaded and straight guides. - 6
Configure driver settings
Set label size, margins, print darkness, and speed in the driver. Save profiles for common formats and test prints after each major change.
Tip: Keep a consistent profile for each label type to reduce errors. - 7
Print a test label/receipt
Print a standard test page and a sample label to check text sharpness and barcode readability. Confirm the correct orientation and that no parts are cropped.
Tip: Use a barcode verifier app to confirm scan reliability. - 8
Create label templates
Use your software to create templates for shipping, inventory, or receipts. Ensure fonts and barcode modules match the label stock specifications.
Tip: Keep templates in a centralized location for team-wide use. - 9
Enable sharing or mobile printing
If using multiple users, configure network sharing or a mobile printing workflow. Ensure access controls and printer security settings are active.
Tip: Limit access to trusted devices to minimize misuse. - 10
Integrate with software workflows
Connect the Zebra printer to your ERP, WMS, or POS as needed. Use print hooks or label printing plugins to automate tasks and reduce manual work.
Tip: Test end-to-end with live data prior to production runs. - 11
Schedule maintenance
Create a routine for cleaning the print head, sensors, and rollers. Replace consumables on schedule to minimize downtime and maintain print quality.
Tip: Document maintenance logs to spot recurring issues early. - 12
Troubleshoot common issues
Review common symptoms (blurry prints, jams, connectivity) and follow step-by-step checks from media loading to driver settings before escalating.
Tip: Keep a small diagnostic kit handy for quick checks.
People Also Ask
What is the difference between direct thermal and thermal transfer for Zebra printers?
Direct thermal prints use heat-sensitive media and require no ribbon, making it quick and inexpensive for short-term labels. Thermal transfer uses ribbons for longer-lasting labels suitable for harsh conditions. Choose based on label life needs and environmental exposure.
Direct thermal is good for short-term labels, while thermal transfer provides longer-lasting prints. Choose based on how long your labels need to endure.
Which drivers are needed for Zebra printers?
Zebra printers require the official drivers for your OS (Windows, macOS, Linux). Download the latest version from Zebra’s site and follow the installation prompts. Some environments may also use third‑party utilities for label design.
Install the official Zebra drivers for your operating system to ensure compatibility.
How do I load labels correctly in a Zebra printer?
Open the media compartment, load the correct label size with guides snug, and ensure the media path is clear of obstructions. For thermal transfer, thread the ribbon properly and check tension. Calibrate after loading to align print output.
Load labels with guides aligned, thread ribbons correctly, and run calibration to ensure proper alignment.
Why isn’t my Zebra printer printing correctly?
Common causes are wrong label size, misaligned media guides, incorrect driver settings, or outdated firmware. Start with a test print, verify media type, and adjust margins, darkness, and speed as needed. If issues persist, check for jams and clean the print head.
Check label size, driver settings, and media alignment first; clean the print head if prints look blurry.
Can Zebra printers connect over Wi‑Fi?
Yes, Zebra printers support Wi‑Fi for mobile and shared printing. Ensure the device is on the same network, assign a static IP if possible, and enable secure wireless settings. If issues arise, verify network permissions and firmware compatibility.
Yes—Wi‑Fi is supported with proper network setup and secure settings.
Watch Video
Quick Summary
- Validate media and alignment before production.
- Choose direct thermal or thermal transfer based on label durability needs.
- Keep drivers and firmware up to date for compatibility.
- A structured test print workflow reduces downtime and waste.