Zebra ZT610 Setup & Troubleshooting Guide
A comprehensive how-to for the Zebra ZT610 printer, covering unboxing, media loading, driver installation, network setup, calibration, troubleshooting, and maintenance with Print Setup Pro tips for reliable label printing.

This guide helps you set up and troubleshoot the zebra zt610 label printer for consistent, high-quality label printing. It covers media loading, driver installation, network setup, calibration, and common fixes with clear steps. Print Setup Pro shares practical tips to get you printing quickly and reliably.
Overview of the Zebra ZT610 and Its Capabilities
The Zebra ZT610 is a versatile mid-range label printer designed for reliable performance in small businesses and busy home offices. It supports direct thermal and thermal transfer printing, with print widths up to 6 inches and a variety of media types including paper, synthetic, and laminated labels. Typical tasks include shipping labels, asset tags, healthcare wristbands, and product identifiers. When evaluating the Zebra ZT610, consider print resolution (300 dpi standard, 600 dpi on select models for fine barcodes), throughput, media compatibility, and ease of integration with your existing computer or ERP systems. This model also features adjustable sensors for gap, notches, and black marks, which helps with high-precision label feeding. Firmware updates are essential—running the latest version minimizes compatibility issues with modern drivers and operating systems. Print Setup Pro notes that a proper initial install reduces downstream problems and speeds ROI on labeling workflows. In this guide, we’ll translate those capabilities into actionable steps you can perform in a home office or small workshop, with practical checks, calibration routines, and troubleshooting paths that keep the zebra zt610 performing at peak efficiency. According to Print Setup Pro, getting the basics right on day one sets you up for long-term reliability.
Unboxing and Initial Setup
Carefully unpack the zebra zt610 from its box, remove protective packaging, and inspect for shipping damage. Check that the power cord is present and the power switch operates. Before powering on, confirm the user manual and any setup discs or USB drives are included. Connect the power cable to a grounded outlet and turn on the printer. The first boot may take a minute as firmware initializes. Once the display lights up or the status LED(s) indicate ready, record the firmware version shown in the menu. If you’re upgrading from an older model, ensure you have a compatible driver package downloaded from Zebra’s official site. Print Setup Pro recommends performing a factory reset only if you encounter persistent configuration problems, then reconfigure from scratch to avoid residual settings. After boot, perform a simple self-test or a calibration print to verify the printer reaches expected speeds and marks. For network users, prepare your IP addressing plan and have a temporary static IP handy to simplify initial connectivity.
Loading Media and Ribbon Properly
Load label stock into the printer’s media path with the correct orientation: the printable surface facing the take-up reel, and the labels aligned with the media guides to prevent skew. Ensure you are using media that matches the ZT610’s supported widths (up to 6 inches) and that the core size is correct for your label roll. If you plan to use thermal transfer, install the ribbon with the correct tension and color direction as indicated in the user manual. Close the printer cover and feed a few labels to ensure smooth delivery; the head must be clean and free of adhesive debris. Use the printer’s test label feature to confirm sensor alignment and spacing. If labels feed skewed, adjust the media guides inward evenly and re-run the feed. Keep spare media stock and ribbons stored in a cool, dry place to preserve adhesive quality and surface finish. Print Setup Pro emphasizes preloading and verifying media alignment before drivers are installed to avoid wasted media during calibration.
Driver Installation and Network Configuration
Install the appropriate printer driver for your OS from Zebra’s official support site or your device’s app store. Connect via USB for initial setup, then switch to Ethernet or Wi-Fi as needed. Assign a static IP to the ZT610 to prevent addressing changes that disrupt print jobs. Add the printer in your operating system’s printer settings, select the correct label size and media type, and set the print darkness and speed to match your workflow. If using Windows, verify the spool service is running and that there are no conflicts with existing printers. For macOS and Linux, ensure CUPS or the print service recognizes the ZT610 and can handle label stock widths. Run a test print from the driver dialog to verify margins, alignment, and barcode readability. Print Setup Pro notes that keeping drivers up-to-date reduces compatibility issues when you install new operating system updates, and that using a dedicated USB or network path minimizes print interruptions.
Calibration, Print Quality, and Label Calibration
Calibrate the printer by printing a calibration label that exercises each sensor and marks the correct gap detection. Use a calibrate media setting if the printer expects a specific label layout, and adjust print darkness and speed for your media. Check for clean print heads, even heat distribution, and uniform ink transfer. For high-density barcodes, verify resolution is set to 300 dpi or higher, and prototype a few sample labels to confirm scannability. If you notice faded text or inconsistent density, clean the printhead and platen roller, then re-run the calibration. Recheck ribbon tension (if you use thermal transfer) and ensure the ribbon passes cleanly through the print path. Monthly maintenance intervals include cleaning with manufacturer-approved swabs and ensuring none of the sensors are blocked by dust. Print Setup Pro reminds users to periodically back up printer configurations and firmware, preserving recovery points if settings degrade after OS updates.
Troubleshooting Common Issues
Common issues with the zebra zt610 include offline status, misfeeds, slow throughput, and poor print quality. Start with confirming connectivity: verify IP address, network accessibility, and that the printer is online in the OS. If the printer shows offline in Windows, restart the spooler service, reselect the printer, and print a test page. Misfeeds are usually caused by incorrect media guides, improper ribbon path, or dirty rollers; correct the guides, ensure the ribbon is seated, and clean the roller with a lint-free swab. For poor print quality, verify print darkness and print speed settings, perform a cleaning cycle on the print head, and replace worn media or a dirty roller. If labels jam, check for adhesive debris on the feed path and ensure the label stock is not bending around the roller. For advanced users, check firmware version compatibility with your OS and consider performing a firmware upgrade using the printer's built-in maintenance menu or USB updater. Print Setup Pro highlights keeping a log of issues and changes to quickly identify recurring patterns.
Maintenance, Consumables, and Longevity
To maximize the life of the zebra zt610, implement a regular cleaning routine, replace worn parts such as the print head and platen roller at recommended intervals, and store media properly. Clean the print head with approved swabs and isopropyl alcohol, avoiding harsh chemicals. Inspect sensors for dust buildup and recalibrate after every media change or ribbon replacement. Use high-quality labels that meet tolerance specifications and avoid labels with uneven edges which can cause jams. Replace the print ribbon before it shows signs of tearing or flaking, and check the alignment of the take-up spindle. Schedule firmware updates and driver maintenance to avoid compatibility issues. Maintain a written log of service dates, media types used, and observed print quality metrics. Print Setup Pro encourages establishing a predictable maintenance schedule to reduce downtime and extend the life of your Zebra ZT610 printer.
Tools & Materials
- Zebra ZT610 printer(Ensure it is powered and firmware is up to date)
- Power cable(Use a grounded outlet)
- USB cable or Ethernet/network cable(For initial setup or network deployment)
- Computer with Windows/macOS/Linux(Install the correct driver package)
- Label media (up to 6 inch width)(Label stock compatible with ZT610)
- Ribbon for thermal transfer (optional)(Needed if using thermal transfer mode)
- ZT610 driver software(Download from Zebra's official site)
- Manufacturer-approved cleaning swabs(For printhead and platen cleaning)
Steps
Estimated time: Total time: 60-120 minutes
- 1
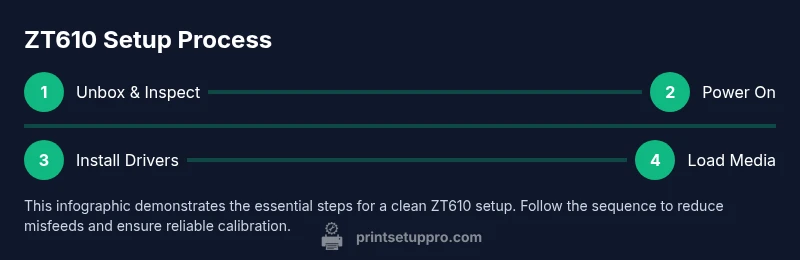
Unbox and Inspect
Open the box and confirm all components are present. Inspect for visible damage and verify that the power cable, user manual, and setup media are included. Photograph contents for record-keeping, and note any packaging defects that could affect initialization.
Tip: Document the serial number and firmware version at first power-on to track changes. - 2
Power On and Configure Language
Connect to a grounded outlet and turn on the printer. Navigate the on-device menu to set language, units, and date/time. Wait for the printer to complete the initial boot sequence before proceeding.
Tip: Set language and time zone early to avoid configuration drift during calibration. - 3
Install Drivers and Add Printer
Install the appropriate Zebra ZT610 driver on your computer, then add the printer in your OS settings. Choose USB for initial setup, then configure a stable network path if needed. Run a quick test page to confirm basic communication.
Tip: Use the latest driver from Zebra’s official site to minimize compatibility issues. - 4
Configure Network or USB Path
If using Ethernet or Wi‑Fi, assign a static IP to the printer to prevent address changes. Ensure the computer can reach the printer by pinging the IP address. Update any firewall rules if necessary to allow label printing traffic.
Tip: Document the IP address in a centralized network guide for IT consistency. - 5
Load Media and Ribbon
Load the label stock into the media path with the print surface facing the correct direction. If using thermal transfer, install and thread the ribbon correctly. Close the cover and feed a few labels to verify smooth operation.
Tip: Align media guides evenly to prevent skew and wasted labels. - 6
Calibrate and Run a Test Print
Use the printer’s calibration feature to set sensors for gap, notch, and black marks. Print a test label and inspect for proper margins, alignment, and barcode readability. Adjust darkness and speed settings to match the label stock.
Tip: Calibration is regular when changing label type or media width. - 7
Set Up Maintenance Schedule
Create a routine cleaning and maintenance plan, including printhead and roller cleaning and periodic firmware updates. Keep a log of media types used, counts printed, and any issues observed. Prepare replacement consumables before they run out to avoid downtime.
Tip: Low-downtime workflows rely on pre-ordered consumables and documented steps.
People Also Ask
What media types does the Zebra ZT610 support?
The ZT610 supports direct thermal and thermal transfer printing across a range of label materials, including paper, synthetic, and laminated stock. Compatibility depends on label width, core size, and ribbon choice. Always verify media specs before purchase.
The Zebra ZT610 handles many label materials with options for direct thermal and thermal transfer. Check width, core size, and ribbon compatibility before printing.
Can I use the printer without a network connection?
Yes. You can install drivers and print via USB. For shared environments, a network connection improves flexibility, but USB is perfectly adequate for standalone use.
Yes, you can print over USB if you don’t have a network, though network printing offers more convenience for multiple users.
How do I update the firmware on the ZT610?
Firmware updates are obtained from Zebra’s official site. Download the package, follow the on-screen prompts, and perform a printer reset if requested. Back up settings beforehand.
Get the newest firmware from Zebra, install it, and reset if asked. Always back up your settings first.
Why is print quality fading and how do I fix it?
Fading can result from worn print head, dirty platen roller, or incorrect print darkness. Clean the head and roller, recalibrate, and adjust density and speed to match stock. If persistent, inspect for ribbon wear (if using transfer) or media quality issues.
If prints fade, clean the head and roller, recalibrate, and tweak density. Check for worn ribbons or poor-quality media.
Is there a Mac driver for the ZT610?
Yes. Zebra provides drivers compatible with macOS or you can use CUPS-based printing on macOS. Ensure you download the correct driver package for your OS version.
Mac users can print with Zebra’s driver or CUPS support; just download the right package for your macOS version.
What consumables are recommended for best results?
Use Zebra-approved labels and ribbons, designed for your print quality and durability needs. Avoid cheap third-party stock that can cause jams or poor adhesion.
Stick to Zebra-approved labels and ribbons to ensure the best print quality and avoid jams.
Watch Video
Quick Summary
- Power up with verified media and firmware.
- Use correct drivers and network configuration for stability.
- Calibrate sensors to ensure print accuracy.
- Maintain routine cleaning and consumable management for longevity.