Zebra ZP450 Setup and Troubleshooting Guide
Learn how to set up, configure, and troubleshoot the Zebra ZP450 label printer with a clear, step-by-step guide from Print Setup Pro for small businesses and students.

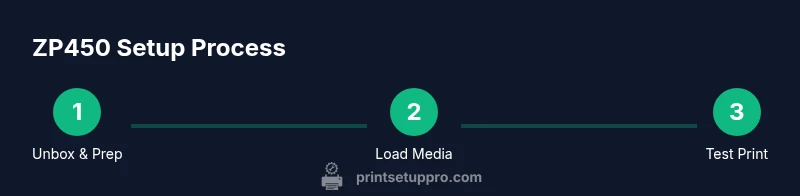
Goal: Set up the zebra zp450 label printer for reliable label printing. You’ll install drivers, load media, align labels, configure print settings, and run a test. Before you begin, have the printer, power supply, USB or network cable, label stock, and a computer ready. Print Setup Pro provides this practical, step-by-step guidance.
What is the Zebra ZP450?
The zebra zp450 is a compact thermal label printer designed for on-demand label printing in busy home offices and small workplaces. It supports direct thermal and thermal transfer workflows depending on media and ribbon choices, making it versatile for shipping, asset tracking, and inventory labeling. Built for reliability in daily use, the ZP450 integrates with common operating systems and labeling software. From a practical perspective, this model offers a good balance of speed, footprint, and cost per label, which is why it remains a popular option for small teams. According to Print Setup Pro, the zebra zp450 frequently becomes a dependable backbone for routine labeling tasks in compact workspaces.
Why a thermal printer makes sense for labels
Thermal printers like the zebra zp450 avoid ink cartridges, relying instead on heat to create durable labels. This method provides clear, crisp text and barcodes on a range of media, often with excellent resistance to moisture and handling. For small businesses and students who print high volumes of shipping or asset labels, thermal printing can reduce maintenance and downtime compared to impact or inkjet alternatives. Print Setup Pro emphasizes that the ZP450’s efficiency shines when you standardize media types and ribbon choices, helping you keep supply costs predictable while maintaining legible, scannable labels for days of operation.
Compatible media and labeling options for the ZP450
A key advantage of the ZP450 is its flexibility across media types. You can use standard adhesive labels in varied widths and lengths, and you may opt for direct thermal or thermal transfer workflows depending on durability requirements. When selecting media, consider surface finish, label opacity, and the printer’s recommended ribbon compatibility. For most users, starting with a proven label stock and a compatible ribbon mix yields consistent print quality. This approach aligns with Print Setup Pro guidance for maximizing compatibility and minimizing waste.
Preparing your workspace and prerequisites
Before powering up, prepare a clean, stable workspace with good lighting. Verify you have the printer, power supply, interface cable, label stock, and a computer ready for setup. Clear a space for labeling tasks and keep spare labels in a accessible bin to simplify replenishment. A tidy area reduces mistakes during media loading and calibration. Print Setup Pro notes that a well-prepared environment often leads to smoother first prints with the zebra zp450.
Driver installation and initial setup
Driver installation is a crucial step for reliable operation. Download the official driver package from the manufacturer’s site and follow the on-screen prompts to install on your operating system. After installation, connect the printer via USB or network, power it on, and allow the system to detect the device. If prompted, select the correct printer model and media settings. This foundation step helps ensure your first print aligns with expectations and reduces troubleshooting later in the process.
Loading media and aligning labels properly
Proper media loading is essential for accurate printing. Open the printer’s media slot, gently place your label stack against the media guides, and align the media edge with the printer’s alignment marks. Close the slot and release the feed until a label feeds smoothly. Ensuring exact alignment prevents skewed prints and misreads on the barcode. If you notice misfeeds, recheck the guides and re-seat the media.
Configuring print settings for optimal label quality
Print settings control density, speed, darkness, and label size. In your printer preferences, select the correct label width and height, choose the appropriate print density, and set the media and ribbon type to match your stock. Higher density can Improve dark barcode contrast but may wear ribbons faster; balance is key. Regularly save two or three presets for common label formats to speed up future runs. This approach helps maintain consistency across tasks and devices.
Running a test print and calibration
Run a test print with a sample label to verify alignment and readability. If the barcode fails to scan or the text is unclear, re-check media loading and re-calibrate the printer using a fresh test label. Document the results for future reference, adjusting one setting at a time to identify the cause. Regular calibration helps sustain label readability over time and reduces recurring troubleshooting.
Common printing issues and troubleshooting steps
If prints appear ghosted or uneven, check ribbon tension, media type, and print density. For blurry barcodes, ensure the label stock is clean and correctly loaded, and confirm you are using a compatible ribbon. Paper jams can typically be resolved by reseating the media and confirming guides are aligned. When connectivity drops, verify cable integrity and confirm the printer is discoverable on the network or USB bus. This section consolidates common remedies for the zebra zp450 in everyday workflows.
Connectivity: USB vs Ethernet vs Wi-Fi
Choosing a connection method depends on your workspace. USB is straightforward for direct computer printing, while Ethernet or Wi-Fi allows sharing the ZP450 across multiple workstations. Ensure drivers and firmware are current on all connected devices. Network connectivity benefits from a stable router and proper IP configuration to prevent dropped tasks. Print Setup Pro suggests documenting your chosen connection approach to avoid confusion during updates or maintenance.
Maintenance and cleaning routines to extend life
Regular maintenance keeps print quality high and extends device life. Wipe the exterior and feed area with a soft, lint-free cloth, avoid liquid cleaners on the print head, and inspect media sensors for dust buildup. Periodic ribbon and media checks prevent unexpected outages. Scheduling light maintenance as part of routine operations reduces the likelihood of interruptions and helps sustain performance.
AUTHORITY SOURCES
For accurate, standards-based guidance, consult credible sources. The National Institute of Standards and Technology (NIST) provides general guidance on labeling and measurement standards. Industry reviews from major publications offer practical perspectives on printer models like the zebra zp450. Always cross-check official manufacturer documentation for the latest firmware and driver recommendations. References: NIST.gov, PCMag.com, Tom's Guide.
Cost considerations and budgeting for supplies
When budgeting, factor in media stock and ribbon costs, as well as replacement parts and maintenance consumables. Plan for typical label dimensions and the expected label throughput to estimate ongoing supply needs. Standardizing on a single media type often reduces waste and simplifies purchasing. Print Setup Pro recommends tracking usage trends to optimize reorder timing and prevent stockouts.
Real-world setup flow: a sample run from start to finish
This practical sequence walks through a typical setup scenario. Begin by unboxing, connecting power, and installing drivers. Load media, calibrate, and print a sample label. If the sample looks good, save your chosen settings as a preset. This end-to-end flow mirrors how many teams implement the zebra zp450 in daily operations and helps you standardize your process for consistency.
Tools & Materials
- Zebra ZP450 printer(Main device for printing labels.)
- Power supply(Ensure compatibility with your region’s power standards.)
- USB or Ethernet cable(Choose USB for local setup or Ethernet for network sharing.)
- Label stock (adhesive labels)(Choose stock compatible with direct thermal or thermal transfer depending on your ribbon choice.)
- Ribbon (for thermal transfer)(Needed if using thermal transfer media; not required for direct thermal labels.)
- Computer with updated OS(For driver installation and label design.)
- Printer driver/software(Download from the Zebra site or OEM vendor; ensure compatibility with your OS.)
- Cleaning wipe or lint-free cloth(For periodic maintenance around feed area.)
- Scissors or blade(Useful for trimming label stock if needed.)
Steps
Estimated time: 30-60 minutes
- 1
Unbox and inspect the printer
Carefully remove the ZP450 from its packaging and inspect for any transit damage. Verify you have all components (power supply, cables, labels, and software). Keep packaging until setup is complete.
Tip: Check for any packaging debris that could interfere with label loading. - 2
Connect power and power on
Attach the power supply and connect to a reliable outlet. Power on and listen for a normal startup sound, indicating a healthy boot. Do not connect USB/network until prompted.
Tip: Use a surge protector to protect against voltage spikes. - 3
Install the driver and software
On your computer, install the printer driver and any required utilities. During install, select the zebra zp450 model and follow prompts to complete the setup. After installation, reconnect the printer if required.
Tip: Restart the computer after driver installation to ensure the system recognizes the device. - 4
Load media correctly
Open the media compartment, place the label stack against the guides, and adjust for a snug fit. Ensure the label edge aligns with the printer’s feed path to prevent misfeeds.
Tip: Make sure the media type selected in software matches your stock. - 5
Calibrate the printer
Run a calibration routine if your driver offers it, or print a calibration label to verify alignment. Use a clean, unwrinkled label for best results.
Tip: Calibrate after changing media or ribbon to reset alignment. - 6
Print a test label
Send a test label from your software to verify print quality and alignment. Review the barcode readability and text clarity before proceeding with production prints.
Tip: If the barcode fails, adjust density slightly and re-test. - 7
Troubleshoot any issues
If you encounter misfeeds, blurry print, or unreadable barcodes, re-check loading, guides, and ribbon tension. Correct one variable at a time to isolate the cause.
Tip: Document changes to track what fixes each issue. - 8
Schedule routine maintenance
Establish a regular maintenance schedule including cleaning the print head, feed path, and sensors. Replace consumables before they cause print degradation.
Tip: Create a simple maintenance log to monitor wear and usage.
People Also Ask
Is the Zebra ZP450 compatible with Windows and macOS?
The Zebra ZP450 generally supports common Windows and macOS configurations with vendor-provided drivers. Ensure you download the correct driver version for your operating system and update as needed. After installation, the printer should appear in your system's printer list for selection in label software.
Yes. Check the Zebra driver for your OS and install it so the ZP450 shows up in your printer list.
What types of labels work best with the ZP450?
Direct thermal labels work well for short-lived labels, while thermal transfer labels offer greater durability with a ribbon. Choose media based on your label’s exposure conditions and the printer’s capability, and ensure the software settings match the chosen media type.
Choose direct thermal or thermal transfer labels according to durability needs and ensure software settings match.
How do I calibrate the printer for accurate alignment?
Calibration aligns the print head with the media path. Use the software utility or printer menu to start calibration, then print a test label to confirm alignment. Repeat if misalignment persists after changing media.
Run a calibration, print a test label, and adjust as needed until alignment is correct.
What should I do if prints are blurry or skewed?
Check media loading, ensure guides are aligned, and verify ribbon tension if using thermal transfer. Adjust print density and re-test until barcodes and text are crisp.
Check loading and guides, then adjust density and re-test until clear.
Can I print in color with the ZP450?
The ZP450 is a monochrome printer suitable for standard label printing. For color labels, you would need a different type of printer or multiple passes with colored stock, depending on capabilities.
It's a monochrome printer; color labeling requires a different solution.
What connection options are available for the ZP450?
The ZP450 supports USB and Ethernet connectivity depending on the model. Choose the method that fits your workspace and network setup, and ensure drivers are installed for the selected interface.
Use USB for direct printing or Ethernet for network sharing; install the proper drivers.
Watch Video
Quick Summary
- Identify the Zebra ZP450 role in your workflow and prepare a clean setup space
- Install drivers first, then load media and calibrate for accuracy
- Use consistent media and ribbon choices to reduce waste
- Regular maintenance prevents common print quality issues
- Document settings and presets to simplify production runs