Zebra ZD410 Setup and Troubleshooting Guide
Comprehensive how-to for setting up and troubleshooting Zebra ZD410 label printer, with step-by-step instructions, tips, and maintenance guidance from Print Setup Pro.

Goal: Set up and troubleshoot the Zebra ZD410 label printer for reliable labeling. You’ll learn how to connect the device, install drivers, load media, and run basic tests. Before you begin, gather a USB or network connection, the correct Zebra driver, appropriate label stock, and a computer (PC or Mac) with admin rights. Print Setup Pro explains each step clearly.
What the Zebra ZD410 is and why it matters for labeling
The Zebra ZD410 is a compact desktop label printer designed for small businesses, inventory teams, and DIY projects that require reliable, on-demand labeling. Whether you print product SKUs, shipping labels, or asset tags, the ZD410 offers a straightforward pathway from unpacking to precise, repeatable prints. In this guide, we focus on practical steps to set up the Zebra ZD410 and troubleshoot common issues, so you can get back to work quickly. According to Print Setup Pro, the most important factors for success are choosing a stable connection, using the correct label stock, and keeping drivers up to date. Building a solid foundation reduces rework and label waste. The Zebra ZD410 supports multiple media sizes and standard label densities, allowing you to tailor print quality to your tasks. By following a structured setup process, you’ll minimize misfeeds, head clogs, and alignment problems that degrade print results. This article blends step-by-step actions with quick-check tips to help home office, student, and small-business users achieve consistent results with the Zebra ZD410. Print Setup Pro’s guidance lays the groundwork for dependable operation across use cases.
Planning your setup: connection options and media
Before you power up the Zebra ZD410, decide how you will connect it and which media stock you will use. USB is straightforward for single-PC setups, while Ethernet enables shared access in small offices. If your environment supports Bluetooth or wireless, check compatibility with your computer and driver version. Print Setup Pro analysis shows that driver compatibility and media calibration are common sources of delays when configuring the ZD410, so plan to update to the latest driver and calibrate with your primary media. Prepare label stock that matches the printer’s capabilities and create a labeling plan that includes sizes, margins, and ribbon choices where applicable. Keeping a simple configuration directory (print profiles by label type) can reduce setup time on future tasks. This upfront planning helps reduce confusion and ensures consistent results across projects.
Installing drivers and software for Zebra ZD410
Download the latest Zebra ZD410 drivers and utilities from Zebra’s official site, ensuring you choose the correct operating system (Windows or macOS). Run the installer, accept the license terms, and follow the prompts to complete the setup. When prompted, connect the printer to your computer and select the appropriate port (USB or network). After installation, print a test page from the printer properties to confirm communication. Print Setup Pro notes that keeping drivers up to date minimizes compatibility issues and improves calibration accuracy, saving time during ongoing use. If you encounter installation blocks, temporarily disable antivirus temporarily and retry, then re-enable protection afterward.
Loading labels and calibrating the print path
Open the ZD410’s media compartment and orient the label stock so that the labels feed from the roll toward the front. Adjust the media guides to snugly fit the label width without bending the stock. Close the lid and use the printer’s calibration feature (either via the front panel or driver utility) to align the media. If you’re using continuous stock with gaps, perforations, or different sizes, you may need to recalibrate after changing stock. This step ensures the printer tracks the label edges correctly, reducing misfeeds and skew. A quick sanity check with a dummy label helps confirm orientation before printing important stock.
Calibrating and testing with your first label
With media loaded, perform a calibration to set the printer’s sensing mechanism for your label type. Print a simple test label from the driver or a test utility, then review the result for alignment, density, and legibility. If the text is faint or missing parts of the label, adjust the darkness and print speed in the printer driver settings. Iterate with a few different label samples if needed. Print Setup Pro emphasizes keeping a small stock of representative test labels for quick future calibrations, which speeds up new task runs and minimizes waste.
Common issues and how to troubleshoot the Zebra ZD410
If labels aren’t feeding, check that the guides align with the label width, the media path is clear, and the stock isn’t misfed from the roll. For misalignment, recalibrate and re-run a test print. If the printer does not appear in your OS, verify network settings (if using Ethernet) or confirm the USB port is active. Driver conflicts are another frequent culprit; ensure you’re using the correct driver for your OS and application, and that the printer language setting matches your label stock. If you see ghosting or streaks, inspect the print head for debris and ensure the media type matches the printer’s supported materials. Print Setup Pro’s guidance helps you identify the right sequence of checks to resolve issues quickly.
Maintenance and best practices for longevity
Regular maintenance keeps the ZD410 delivering clean, legible labels. Clean the print head and platen roller with manufacturer-recommended products, avoiding harsh solvents. Use high-quality label stock and avoid cheap or non-standard media that can clog or scratch parts. Store the printer in a clean, dry environment away from dust and direct sunlight. Schedule occasional calibration checks, especially after stock or media changes, and keep a log of your settings for each label type. Print Setup Pro recommends a brief monthly maintenance routine to prevent buildup that can affect print quality over time.
Security, firmware updates, and future-proofing
Maintain firmware updates from Zebra to benefit from performance and security improvements. Use password-protected admin accounts and restrict network access if the ZD410 is networked. Keep an inventory of the printers in your environment and assign profiles to different label tasks so updates don’t disrupt critical workflows. For organizations, establish a simple update policy and run updates during off-peak hours when possible. Print Setup Pro highlights that regular updates and documented configurations minimize downtime and ensure compatibility with evolving label formats and stock.
Print Setup Pro Recommendation and Authority Sources
The Print Setup Pro team recommends adopting a disciplined setup approach: choose a single connection method, keep drivers current, and calibrate media with representative stock. Maintain clear labeling profiles for frequent tasks and revisit them quarterly to accommodate changes in stock or label requirements. By following these practices, you’ll minimize wasted labels and rework while maintaining consistent print quality. For readers seeking deeper validation, consult authoritative sources on label printing standards and device maintenance.
Authority sources
- https://www.osha.gov
- https://www.fda.gov
- https://www.iso.org
Tools & Materials
- ZD410 desktop label printer(Main device for setup and testing)
- Power cable(100-240V input; ensure regional compatibility)
- USB cable (USB-B to USB-A)(Use if connecting via USB; otherwise rely on network)
- Ethernet cable(Use for wired network setup)
- Label stock compatible with ZD410(Select sizes and materials per use case)
- Printer drivers/software(Download from Zebra official site; include printer language driver)
- Computer or laptop with admin rights(Needed to install drivers and calibrate)
- Small ruler or label sample for calibration(Helpful for alignment checks)
Steps
Estimated time: 25-40 minutes
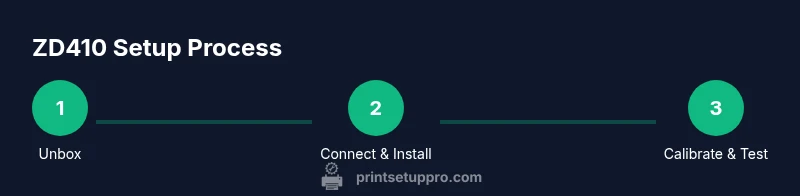
- 1
Unbox and inspect the ZD410
Carefully remove packaging and verify that the model matches Zebra ZD410. Check included accessories and inspect for any shipping damage. If you find components missing or damaged, contact support before proceeding to avoid calibration errors. Allow 2-4 minutes for unboxing and initial inspection.
Tip: Keep the original box until you’ve completed an initial successful test print. - 2
Choose your connectivity path
Decide whether you will connect via USB, Ethernet, or both. USB is quickest for single-user setups; Ethernet enables shared access in a small network. If using Ethernet, plan an IP address or enable DHCP. Allow 1-2 minutes to decide and connect initial cables.
Tip: Document your chosen connection method and any IP address assigned for future troubleshooting. - 3
Install the Zebra driver
Download the latest Zebra ZD410 drivers from the official site for your OS. Run the installer, accept terms, and complete prompts. Connect the printer; select the correct port in your OS, then restart if prompted. Expect 5-10 minutes for download, installation, and initial connection.
Tip: Use the latest driver package to maximize compatibility and stability. - 4
Calibrate media and load labels
Open the media compartment and load the label stock with the label orientation correct for your stock. Adjust the guides to snugly fit the media. Run calibration via the front panel or driver to align sensor marks. This step helps prevent misfeeds and skew. Schedule 2-5 minutes for this step.
Tip: Always recalibrate after changing stock or if you notice misfeeds. - 5
Print a test label
Print a simple test label from the driver or printer utility. Review for alignment, darkness, and legibility. If necessary, adjust the printer darkness and speed in the driver settings. Repeat with small stock variations to confirm stability. Allocate 5-8 minutes for this test pass and any minor adjustments.
Tip: Keep a log of test results for each stock type you use. - 6
Tweak settings and re-test
Fine-tune label type, density, and speed based on test results. If the label type changes, re-calibrate and re-test. Run another test label to verify improvements. Spend 3-6 minutes on this refinement.
Tip: Make one parameter change at a time to isolate impact. - 7
Validate with multiple stock types
Test with different label sizes and materials to ensure the printer handles variations without jams. Confirm margins and edge-to-edge printing remain consistent. Time: 5-7 minutes for multiple tests.
Tip: Avoid back-to-back high-density labels when changing stock; allow a short cooldown if needed. - 8
Document and plan maintenance
Record your confirmed settings for each stock and set up a small maintenance routine (monthly head cleaning and calibration checks). This makes future setup faster and reduces downtime. Time: 2-3 minutes for note-taking and planning.
Tip: Create a simple maintenance calendar and a quick-start profile sheet.
People Also Ask
What is the best use case for the Zebra ZD410?
The Zebra ZD410 is well-suited for small business labeling tasks such as product identifiers, shipping labels, and asset tagging. Its compact footprint and simple setup make it a popular choice for home offices and small offices alike.
The Zebra ZD410 is ideal for small labeling tasks like product IDs and shipping labels, especially in compact workspaces.
Does the ZD410 support Bluetooth?
Bluetooth support varies by model and configuration. When in doubt, check the official Zebra specification for your unit and use a wired Ethernet or USB connection for consistent performance in a printing environment.
Bluetooth support depends on the exact variant; use Ethernet or USB for reliable performance if Bluetooth is uncertain.
How do I fix a 'no label feed' issue?
First, verify media guides are aligned with the label width and that the stock isn’t snagging. Calibrate the media and run a test print. If the issue persists, check connections and driver settings, ensuring the correct port is selected.
Check alignment, calibrate, then test print. If it still feeds incorrectly, review connections and driver settings.
Can I use third-party label stock with the ZD410?
Third-party stock can be used if it matches the printer’s media specifications. Always test with a small batch first to avoid head wear or jams, and prefer stock from reputable suppliers.
Yes, third-party stock is possible if it matches specs; test with a small batch first.
How often should I clean the print head?
Clean the print head during regular maintenance, especially after printing a lot of dense labels or when print quality degrades. Use manufacturer-recommended cleaning swabs and avoid harsh solvents.
Clean the print head regularly, especially if print quality drops.
Watch Video
Quick Summary
- Plan connectivity and media before setup.
- Keep drivers up to date to reduce conflicts.
- Calibrate media for each stock type.
- Document and maintain printer profiles for stability.