ZT410 Printer Setup and Troubleshooting
Learn how to install, configure, and troubleshoot your ZT410 printer with step-by-step guidance, driver setup, media calibration, and practical tips for durable label printing.

According to Print Setup Pro, this guide will help you set up the zt410 printer, install drivers, connect via USB or network, load media correctly, and run a basic calibration. You’ll configure print settings, interpret common error codes, and perform routine maintenance to prevent jams. This approach covers end-to-end setup for reliable label printing.
What is the ZT410? Overview and use cases
The ZT410 is a compact, industrial-grade thermal printer commonly used for shipping labels, product labeling, and asset tracking. In many workplaces, the zt410 replaces slower or less reliable printers by delivering crisp, durable barcodes and text on a variety of media. Understanding its core capabilities helps you tailor settings for different label materials and environments. For home offices or small businesses, the zt410 offers a balance of performance and flexibility that supports growing print volumes while keeping operation costs predictable. By knowing where the zt410 shines—speed, print quality, and media versatility—you can decide how to integrate it into your workflow.
Why correct setup matters for zt410
A correct setup directly affects print quality, label legibility, and overall reliability of the zt410. Poor driver installations, misconfigured print settings, or misloaded media can lead to misaligned labels, jams, or faded barcodes. Print Setup Pro emphasizes starting with clean media, verified drivers, and calibrated sensors to minimize maintenance overhead. When the zt410 is configured correctly, you gain consistent results across shifts, making batch labeling predictable and reducing rework. This is especially important for barcode readability in inventory and shipping workflows.
Required tools and environment for ZT410 setup
Before you begin, assemble the essentials: the ZT410 printer, a reliable power source, a data connection (USB or Ethernet), and the appropriate driver software. Have your label stock ready—make sure width and type match the printer’s capabilities. A computer or mobile device with network access helps you install drivers and run initial tests. Optional items like lint-free cloths and isopropyl alcohol assist with sensor cleaning and preventing jams from residue on rollers.
Step-by-step overview: unboxing to first print
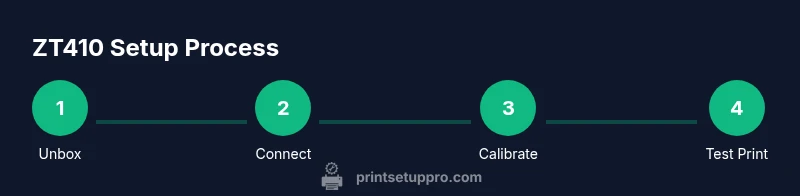
The following steps outline the practical path from unboxing to producing your first test label with the zt410. Start by inspecting the box for damage and confirming all parts are present. Power up the device, connect the chosen data link, and install the drivers. Load your first label roll and perform a basic calibration to align the sensor. Finally, print a test label and adjust settings for optimal density and speed. This flow prepares you to handle ongoing tasks with confidence using the zt410.
Common issues and quick diagnostics
If the zt410 prints blank labels, suspect media, sensor alignment, or print darkness settings. A misloaded roll can misfeed media, while an uncalibrated sensor may fail to detect label gaps. Ensure the print head is clean and free of adhesive residue. If network printing isn’t working, verify IP configuration and firewall rules. Regularly updating drivers and firmware reduces compatibility issues that disrupt workflows.
Maintenance and care for the ZT410
Routine maintenance extends the life of your zt410. Clean rollers and the print head with lint-free cloths and isopropyl alcohol as part of a periodic routine. Keep the interior free of dust and verify media path clear of obstructions. Store label stock in a cool, dry location to preserve its quality and prevent feed issues. Regular calibration checks help catch drift before it affects print quality.
Advanced configuration for different label types
Different label media require adjustments to density, speed, and cut settings. The zt410 can handle a range of label materials, including coated and uncoated stocks, as well as various adhesive types. When changing media, re-run the calibration and verify the sensor alignment for the new stock. Utilizing saved print profiles can speed up transitions between label types and ensure consistent results across batches.
Safety and compliance notes
Follow standard electrical safety practices when working with any printer. Ensure the power source is grounded and that cables are secured to prevent tripping hazards. Use appropriate PPE when handling chemical cleaners and avoid contact with hot surfaces on the print head. For regulated environments, document firmware versions and configuration settings as part of a quality assurance program.
Tools & Materials
- ZT410 printer(Main device to set up)
- Power cable/AC adapter(Regional power requirements)
- USB cable (Type-B to USB-A or compatible)(Direct connect option if not using network)
- Ethernet cable(Required for wired network setup)
- Printer drivers and software(Download from official site or provided media)
- Label stock compatible with ZT410(Check width, length, and material)
- Cleaning supplies (lint-free cloth, isopropyl alcohol)(Sensor and roller cleaning)
- Computer or mobile device with network access(To install drivers and test prints)
Steps
Estimated time: 60-90 minutes
- 1
Unbox and inspect the ZT410
Open the box and verify that all parts are present and intact. Look for shipping damage and confirm the media and cables are included. Report any issues before powering on to avoid post-sale disputes.
Tip: Check for missing parts and document any discrepancies with photos. - 2
Connect power and initialize
Plug in the power supply and turn on the printer. Make sure the outlet is stable and avoid using extension cords for critical setups. Allow the printer to perform its initial boot checks before proceeding.
Tip: Ensure the power source remains stable during first boot to prevent boot errors. - 3
Install drivers and software
Download the latest ZT410 drivers and calibration tools from the official site or use the provided media. Follow the on-screen prompts to complete the installation. Restart the computer if prompted to ensure proper communication with the printer.
Tip: Install in a user account with administrative rights to avoid permission issues. - 4
Connect to USB or Ethernet
Choose your connection method. If USB, select the ZT410 in your printer list. If Ethernet, assign a stable IP or use DHCP as appropriate for your network policy.
Tip: Label network printers with a fixed IP to simplify future changes. - 5
Load media and calibrate sensors
Feed a sample label stock through the media path. Run the calibration utility to align the sensors with the stock’s gap or notch positions. Confirm media advances cleanly and the sensor accurately detects labels.
Tip: Use the calibration mode with the exact stock you plan to use in production. - 6
Print a test label
Send a simple test label to verify alignment, density, and speed. Inspect the print for sharp text and scannable barcodes. Adjust darkness and speed as needed for optimal results.
Tip: If the barcode fails to scan, adjust the print density or label stock type and re-test. - 7
Save settings as a profile
Store your successful configuration as a printer profile to reuse for future jobs. Document media type, label width, and calibration results for reference. This makes scaling easier across multiple label runs.
Tip: Create separate profiles for different label types to avoid cross-contamination of settings.
People Also Ask
What cables are required to start with the ZT410?
You’ll need a power connection and either a USB data cable or an Ethernet network connection. Choose USB for direct setup or Ethernet for networked environments. Ensure any wireless option is supported by your model or module.
For starting, power the device and connect via USB or Ethernet depending on your setup; wireless may require an additional module.
How do I calibrate the ZT410 after loading media?
Run the built-in calibration tool in the printer or its driver utility. Use the exact label stock you intend to print with and verify sensor alignment with a test label.
Use the printer’s calibration tool with the stock you’ll print on to ensure sensors line up properly.
Why is my ZT410 printing blank labels?
Common causes are misloaded media, incorrect density settings, or an uncalibrated sensor. Check the media path, stock type, and re-run calibration if needed.
Blank prints usually mean media or sensor issues—recheck alignment and calibration.
How do I update ZT410 firmware or drivers?
Visit the official support site for the ZT410 to download the latest firmware and driver packages. Follow the installation prompts and reboot after updates to ensure changes take effect.
Get the latest firmware from the official site and follow the prompts to update.
Can the ZT410 connect to a wireless network?
Most ZT410 configurations favor wired Ethernet; wireless capability depends on the model and optional modules. Check your hardware and vendor guidance for your exact setup.
Wireless support depends on your specific model and modules; check your hardware.
Where can I find official documentation for the ZT410?
Refer to the vendor’s official manuals and knowledge base. They provide device-specific setup, calibration steps, and troubleshooting guides.
See the official manuals and knowledge base for detailed setup and troubleshooting.
Watch Video
Quick Summary
- Set up the ZT410 with correct drivers and media.
- Calibrate sensors after loading new stock.
- Test prints ensure barcode readability.
- Maintain profiles for multi-stock workflows.