Printer Ink Replacement: A Complete Step-by-Step Guide
Learn how to replace printer ink cartridges with confidence. This guide covers when to replace, choosing original vs compatible cartridges, and post-installation maintenance for crisp, long-lasting prints. Brought to you by Print Setup Pro.

This guide equips home office users and students with a reliable, step-by-step approach to printer ink replacement. You’ll learn how to identify when to replace cartridges, choose between original and compatible options, and install cartridges with minimal waste for consistently crisp prints. By following these steps, you’ll reduce downtime and keep your printer running smoothly.
Why printer ink replacement matters for consistent print quality
Regular printer ink replacement is essential to maintain crisp text, vibrant photos, and reliable printer performance. When ink levels fall or the nozzle clogs, prints become grainy, colors fade, and maintenance costs rise. According to Print Setup Pro, a disciplined ink replacement routine saves time and ensures you get reliable results across papers and media. In practice, choosing the right cartridge type, matching the color profile, and performing timely replacements can significantly cut waste and avoid the frustration of frequent misprints. This section explains how ink replacement affects output quality and long-term printer health, so you’ll understand why a proactive approach pays off.
- Print quality depends on fresh ink and clean nozzles.
- Delayed replacement increases the risk of clogged print heads.
- Maintaining cartridge stock improves consistency and reduces downtime.
Understanding ink cartridge types and compatibility
Printers use a range of cartridge types, from OEM (original equipment manufacturer) cartridges to high-quality compatibles and remanufactured options. The compatibility depends on the printer model, the cartridge chip, and the print head architecture. When considering ink replacement, you must balance cost, reliability, and warranties. Print Setup Pro notes that genuine cartridges often offer the best compatibility with new models and firmware, including dependable page yields and color accuracy. Compatible cartridges can save money and are widely available, but their performance can vary by brand and batch. Always verify the model number, color codes, and any firmware prompts before purchasing a replacement.
- OEM cartridges are designed for perfect compatibility with your printer.
- Compatible cartridges offer potential savings but may require testing.
- Check cartridge numbers and printer compatibility before buying.
When to replace ink: signs and timing
Ink replacement isn’t just about empty chambers; it’s about maintaining print quality and avoiding downtime. Look for faint lines, color shifts, banding, or streaks that indicate low ink or clogged nozzles. A printer’s built-in status monitor is a helpful guide, but physical tests (like printing a color test page) reveal subtle issues. If you notice ghosting, smudging, or inconsistent color, it’s time to replace or consider a maintenance cycle. Print Setup Pro suggests scheduling replacements around your typical print volume—replacing too early wastes ink, while replacing too late invites drying and clogging.
- Signs include fading colors, streaks, and blank spots.
- Run a test page to verify print head health.
- Plan replacements around peak printing periods to minimize disruption.
Original vs compatible cartridges: pros, cons, and costs
Choosing between original and compatible cartridges affects print quality, reliability, and total cost of ownership. Original cartridges typically deliver consistent color matching and robust performance across firmware updates, supporting warranties in many cases. Compatibles can offer substantial cost savings but may require a few test pages to achieve the same results. Consider your printer model, the likelihood of firmware changes, and your tolerance for potential start-up adjustments. Print Setup Pro recommends starting with OEM for the first replacements after a new printer purchase, then evaluating compatible options for ongoing use based on performance.
- Original cartridges: reliable quality, easier warranty support.
- Compatible cartridges: lower cost, variable performance.
- Evaluate page yield, color accuracy, and waste when deciding.
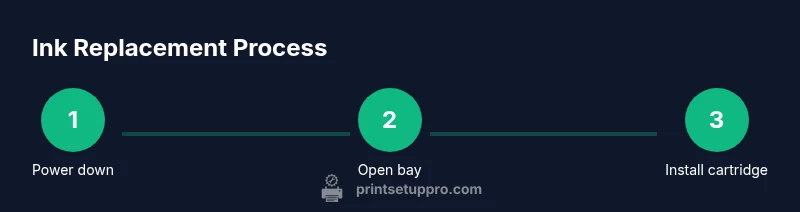
Step-by-step overview of a universal ink cartridge replacement process
This section provides a practical overview of the replacement flow that works across most consumer printers. Use the device’s user guide for model-specific steps, but the general approach remains consistent: power down, access the cartridge bay, remove the empty cartridge, insert the new cartridge, and verify alignment. After installation, run a test print and perform any recommended cleaning or alignment tasks. This high-level sequence helps you prepare for the detailed, model-specific steps in the dedicated STEP-BY-STEP section.
- Always power off and unplug before opening covers.
- Keep cartridges upright to prevent leaks during handling.
- Verify color codes and alignment after installation.
Post-replacement maintenance and calibration
After ink replacement, a printer may require a few maintenance actions to optimize results. Run an automatic print head cleaning (if your model offers it) and a calibration or alignment page to ensure the print head aligns with the cartridge nozzles. Use a clean, lint-free cloth to wipe any accessible contact areas if you notice smudges, but avoid touching gold contacts with bare fingers. Keep spare cartridges in a cool, dry place to prevent drying; label them with color codes for quick identification. Print Setup Pro emphasizes routine post-install checks to prevent waste and ensure consistent results across print jobs.
- Run alignment and cleaning as recommended by your printer.
- Handle cartridges carefully to avoid smearing ink.
- Store unused cartridges in original packaging in a temperatures-controlled area.
Eco-friendly and cost-saving ink replacement strategies
Sustainable ink replacement involves mindful use of cartridges and proper recycling. Choose refill options or remanufactured cartridges from reputable sources if you’re comfortable with testing and verification steps. Recycle empty cartridges through manufacturer programs or local recyclers to reduce waste. Print Setup Pro highlights that mindful stock management and recycling programs can lower environmental impact while keeping your printer ready for future tasks.
- Recycle used cartridges to reduce waste.
- Consider refills or remanufactured options when appropriate.
- Track your ink usage to optimize purchases and avoid overstock.
Authority sources
- https://www.consumerreports.org/printers/printer-ink-cartridges/
- https://epa.gov/recycle/inkjet-printer-cartridges
- https://www.energy.gov/eere/buildings/articles/printers-and-sustainability
Tools & Materials
- New ink cartridges (colors as needed)(Check model compatibility and color codes.)
- Lint-free cloths(For cleaning contacts and spills.)
- Gloves (optional)(Protect hands from ink stains.)
- Isopropyl alcohol (70-90%)(Use sparingly for stubborn residue.)
- Owner's printer manual(Model-specific steps and warnings.)
Steps
Estimated time: 20-40 minutes
- 1
Power down and unplug
Turn off the printer, unplug the power, and wait 60 seconds to discharge any residual current. This prevents electrical shock and protects sensitive components.
Tip: If the printer has a locked front panel, wait an extra minute before opening. - 2
Open cartridge access door
Gently open the access panel or ink cartridge bay according to your model’s manual. Do not force the cover.
Tip: Have a tray to catch any minor spills. - 3
Remove empty cartridge
Carefully lift out the empty cartridge by its handle or release clip. Avoid touching the cartridge’s copper contacts or nozzles to prevent damage.
Tip: Set the empty cartridge on a protected surface for disposal. - 4
Unpack new cartridge
Remove the cartridge from its packaging, including any protective tape. Do not touch the copper contacts.
Tip: Keep the cartridge upright to prevent ink leakage. - 5
Insert new cartridge
Align the cartridge with its color-coded slot and insert firmly until it clicks. Ensure it sits evenly.
Tip: If your model requires priming, gently press down and release to seat the cartridge. - 6
Run a cleaning and alignment
Power on the printer, run the automatic print head cleaning, then perform alignment or calibration as prompted.
Tip: Print a test page to verify color alignment and avoid waste. - 7
Test print and observe
Print a color test page and check for banding, ghosting, or color shifts. If issues persist, re-seat the cartridge or try a different brand.
Tip: Keep spare cartridges ready for quick replacements. - 8
Dispose of or recycle empty cartridge
Follow local guidelines to dispose of the empty cartridge or place it in a recycling program.
Tip: If a cartridge is under warranty, check program terms.
People Also Ask
How do I know when it’s time to replace printer ink?
If you notice fading colors, streaks, or ghosting on prints, it’s a strong sign that replacement is needed. Run a test page to confirm, and consider the printer’s maintenance schedule.
Look for fading colors and streaks on your test pages. If you see ghosting or empty areas, it’s time to replace the cartridge.
Can I use third-party cartridges without voiding my warranty?
Many printers support third-party cartridges, but some manufacturers reserve rights that could affect warranties. Check your model’s policy and firmware prompts before purchasing.
Check your warranty terms and printer policy before using third-party cartridges.
How do I reset the printer after installation?
Most printers automatically recognize new cartridges. If not, run a calibration or alignment from the printer’s menu, then print a test page to confirm.
The printer usually recognizes the new cartridge automatically. If not, run alignment.
What should I do if ink smears or prints faintly after replacement?
Check that the cartridge seated correctly and the contacts are clean. Run cleaning and alignment, and print a test page. If issues persist, re-seat the cartridge or try a different brand.
Make sure the cartridge is seated properly, run cleaning, and test again.
Is it cost-effective to refill cartridges vs buying new?
Refills can lower costs but may involve more maintenance. Weigh the price, reliability, and waste when deciding, especially for color prints.
Refills can save money but may need more maintenance; consider your printing needs.
Can I recycle empty cartridges?
Yes. Most manufacturers offer recycling programs. Check local services or return programs to keep cartridges out of landfills.
Yes, recycle cartridges through manufacturer programs or local services.
Watch Video
Quick Summary
- Know when to replace ink with signs like fading or streaks.
- Choose OEM for critical reliability, compatibles for savings.
- Follow model-specific steps to avoid leaks and damage.
- Calibrate and test after installation to ensure print quality.