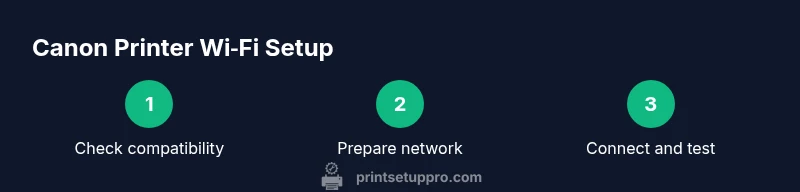
How to Connect a Canon Printer to Wi-Fi
Learn how to connect your Canon printer to Wi-Fi with a clear, end-to-end setup. From compatibility checks to using the Canon PRINT app and testing your connection, this guide covers models, security, and common issues for reliable wireless printing.

To connect a Canon printer to Wi-Fi, you will enable wireless networking on the printer, join it to your home network, and install any required software. If you wonder how do i connect canon printer to wifi, this guide walks you through model-by-model steps, what details you’ll need, and how to test the connection before printing.
How wireless printing works with Canon printers
If you’re setting up wireless printing for the first time, understanding the basics helps prevent frustration. Your Canon printer becomes a network device on your home or office Wi‑Fi, assigned an IP address by your router. When you send a job from a computer or mobile device, the print spooler on your device transmits the file to the printer over the local network. For most homes, the process hinges on the printer being on the same 2.4 GHz or 5 GHz network as your computing devices, with correct security credentials. If you ask how do i connect canon printer to wifi, it’s essential to verify you have a supported model, current firmware, and an accessible network name (SSID) and password at setup time. Print jobs then travel from your device to the printer, queue in the printer’s memory, and print when the printer is ready.
This overview sets the stage for model-specific steps and troubleshooting, ensuring you don’t miss basic requirements before diving into menus and apps.
Verify printer and firmware compatibility
Before you begin the wireless setup, confirm that your Canon printer actually supports Wi‑Fi connectivity. Check the model label on the printer or the user manual for wireless capability and supported network bands. Firmware updates can close security gaps and improve compatibility with modern routers, so it’s wise to check Canon’s official support site for the latest version. If your firmware is outdated, install the update following the manufacturer’s prompts. A quick pre-check like this reduces pushback during the actual connection step and minimizes post-setup issues.
Note: Some older Canon models require a USB connection for initial setup or may use a built‑in WPS method. Always consult your model’s setup guide to confirm the recommended method for your device.
Know your network: SSID, password, and frequency bands
Your printer needs access to your Wi‑Fi network. Have your SSID (network name) and the password handy, and verify you’re connecting to a supported network band. Many printers handle 2.4 GHz networks most reliably, while some newer models can also join 5 GHz networks; if you run into trouble, try the 2.4 GHz band first. If you’re on a guest network or a network with client isolation, you may need to adjust settings so devices can see each other. Knowing these basics helps you avoid common stumbling blocks during the setup flow.
Remember to disable features like MAC address filtering temporarily if you suspect it blocks the printer from appearing on the network during setup.
Prepare devices to print on the same network
Whether you’re using a Windows PC, a Mac, or a mobile device, ensure that your device is connected to the same Wi‑Fi network as the printer. If your routine involves multiple networks (home, office, or guest networks), consider temporarily disabling any separate networks to minimize conflicts. Having the Canon software or drivers downloaded in advance can simplify the process. For mobile users, ensure your phone or tablet is updated and that you have the Canon PRINT app installed if you plan to use it for wireless configuration or direct printing. A unified network helps devices discover the printer quickly during installation.
Connect via the printer’s control panel (built‑in setup)
Access the printer’s control panel and navigate to the Wireless or Network settings. Choose Wireless LAN, then select your Wi‑Fi network from the list of available SSIDs and enter the network password. Some models present a connection test or “Connection to network: successful” notification. If you cannot see your network, verify the printer’s signal strength and ensure you’re not too far from the router. After a successful connection, print a network report or a test page to confirm the setup.
Tip: If your printer has a touchscreen, the on-screen prompts usually provide clear guidance on selecting the proper security type (WPA2) and completing the connection.
Connect via the Canon PRINT app (mobile or tablet)
The Canon PRINT app guides you through wireless setup directly from your mobile device. Install the app from your device’s app store, then run the in-app setup wizard. The app will scan for nearby Canon printers on the same network and guide you to connect. This path is often faster for mobile users and can install necessary drivers and utilities automatically. If your printer requires a firmware check during app setup, allow the app to perform the upgrade and restart the printer if prompted.
Pro tip: Use the app to scan for the printer periodically after setup to verify permanent connectivity.
Manual setup for advanced users: IP address, static DHCP, and direct connections
Some networks benefit from a manual setup approach. You can assign a static IP to the printer via the printer’s control panel or through your router’s DHCP reservation feature. This reduces address changes after restarts or router updates. In most cases, you’ll enter the printer’s IP into your computer’s or device’s printer setup dialog to add the device. If your router supports IPv6, disable it for initial setup if you encounter discovery issues, then re-enable after successful connection. A stable IP prevents the printer from losing visibility on the network.
Warning: Recording the IP address in your documentation helps future troubleshooting and avoids repeated network scans.
Test print and confirm the connection
After linking the printer to Wi‑Fi, print a test page to verify both connectivity and print quality. On Windows or macOS, use the system print dialog to select the Canon printer and a simple test document. On phones or tablets, use the Canon PRINT app’s built-in test print or a standard document to confirm the wireless path is working. If the test fails, re-run the network setup steps from the printer and your device, ensuring the same network name and password are used.
Tip: If the test print looks pixelated or washed out, verify the printer’s color settings and ensure you’re not sending a high‑fidelity color job over a weak network link.
Common issues and quick fixes
If the printer isn’t visible on your devices, confirm that the printer’s wireless mode is active and that the router is broadcasting on a reachable channel. Reboot the printer and router if needed, then retry the discovery step. If the printer connects but prints slowly or intermittently, move it closer to the router or switch to a wired fallback for critical tasks. In both cases, verify the latest firmware and driver versions are installed. Finally, avoid using multiple print queues that could confuse the OS when selecting the Canon device.
By addressing visibility, signal strength, and software updates, most connectivity problems resolve quickly.
Security best practices for wireless printing
Wireless printing introduces potential exposure if not secured properly. Use WPA2 or WPA3 where available, disable WPS if you do not use it regularly, and keep firmware up to date to mitigate vulnerabilities. Create a separate guest network if you need to share printing with visitors, but ensure the guest network cannot access your main devices directly. Regularly review paired devices and remove printers or computers that no longer require access. These practices help maintain a strong, secure printing environment.
Maintaining a stable wireless connection over time
Network environments change, and printers can drift from the ideal settings. Schedule periodic firmware checks, keep the Canon software updated, and monitor signal strength, especially if you relocate the printer or router. If you notice persistent drops in connectivity, consider configuring a DHCP reservation so the printer keeps the same IP and reduces discovery delays. Keeping a concise log of printer models, firmware versions, and router firmware helps troubleshooting when issues arise.
Quick-reference: home-network settings for Canon Wi‑Fi setup
- Use a single 2.4 GHz network for best compatibility, unless your printer supports 5 GHz.
- Enable WPA2/WPA3 security and avoid deprecated protocols.
- Keep a known, simple SSID and password for easier onboarding.
- If you use a mesh network, ensure the printer can roam without losing its connection.
- Update firmware on both the printer and router to minimize compatibility problems.
Security considerations and best practices for wireless printing
In practice, you should treat wireless printing like any other networked device: keep firmware current, use strong passwords, and limit exposure by segmenting devices where possible. Regularly audit connected devices and remove devices that are no longer needed. For shared home networks, you can enable print sharing while keeping other network resources protected by firewall rules. Thoughtful security reduces risk while preserving convenient wireless printing.
Tools & Materials
- Canon printer with Wi-Fi capability(Ensure model supports wireless connection; verify on printer panel or manual)
- Smartphone, tablet, or computer(Needed for setup and testing; ensure device is on the same network)
- Stable Wi-Fi network (2.4 GHz recommended)(Most printers perform best on 2.4 GHz; 5 GHz may work depending on model)
- Network password(Needed to join the printer to the network)
- Canon PRINT app (iOS/Android)(Optional but highly recommended for mobile setup and testing)
- Canon drivers/installer from Canon website(Install on Windows or macOS before adding the printer)
- Router with DHCP or static IP option(Useful for advanced setups and reliability)
- Network documentation(Keep a record of SSID, password, and IP addresses for troubleshooting)
Steps
Estimated time: 25-60 minutes
- 1
Power on printer and access control panel
Turn on the printer and open the control panel. If there is a touchscreen, navigate to the Wireless settings. This initial step primes the device for network discovery and confirms the panel is responsive.
Tip: If the panel is unresponsive, perform a soft reset or power cycle before proceeding. - 2
Enable wireless networking on the printer
Within Wireless settings, turn on Wireless LAN. Confirm that the printer is broadcasting its own network or ready to join an existing one.
Tip: Some models require you to select a country/region before enabling wireless features. - 3
Select your Wi-Fi network and enter the password
From the printer’s list of available networks, choose your SSID and enter the password exactly as configured on the router.
Tip: Copy-paste the password if possible to avoid typos; ensure case sensitivity is respected. - 4
Choose the correct network band
If prompted, pick 2.4 GHz for better compatibility with most printers; some models may support 5 GHz.
Tip: If you’re in a dense signal area, 2.4 GHz often yields steadier connections. - 5
Confirm connection status on the printer
Check for a ‘Connected’ or test result on the display. If the connection fails, re-enter the credentials or re-run the setup.
Tip: A blinking Wi‑Fi icon may indicate a setup in progress; wait until the status is stable. - 6
On your device, connect to the same network
Make sure your computer or mobile device is connected to the same Wi‑Fi network as the printer.
Tip: Avoid using VPNs during setup as they can interfere with local discovery. - 7
Install Canon drivers and software
Run the Canon driver/utility installer from Canon’s site and follow the on-screen prompts to add the printer to your OS.
Tip: Choose the correct OS version (Windows/macOS) and 64-bit vs 32-bit if prompted. - 8
Add the printer to your OS and run a test print
Use the OS’ printer setup to add the Canon device, then print a test page to verify accurate communication.
Tip: If the printer isn’t listed, re-scan for devices and restart the printer service. - 9
Optionally set up via Canon PRINT app
Install the app and follow the guided setup to connect the printer, enabling mobile printing and easy monitoring.
Tip: The app often provides helpful troubleshooting tips and status updates. - 10
Print a test page and verify results
From your device, send a simple document to print and confirm the output matches expectations.
Tip: If color calibration seems off, run a printer maintenance or color calibration from the printer menu. - 11
Check for firmware updates
If prompted, update printer firmware to ensure compatibility with your router and devices.
Tip: Firmware updates can fix known connectivity issues and improve stability. - 12
Document network details for future troubleshooting
Record the SSID, password (in a secure place), and the printer’s IP address for quick reference.
Tip: Keep a simple log of changes to speed up future troubleshooting.
People Also Ask
Do I need to connect to a 2.4 GHz network for all Canon printers?
Most Canon printers perform best on 2.4 GHz networks, though some newer models support 5 GHz. If you can connect on 2.4 GHz, start there and move to 5 GHz only if needed. Check your printer’s manual for exact requirements.
Most Canon printers work best on 2.4 GHz networks; try that first and switch to 5 GHz only if your model supports it.
My printer doesn’t show up in the available devices during setup. What should I do?
Verify both printer and device are on the same network and that the printer’s wireless setting is enabled. Reboot the printer and router if needed, and run through the setup steps again. Ensure firmware is up to date.
If the printer isn’t visible, check that both devices are on the same network, reboot the devices, and retry the setup.
Can I print if I’m on a guest network?
Printing on a guest network can be possible, but guest networks often isolate clients from printers. If you must use a guest network, enable client isolation off for the printer, or connect the printer to the main network when possible.
Guest networks sometimes block printer visibility; use the main network if you can for reliable wireless printing.
Why does the printer show Not Connected after setup?
This usually means the printer lost access to the network after step changes. Re-enter the network credentials or perform a fresh setup. Confirm the router broadcast is stable and the password hasn’t changed.
The printer may have dropped the network; re-enter credentials or reset the connection and try again.
How can I verify the printer is connected to Wi-Fi?
Check the printer’s display for a successful connection indicator, run a test print from a computer or mobile device, and review the printer status in printing settings. You can also print a network configuration page to see the current IP and connection status.
Look for a connected status on the printer and run a test print to confirm it’s online.
Watch Video
Quick Summary
- Check model and firmware before setup
- Ensure all devices share the same network
- Use Canon PRINT app for easiest mobile setup
- Test print after connecting to confirm success
- Keep firmware and drivers updated for best compatibility