How to Connect an Epson Printer to Wi‑Fi
Learn how to connect an Epson printer to Wi‑Fi with a clear, step-by-step method. This guide covers router settings, Epson drivers, and network tips to ensure a stable wireless print setup for home offices, students, and DIY printers.

Goal: connect an Epson printer to Wi‑Fi and print wirelessly from any device. You’ll need your Wi‑Fi network name (SSID) and password, plus a printer with wireless capabilities and a computer or mobile device ready to install drivers. According to Print Setup Pro, a calm, methodical setup minimizes connection issues and speeds up troubleshooting.
Why connecting an Epson printer to Wi‑Fi matters
Wireless printing gives you flexibility to place the printer anywhere within range, print from laptops, tablets, and phones, and reduce cable clutter. When you connect an Epson printer to Wi‑Fi, you unlock features like mobile printing, cloud printing, and easier firmware updates. For home offices and student setups, a reliable wireless connection saves time and avoids detours to USB cables. In practice, a well-configured Epson printer on Wi‑Fi can handle multiple devices simultaneously and maintain consistent print quality. Print Setup Pro has observed that users who adopt a dedicated network for printing often experience fewer dropouts and faster print jobs. If you are moving from a USB‑only setup, the transition to wireless may require a one‑time configuration, but the long‑term benefits are worth it: no more hunting for cables, and you can print from anywhere in your network.
What you’ll need to prepare
Before starting, gather the essentials: a powered Epson printer, its power cable, your Wi‑Fi network name (SSID) and password, and a computer, tablet, or smartphone on the same network. If you expect to manage the printer from a mobile device, consider installing the Epson iPrint app. Check that your router supports 2.4 GHz (most printers prefer this band) and confirm WPA2/WPA3 security. If your printer supports WPS, you can use it, but be mindful of potential router exposure. Ensure the printer firmware is up to date. Print Setup Pro notes that firmware updates fix known connectivity issues and improve compatibility with newer devices. A small router reboot before setup can clear stale sessions and speed up the process.
How to approach the setup: two primary paths
There are two robust paths for most Epson printers: (1) a direct setup from the printer’s control panel, which guides you through selecting a network and entering a password; (2) setup via a computer or mobile app (Windows, macOS, iOS, Android) using the Epson software or iPrint. The choice depends on your devices and comfort level. If you’re connecting in a mixed environment (PC and iPhone), the software route often results in a single driver installation that covers all devices. Print Setup Pro recommends starting with the control panel if you’re near the printer, then validating with a mobile device to ensure everything talks to the network.
Option A: Using the printer’s control panel
Many Epson printers offer a built‑in wireless setup wizard. Start by navigating to the network or Wi‑Fi settings, choose your SSID, and enter the network password using the on‑screen keyboard. Once the printer confirms it’s connected to the network, you’ll typically see a wireless icon indicating success. If any step fails, re‑try entering the password carefully and ensure the printer is within good range of the router. After a successful connection, you may be prompted to print a network test page—this validates printability and confirms the correct IP address.
Option B: Using Epson software or mobile apps
If you prefer a software‑guided approach, install Epson’s driver package on your computer and run the Wireless Setup Wizard from the start menu or control panel. For mobile users, the Epson iPrint app can streamline adding the printer to the same network. The software path is especially useful when you have multiple devices or want to manage settings more granularly (like default paper size or color preferences). Follow the prompts to select your network and provide credentials. After setup, print a test page from at least one device to confirm the configuration.
Common issues and quick fixes
Connectivity issues are usually caused by password mistakes, distance from the router, or firmware mismatches. If your printer shows it’s on the network but won’t print, confirm the IP address matches the one assigned by the router and check for driver updates. A restart of the printer, router, and computer can clear stuck sessions. If you still cannot connect, temporarily disable firewall protections during setup, then re‑enable them afterwards. Always verify you’re on the correct Wi‑Fi band (2.4 GHz for most Epson printers) and that your router isn’t blocking printer traffic on the local network.
Advanced tips for reliability
For homes with multiple devices, consider creating a dedicated printing subnet or assigning a static IP to the printer. A static IP reduces IP conflicts and makes re‑adding the printer easier after hardware changes. Update firmware regularly and keep drivers current on all devices. If you use a guest network, ensure it allows printer traffic or temporarily enable a standard network for setup. Print Setup Pro recommends documenting the printer’s IP address and any necessary steps for future migrations or when replacing routers.
Security and privacy considerations
Wireless printers expose a network endpoint that can be exploited if not properly secured. Use a strong Wi‑Fi password, enable WPA2/WPA3, and avoid universal or default passwords. Disable unnecessary features like WPS if you’re not actively using them. Regularly update both printer firmware and router firmware to close vulnerabilities. If you enable cloud printing features, review permissions and revoke access for devices you no longer own or use.
Verification and test printing
After completing setup, print a network test page from at least two devices—one wired to your network and one wireless—to verify consistent performance. Check print quality, color accuracy, and alignment. If the test fails, re‑run the setup steps focusing on network recognition, driver installation, and printer queue status. Keeping a quick reference sheet with the printer’s exact model number, IP address, and your router’s SSID can help streamline future troubleshooting.
Tools & Materials
- Epson printer with wireless capability(Ensure it has the latest firmware and wireless option configured)
- Power cable(Plug the printer in near power source during setup)
- Wi‑Fi network credentials (SSID and password)(Needed to join the printer to your network)
- Computer, smartphone, or tablet on the same network(For driver installation or app setup)
- Epson software or Epson iPrint app(Optional but helpful for a guided setup)
- Printer’s manual or model number(Helpful for model‑specific steps)
- Router set to 2.4 GHz (recommended)(Some printers don’t reliably reach 5 GHz)
Steps
Estimated time: 20-40 minutes
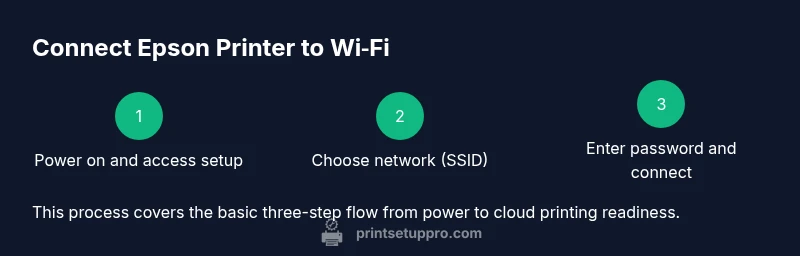
- 1
Power on and prep
Turn on the printer and ensure it is out of sleep mode. Wait for the home screen to be fully active and check that the wireless indicator light is present or the Wi‑Fi symbol is visible.
Tip: If the printer won’t wake, press the power button briefly and wait 30 seconds. - 2
Open wireless setup on printer
Navigate to the printer’s control panel, locate Network or Wireless settings, and choose Wireless Setup Wizard or similar option.
Tip: Some models require you to press a dedicated WPS button if you’re using a router with WPS. - 3
Select your network (SSID)
From the list of available networks, pick your home Wi‑Fi SSID. Use the on‑screen keyboard to enter the password carefully.
Tip: Double‑check the password; keyboards on printers can be finicky. - 4
Enter the network password
Type the Wi‑Fi password exactly as configured on your router. Confirm the entry and allow the printer to connect.
Tip: Avoid password typos by using copy/paste if the printer supports it or validating characters slowly. - 5
Confirm connection
The printer should display a confirmation or show a connected status. If not, retry the previous steps or choose a different 2.4 GHz network.
Tip: Restart the printer if you see no change after a minute. - 6
Install drivers or apps
On your computer or mobile device, install the Epson driver package or the Epson iPrint app. Follow on‑screen prompts to add the network printer.
Tip: Choose a standard driver (not a color management preset) unless you need specialized profiles. - 7
Print a test page
From at least one device, print a test page to verify the printer is online and accessible on the network.
Tip: If the page shows errors, recheck the IP address assigned by the router and ensure the device is using the same network. - 8
Set default printer and save settings
Designate the Epson printer as the default in your OS print settings and keep the configuration saved for automatic use.
Tip: Document the settings so you can reproduce them if you replace devices.
People Also Ask
What if my Epson printer won’t connect to Wi‑Fi?
First verify the Wi‑Fi password and ensure the printer is on the same network. Restart the printer and router, then retry. If it still fails, update firmware and drivers.
If your printer won’t connect, check the password, restart devices, and ensure firmware and drivers are current.
Should I use WPS to connect?
WPS can work for quick access, but it may expose your network if misconfigured. Prefer entering the SSID and password manually for better security.
WPS is convenient but less secure; manual setup is safer.
Do I need to install Epson drivers?
Yes. Drivers ensure proper communication with the printer and enable features like color management, duplex printing, and page sizing.
Install the Epson drivers to ensure full functionality and reliable printing.
Can I connect to multiple networks at once?
Most Epson printers connect to a single primary network at a time. If you move the printer, re‑run setup on the new network.
Connecting to multiple networks isn’t typical; update the network when you relocate the printer.
How do I know if it’s connected correctly?
Look for a connected wireless icon on the printer and confirm the IP address appears in your device’s printer list. Print a test page to confirm.
Check the wireless icon and IP address, then print a test page to verify.
Watch Video
Quick Summary
- Connect Epson printer to Wi‑Fi using control panel or software.
- Ensure network uses 2.4 GHz and WPA2/WPA3 security.
- Test print from multiple devices and verify IP address.
- Keep firmware and drivers current to minimize issues.
- Document your setup details for easy future changes.