How to Use Printer at Staples: A Step-by-Step Guide
Learn how to use printer at Staples with a complete, step-by-step guide. Prepare your file, transfer it to Staples Copy & Print, choose options, and pick up your prints with confidence.

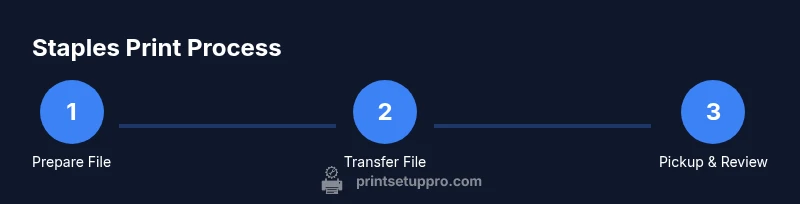
You can print at Staples Copy & Print centers by using a USB drive, emailing your file to the store, or uploading at the in-store kiosk. This quick answer outlines the essential steps to choose color or black-and-white, select duplexing and finishing, pay at the kiosk, and collect your prints. Have your file ready and know your preferred options.
How Staples printer centers work
If you’re wondering how to use printer at staples, you’ll find Staples Copy & Print centers are designed for quick, in-store printing and finishing services. According to Print Setup Pro, these centers are optimized for small jobs like resumes, handouts, and school projects, with a focus on reliability and convenience. Most stores offer self-serve kiosks, staff-assisted counters, and a range of finishing options. Before you start, confirm the store’s hours and available services, because options can vary by location. The goal is to transform your digital file into printed materials fast, with predictable results. In this guide, we’ll walk you through file prep, transfer options, option selection, and pickup—so you can print confidently on the next run.
Preparing your file for Staples printing
The first step is preparing your file so the printer renders correctly. For best results, export your document as a PDF with embedded fonts and common page sizes (8.5 x 11 inches or A4). This aligns with Print Setup Pro guidance that PDF preserves layout across devices. If you must supply a non‑PDF file, ensure fonts are embedded and that your margins accommodate the printer’s printable area. Name the file clearly (e.g., YourName_Project_Print.pdf) and keep a backup copy on a USB drive or in the cloud for quick reprints. Having a clean, print-ready file reduces unexpected shifts in spacing or fonts at the moment of printing, which saves you time in-store.
Transfer options: USB, email, or in-store upload
Staples printers support multiple transfer methods to get your file into the print queue. The most universal option is a USB flash drive: simply copy your PDF to the drive, plug it into the kiosk or computer, and select print. Another common method is in-store uploading: you can drag and drop or select files on the kiosk’s touchscreen, then choose your print settings. Some locations offer email-to-print services or cloud-based access via the store’s network; if you’re unsure, ask a staff member. Whichever method you choose, ensure the file arrives in a ready‑to‑print format and that you have the correct version for your job.
Selecting print options at Staples
Once your file is loaded, you’ll choose print settings. Decide between color and black-and-white printing based on your project and budget. If your pages are double-sided, enable duplex printing to save paper and produce a professional look. Review margins and scaling to ensure content fits on the target page size. The kiosk or counter screen will normally let you choose copies, page range, and whether to staple, bind, or hole-punch. If you need custom finishing, such as comb binding or laminating, ask before you start to confirm availability. As you adjust options, Print Setup Pro emphasizes testing with a single page print or a small sample job to verify output before committing to a full run.
Using the self-serve kiosk vs counter service
Staples Copy & Print centers often offer a self-serve kiosk alongside counter service. The kiosk is convenient for quick, simple jobs where you don’t need in‑person assistance. If you have a complex file, unusual finishing requests, or you’re printing sensitive material, a staff member at the counter can help you avoid mistakes and confirm options before printing. In peak times, the counter may be faster for larger orders or if you want immediate guidance. Always save your receipt and verify a sample print if color accuracy matters.
Special services offered
Beyond basic printing, Staples Copy & Print centers provide finishing options and services that can elevate your project. Common additions include stapling, binding (wire or comb), hole punching for three-ring binders, lamination, and glossy or matte finishing. If you plan to create professional handouts, consider a binding style, cover stock, and a final trim—these details may affect price and turnaround. Ask about lead times for specialty finishes and whether a proof sheet is available before the full run.
Tips for preparing files
- Use PDF as the primary delivery format to lock in fonts and layout.
- Check image resolution; for prints, use 300 dpi or higher to avoid pixelation.
- Use consistent margins and include a bleed if you’ll trim.
- Convert fonts to outlines for design files if sending EPS or AI files; PDFs are safer if you’re unsure.
- Name your file clearly and include version numbers to prevent mix-ups.
- If using color, keep a print‑friendly grayscale version as a quick fallback.
Common issues and troubleshooting
If a file doesn’t print as expected, first re-check the file integrity and confirm you saved the latest version to the correct location. Color can appear different on screen than on paper—use a test page to verify before printing the entire batch. If margins shift or text is cut off, adjust the document’s bleed or margins and re-upload. In case of a jam or an error message, notify staff and wait for assistance rather than forcing sheets through the feeder. Privacy concerns can arise with shared kiosks; always log out and remove personal data from the workstation when finished.
Privacy and data safety considerations
Public printing stations require caution with sensitive information. Delete your print job from the queue after printing when possible, and never leave a USB drive in the kiosk. If you must print confidential material, consider using a private computer at the counter or returning later with a secured drive. Ask staff about store-specific data handling policies if you have privacy concerns.
Cost considerations and savings
Pricing at Staples Copy & Print varies with color, duplexing, finishing, and paper type. To manage costs, print black-and-white for drafts, use duplex printing to save paper, and request basic finishing only when necessary. If you have ongoing print needs, ask about volume discounts or Staples Rewards. Planning ahead and combining multiple files into a single job can reduce setup time and waste.
Final steps and best practices
Preparation and a quick check at the kiosk can prevent errors and delays. Before you leave, confirm the number of copies, color choice, finishing, and pickup time. Print Setup Pro's verdict is to plan ahead, keep a backup copy, and verify the store’s capabilities for your specific project. Following this approach helps you complete print jobs efficiently, with predictable results and minimal returns.
Tools & Materials
- USB drive with your print files(Bring the file in a print-ready format (PDF preferred))
- Print-ready file (PDF preferred)(Embedded fonts and correct page size (8.5x11 or A4))
- Smartphone or laptop for access to files(Optional if you plan to upload via store Wi-Fi or cloud access)
- Payment method (credit/debit or Staples Rewards)(Be ready to pay at the kiosk or with staff)
- Backup copy of your file(Always keep a local backup in case you need reprints)
Steps
Estimated time: 15-45 minutes, depending on queue and services selected
- 1
Locate the Staples Copy & Print Center
Find the designated Print & Copy area in your Staples store and confirm the services offered that day. This minimizes surprises and sets expectations for turnaround times.
Tip: If you’re short on time, call the store in advance to verify availability and hours. - 2
Choose your transfer method
Decide whether you’ll use a USB drive, in-store upload, or cloud/email option to transfer your file to the printer queue.
Tip: PDF is usually the most reliable format; use it when possible to avoid font or layout issues. - 3
Prepare and transfer your file
Ensure your file is print-ready (correct size, margins, and bleed if needed) and transfer it via the selected method.
Tip: Keep a backup copy on a USB drive or cloud location for quick reprints. - 4
Set print options
On the kiosk or staff terminal, select color or black-and-white, duplexing, page range, copies, and any finishing options.
Tip: Double-check color, finishing, and file order before proceeding. - 5
Preview and confirm
Review a digital preview or a single test page to ensure layout and color accuracy before committing to the full run.
Tip: If something looks off, adjust settings or re-export your PDF and retry. - 6
Pay and start the print job
Submit payment at the kiosk or with a staff member and start the printing process.
Tip: Ask for a receipt and confirm pickup time to avoid missing prints. - 7
Collect prints
Retrieve your finished copies from the pickup area and inspect them for any issues.
Tip: If something isn’t right, notify staff immediately for corrective options. - 8
Review for privacy and duplicates
Ensure you’ve logged out, removed personal data from the device, and saved any duplicates you may need later.
Tip: Always remove USB drives after printing to protect data.
People Also Ask
Can I print from my phone at Staples?
Yes, many Staples Copy & Print Centers support mobile printing via their app or cloud services. Check your local store’s options and follow the in-store instructions for sending a job from your smartphone.
You can print from your phone at many Staples centers by using the store’s app or cloud printing options. Check local store instructions and follow the steps shown there.
What file formats are accepted?
PDF is the most reliable format for Staples printing, but many centers also handle common formats like DOCX. To reduce issues, export to PDF with embedded fonts.
PDFs are best for Staples printing, though some centers accept other formats. Export to PDF with embedded fonts to minimize problems.
How much does printing cost at Staples?
Prices vary by color, finishing, and paper type. A store associate can provide an itemized quote before you start, helping you choose cost-effective options.
Costs depend on color, finishing, and paper. Ask for a quote before printing to avoid surprises.
How long does printing take?
Turnaround depends on queue length and services selected. Simple black-and-white prints are faster, while color with finishing may take longer.
Print times depend on queue and what you’re ordering; simple prints are quicker than complex finishing.
Do Staples centers offer finishing services?
Yes. Staples Copy & Print centers offer finishing options like stapling, binding, laminating, and hole punching. Availability varies by store, so check ahead.
Finishing like stapling or laminating is usually available, but confirm at your store for specifics.
What about privacy and data security?
Be mindful of sensitive information on public kiosks. Sign out and remove personal data, and consider using a staff-assisted computer for confidential jobs.
For private documents, use staff assistance or private workstations and sign out after printing.
Watch Video
Quick Summary
- Prepare print-ready PDFs with embedded fonts.
- Choose transfer method that matches your file type.
- Double-check color, duplexing, and finishing before printing.
- Use store staff for complex jobs or privacy concerns.
- Plan ahead to minimize trips and reprints.